
All in One View
Content from Introduction
Last updated on 2026-06-22 | Edit this page
Estimated time: 10 minutes
Overview
Questions
- What is issue tracking?
- Why is issue tracking useful?
Objectives
- Understand the purpose and benefits of issue trackers
- Become familiar with GitHub Issues
What is Issue Tracking?
Issue tracking is an activity that happens as part of Project Management. In this activity, a record is made of bugs, enhancements, and requests in such a way that the team is able to view and access the list of work to be done.
Issues are used to collaborate, solve problems, and plan work, which is enabled by software tools such as GitLab issues, Jira story boards, and GitHub issues.

Issue trackers can be internal (team-facing) or external (user-facing). In this lesson, students will learn about issue tracking through the use of GitHub Issues.
Your mission: welcome to the StarSort team!
To make this concrete, you’ll spend this lesson role-playing a new contributor to StarSort — a (fictional) open-source research tool that sorts and catalogs telescope images. The maintainers are friendly but swamped, and the issue tracker is how the whole team tracks work. Throughout the lesson you’ll file bug reports, triage the backlog, and set up templates — just like a real contributor would.
(You’ll do all of this in your own practice repository — StarSort is just the story we’ll use to make it fun.)
The Benefits of Issue Tracking
Why bother, instead of a pile of sticky notes and “I’ll remember it” promises?
| Benefit | What it gives you |
|---|---|
| Visibility | All the work to be done lives in one place every team member can see. |
| Collaboration | Work can be captured, organized, discussed, and assigned in a single location. |
| Transparency | If the tracker is user-facing, users can follow progress and chime in. |
Where does genAI fit?
Generative AI (LLMs like ChatGPT and Claude) is surprisingly handy for issue tracking — it can turn messy notes into a clear bug report, suggest labels, or summarize a long discussion thread. We’ll point out useful spots throughout the lesson. The catch, as always: the AI drafts, but you review for accuracy.
GitHub Issues
Numerous different issue tracking systems exist - both commercial and open-source, integrated and stand-alone.
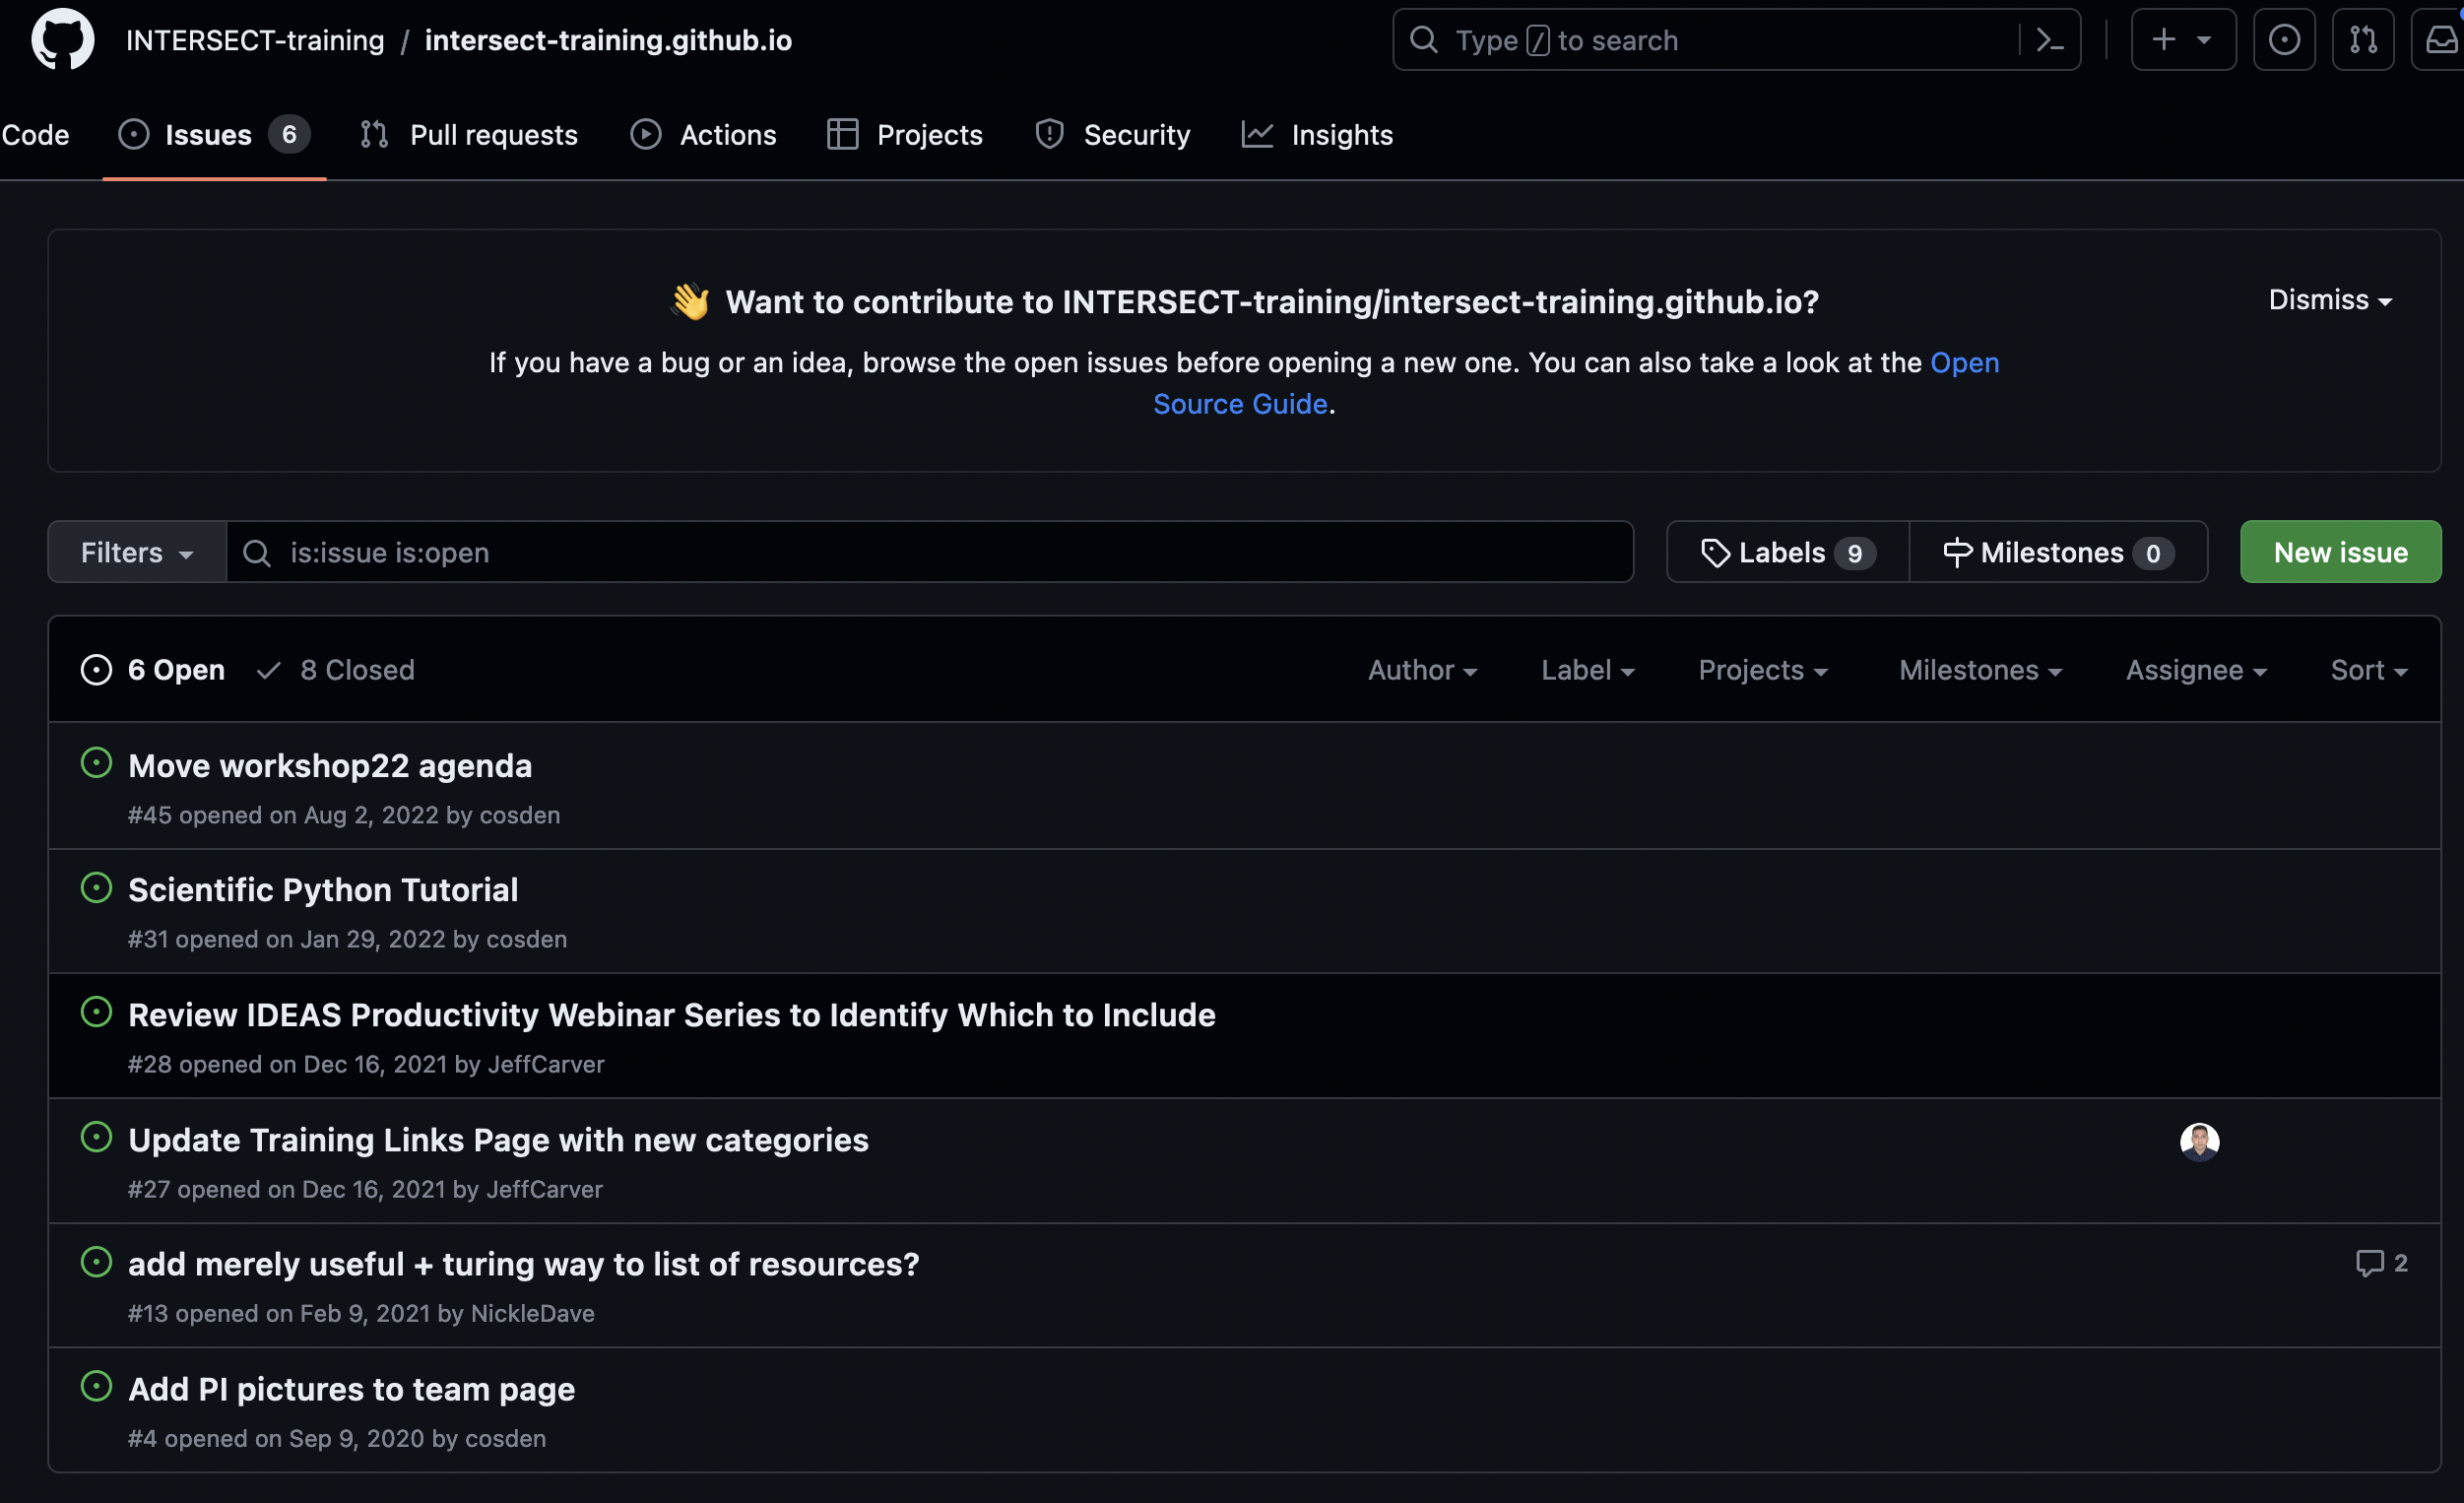
GitHub integrates issue tracking right into version control: every project on GitHub can enable an issue tracker, reached from the Issues tab in the repository’s navigation bar.

The Issues page lists all open issues; click any one to read its details and discussion. You can filter the list by status (Open/Closed), author, label, and more.
Scavenger Hunt: Browsing Open Issues
A real project’s tracker can be huge. Let’s explore one. Navigate to https://github.com/spack/spack and find the issues page.
- How many issues are currently open?
- How many have been closed?
- How many labels are there?
Open vs. closed counts are the toggles at the top of the issues list;
the label count is on the Labels button (or the
/labels page). The exact numbers change daily — that’s the
point: the tracker is dynamic and constantly updated.
- Issue tracking is the process of monitoring problems and requests for a software product.
- Issue tracking enables a software development team to capture, organize, and manage work collaboratively.
Content from Basic Issue Tracking
Last updated on 2026-06-22 | Edit this page
Estimated time: 20 minutes
Overview
Questions
- What makes a good issue?
- How do you make an issue?
- How do you interact with an open issue?
- How do you close an issue?
Objectives
- Recognize what makes an issue clear and actionable.
- Become familiar with basic actions on GitHub Issues.
What Makes a Good Issue?
Anyone can click “New issue” and type “it’s broken.” The skill worth learning is writing an issue a teammate can actually act on without a follow-up conversation. A good bug report usually has:
| Ingredient | Why it matters |
|---|---|
| Clear, specific title | “Crash when sorting empty folder” beats “bug” — it’s findable and scannable. |
| Steps to reproduce | If we can’t trigger it, we can’t fix it. Number the steps. |
| Expected vs. actual | What should have happened, and what did. |
| Environment | OS, version, language version — the details that change behavior. |
| One issue = one problem | Don’t bundle five bugs in one ticket; they can’t be tracked or closed independently. |
A good feature request is similar: what you want, why (the motivation/use case), and any alternatives you considered. Keep these in mind for every issue you open today.
Open an Issue
Click the green New issue button (top-right of the Issues page) to start a new issue.

A new issue has a few parts:
- Title: displays on the main Issues page.
- Write: the details of the issue — GitHub supports Markdown formatting.
- Preview: shows the Markdown-rendered version before you submit.
Once it’s filled out, the Submit new issue button activates.

File Your First StarSort Bug
You’re testing StarSort and it crashes when you point it at an empty image folder. Time to file a proper bug report! In your practice repository’s issue page:
- Open a new issue with a clear, specific title
- In the “Write” section, add a
## Steps to Reproduceheading and number the steps. - Add a section for Expected vs. Actual behavior.
- Include a code block showing the (made-up) error message StarSort printed.
- Preview to check your Markdown, then submit!
GenAI: from messy notes to a clean report
Bug reports often start as a jumble: “it broke when the folder was empty, error said IndexError, was on my mac.” Try pasting notes like that into an LLM and asking it to format a bug report with steps to reproduce and expected/actual sections. Then check it against the good issue table — did it invent steps or details you didn’t give it? You supply the facts; the AI just tidies the structure.
On the right-hand side, there are more options that can be modified.
- Assignee: Here you can choose a specific person to this issue.
- Labels: Here you can add a label to the issue (we will discuss this more later!).
- Projects: Here you can add the issue to a project board.
- Milestone: Here you can add the issue to a milestone.
Interact with an Open Issue
There are many interactions available on an open issue.
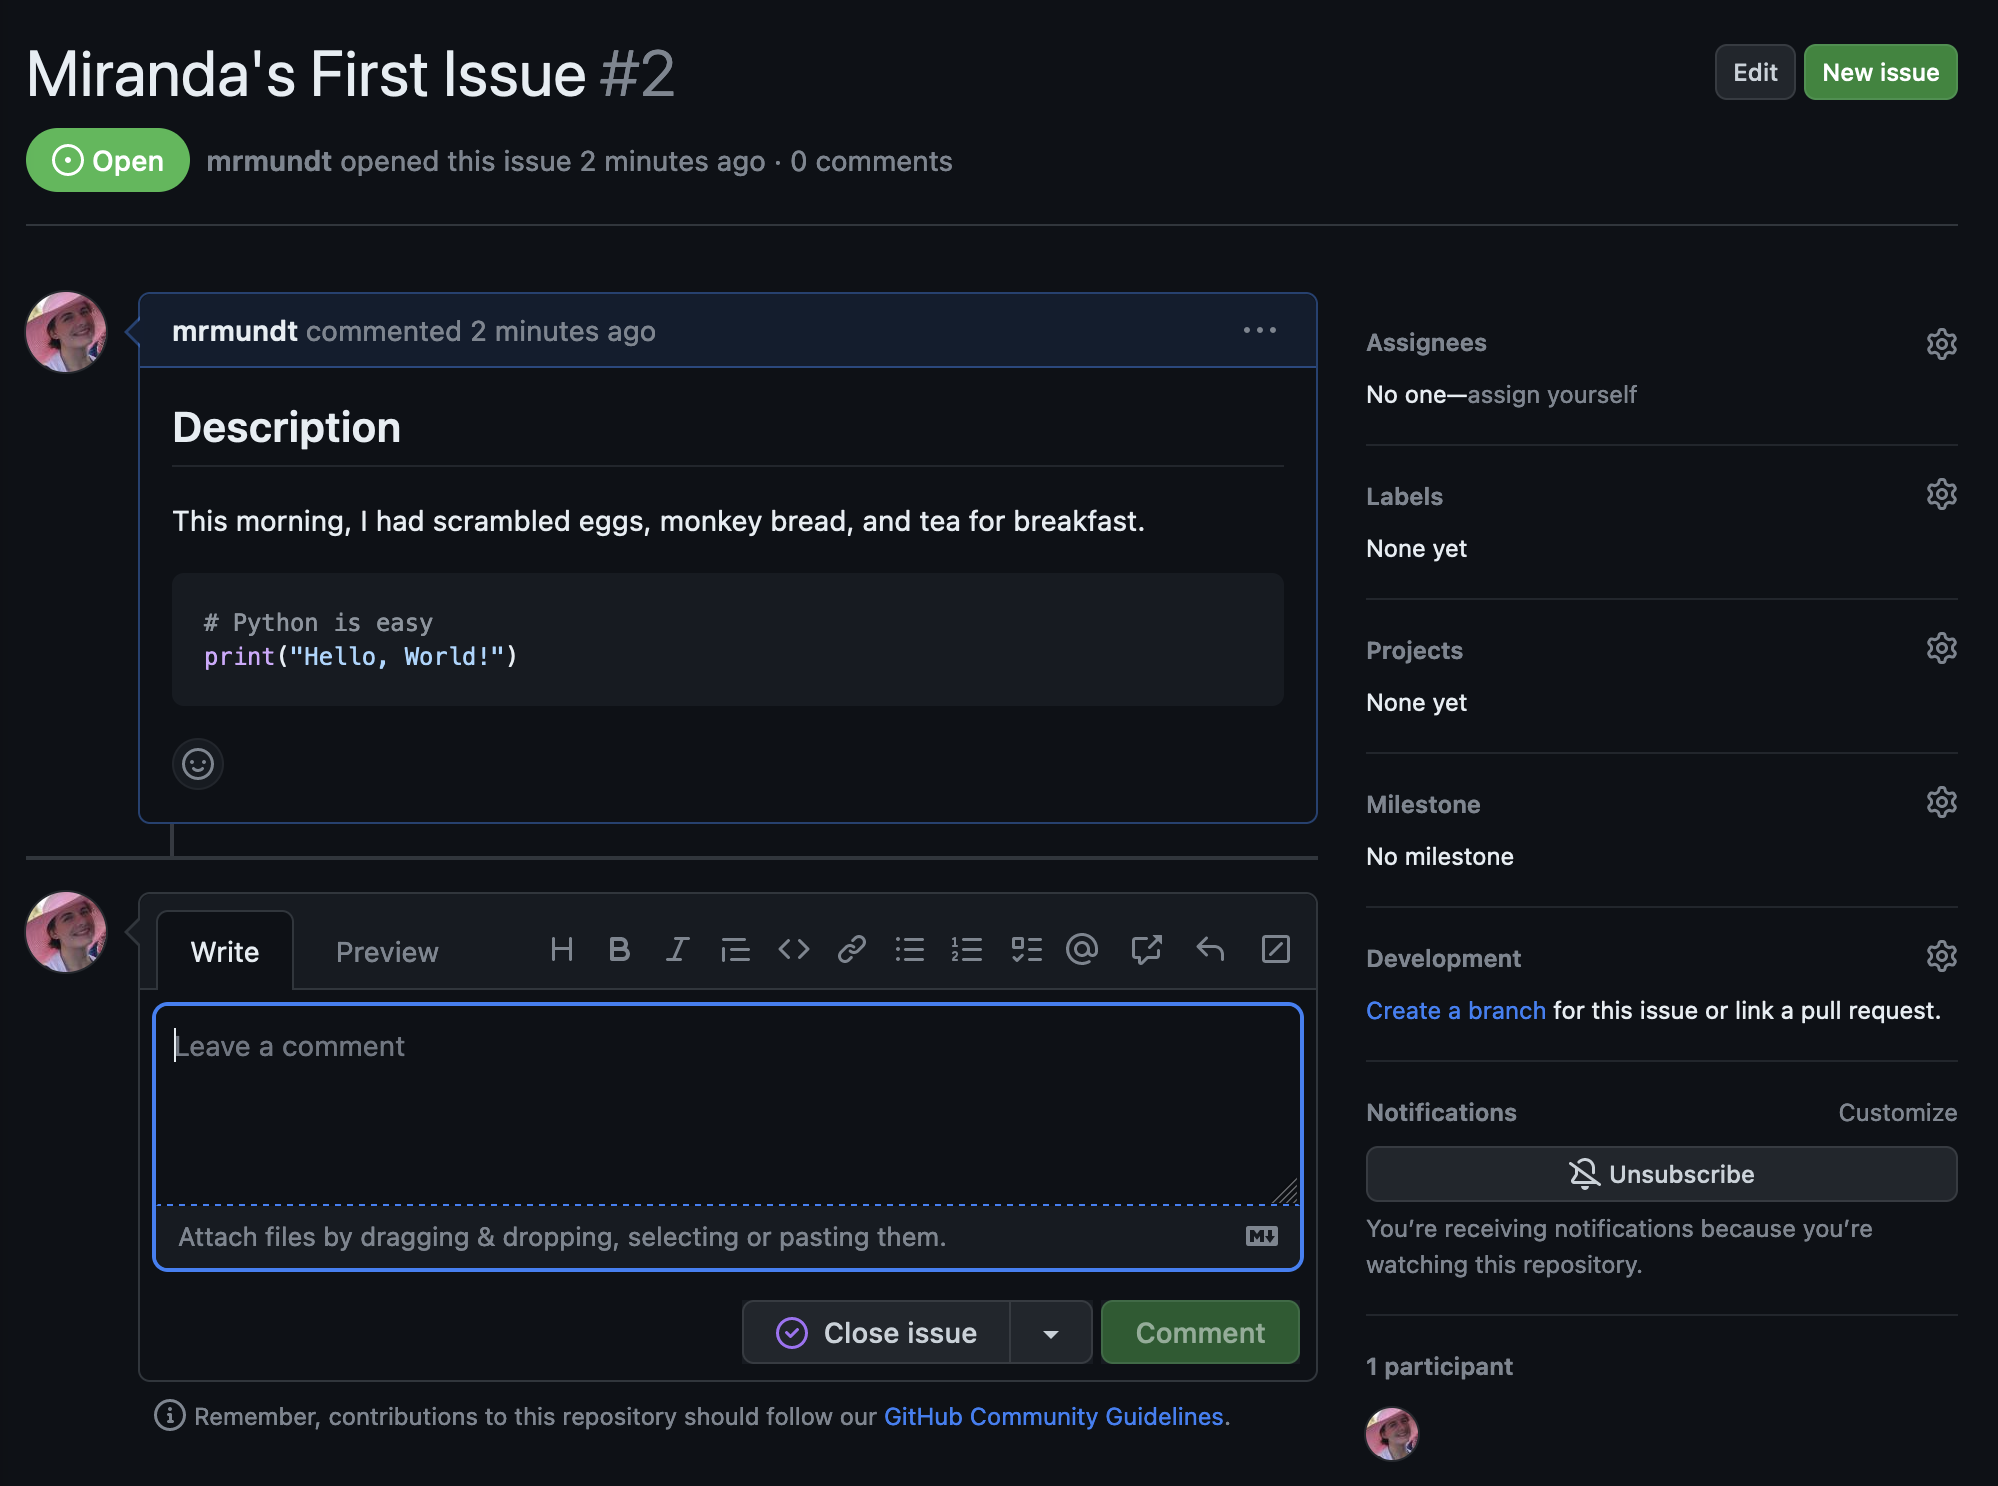
The most basic interaction with an open issue is leaving a comment. This is how you can interact with the issue author, the assignee, and others who have commented on or subscribed to the issue.
Simply click in the comment box at the bottom of the issue, type whatever you’d like, and click “Comment.”
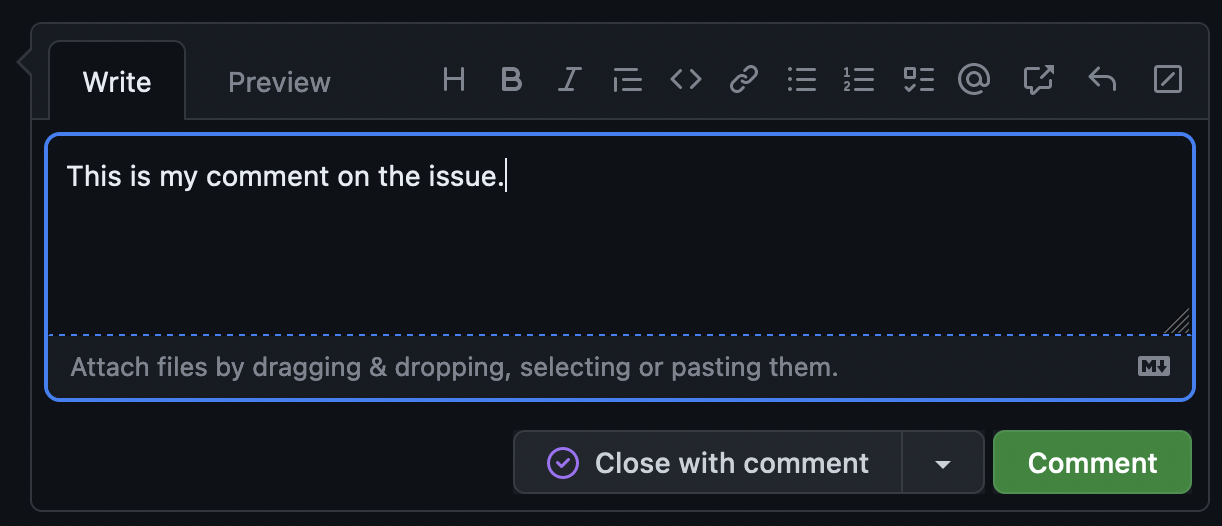
Close by mistake?
Did you accidentally click “Close with comment”? No worries, you can easily reopen it by clicking the “Reopen” button!
You can do other actions like “Edit” the title or original issue information, tag other users, link to other issues or pull requests, and more.
Loop in a Maintainer
A StarSort maintainer should know about your bug. Navigate to your issue from the previous exercise.
- Write a new comment on the issue, mentioning your instructor using
the
@symbol. - Add the comment to the issue.
Close an Issue
Good news — a maintainer “fixed” your StarSort bug! The work is done and the discussion is over, so we don’t want it cluttering up the open-issues list anymore.
Closing an issue is simple - just click the “Close issue” button.
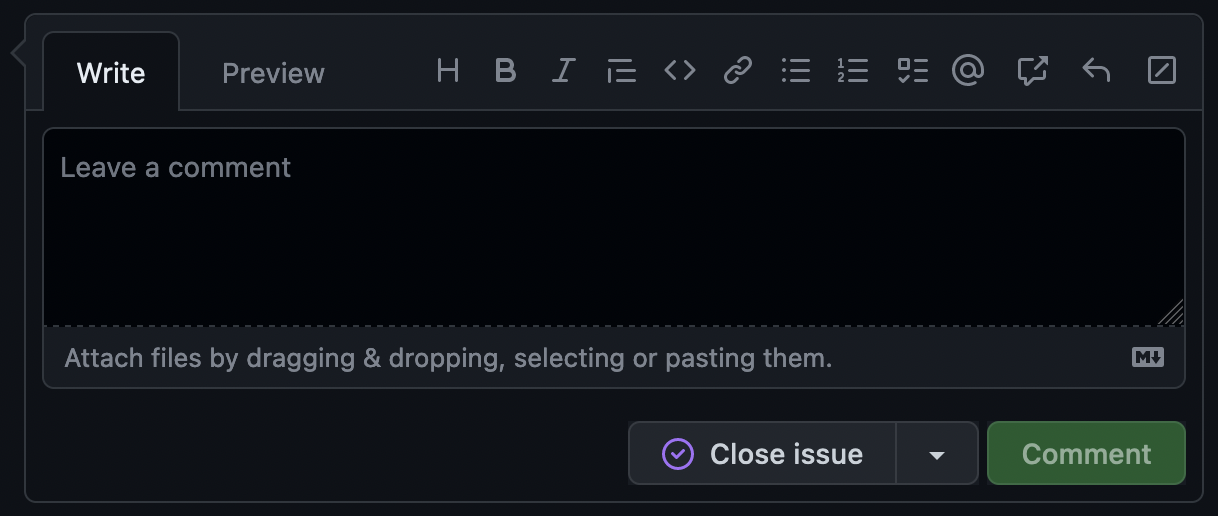
If you start to type in the comment box, this will change into a “Close with comment” button.
The dropdown to the right shows two more options:
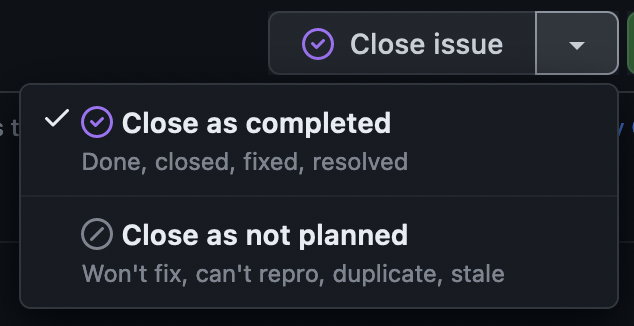
Issue Completed
Navigate to your issue from the previous exercises.
- Close the issue (no comment!)
- Reopen the issue
- Close the issue again with a comment of your choice
You now know the basic actions you can take on a GitHub issue!
- A good issue has a clear title, steps to reproduce, expected vs. actual behavior, and covers one problem.
- New issues can be opened in a repository using the ‘New issue’ button.
- Text on issues use Markdown styling for formatting.
- A user can interact with issues in multiple ways: commenting, mentioning others, linking to other issues and pull requests, and more.
- GenAI can format messy notes into a structured report, but you must supply and verify the facts.
Content from Labelling Issues
Last updated on 2026-07-14 | Edit this page
Estimated time: 14 minutes
Overview
Questions
- How do you make and assign labels to issues?
- How do labels help you triage and prioritize work?
Objectives
- Learn how to make, modify, apply, and filter by labels for GitHub issues.
GitHub Labels
Each new GitHub repository comes with a set of default labels that can be assigned to issues, pull requests, or discussions.
From GitHub’s official documentation:
| Label | Description |
|---|---|
bug |
Indicates an unexpected problem or unintended behavior |
documentation |
Indicates a need for improvements or additions to documentation |
duplicate |
Indicates similar issues, pull requests, or discussions |
enhancement |
Indicates new feature requests |
good first issue |
Indicates a good issue for first-time contributors |
help wanted |
Indicates that a maintainer wants help on an issue or pull request |
invalid |
Indicates that an issue, pull request, or discussion is no longer relevant |
question |
Indicates that an issue, pull request, or discussion needs more information |
wontfix |
Indicates that work won’t continue on an issue, pull request, or discussion |
These labels can be viewed from the Issues and Pull Requests pages.

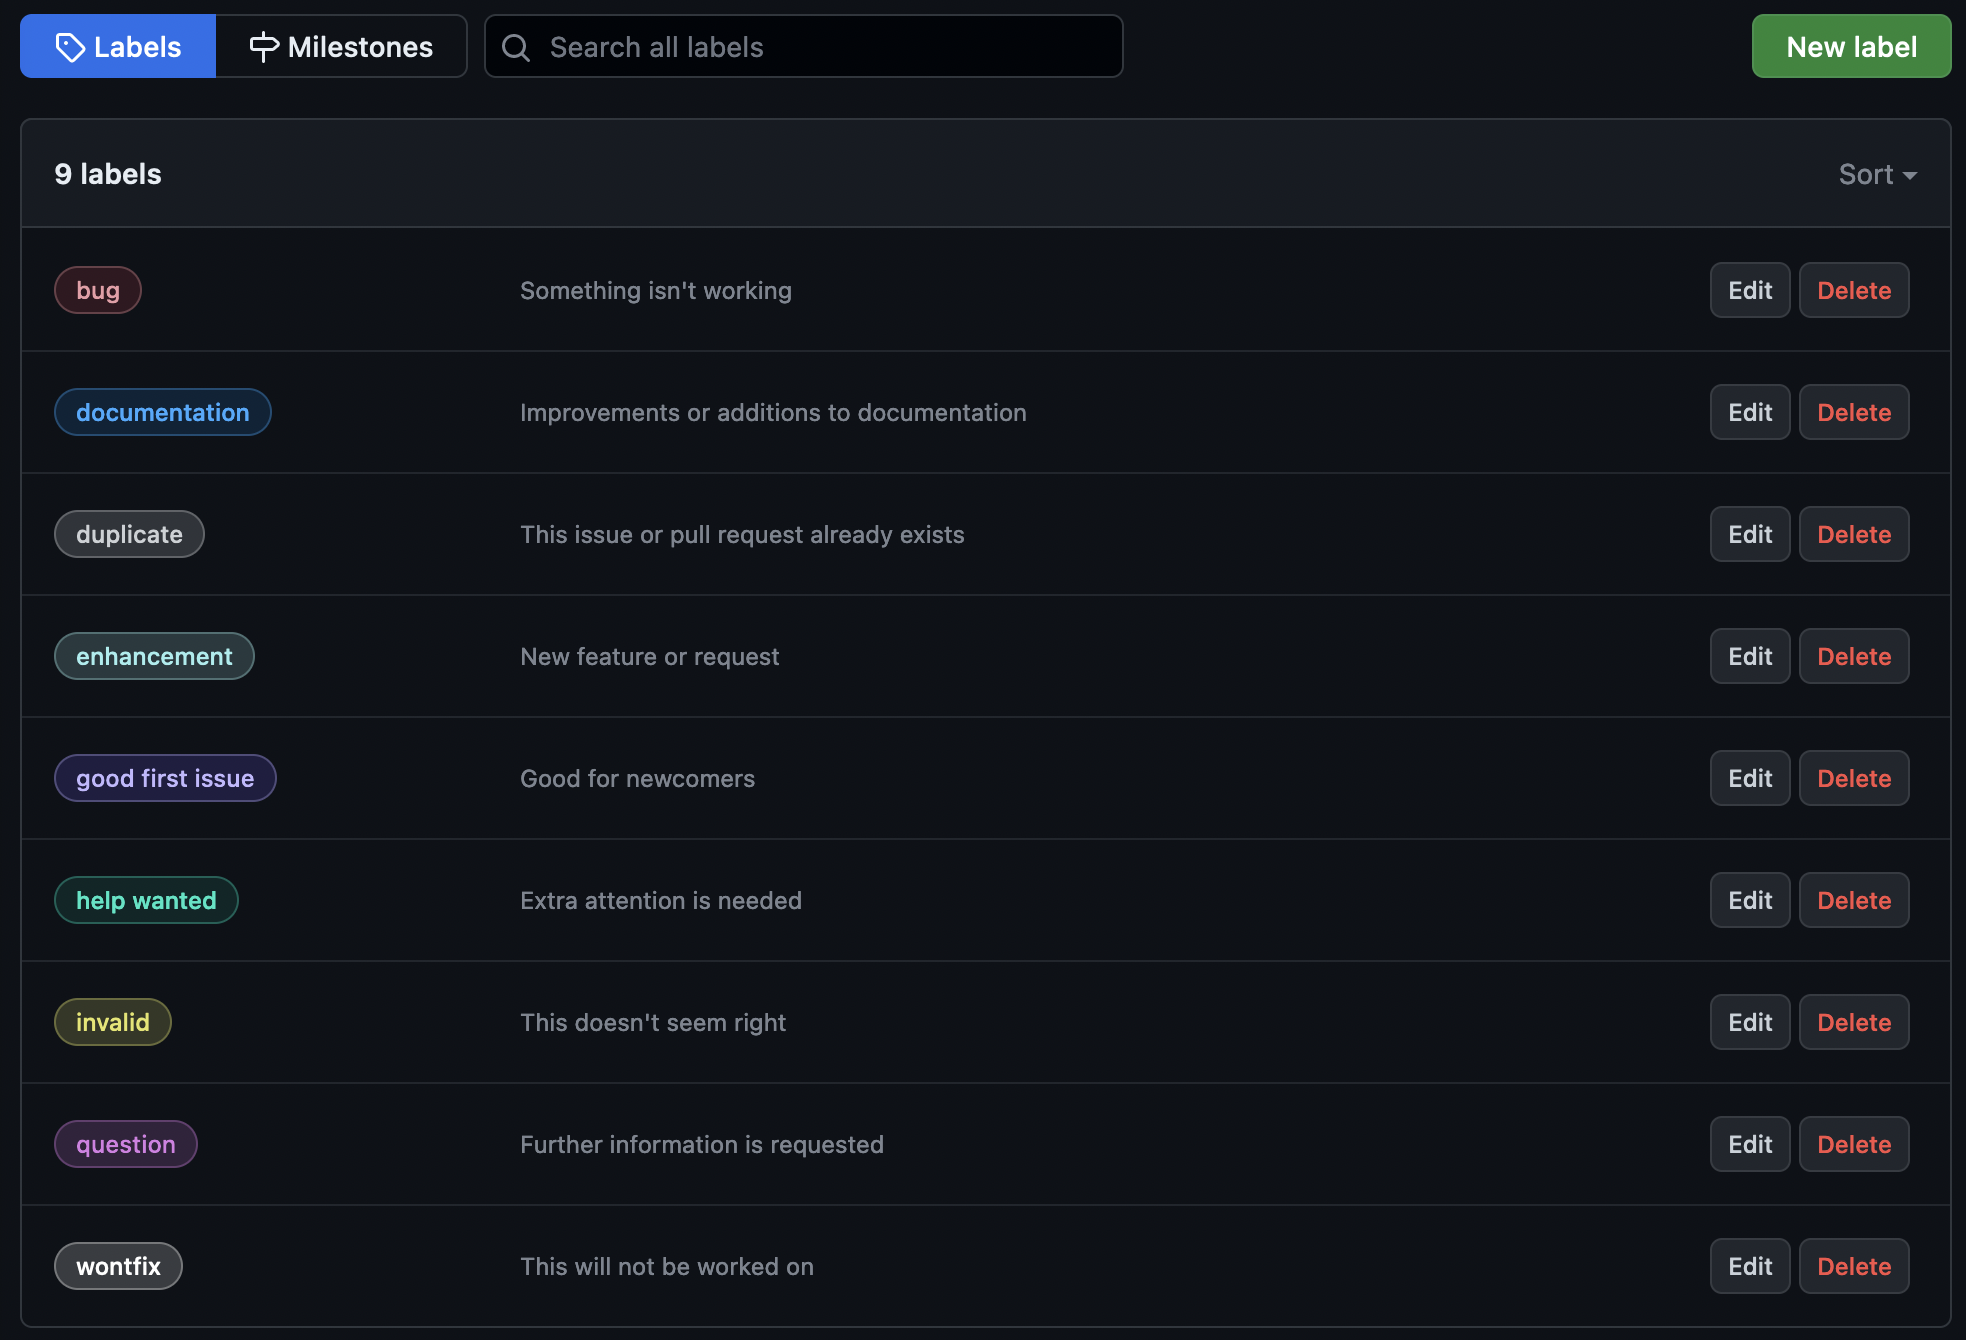
Several of these labels are aimed towards large, open-source communities with many collaborators. This is not always the case in Research Software Engineering, however, so we will need to modify these.
Modifying Labels
Labels can be added, edited, or deleted from the Labels page. Each label has three attributes: a name, a description, and a color (hex code).

Tidy Up StarSort’s Labels
The StarSort maintainers want the label set to fit their small research team. In your practice repository’s Labels page:
- Add a new label for
discussion - Remove the label for
good first issue - Change the color of the
wontfixlabel to your favorite color
Using Labels
Now that the labels are created, they can be assigned to issues.
Labels can be applied from the main Issues page or within a single issue.
From the main Issues page, simply checkmark the issue, hit the “Label” dropdown, select your preferred label(s), and click outside of the dropdown.
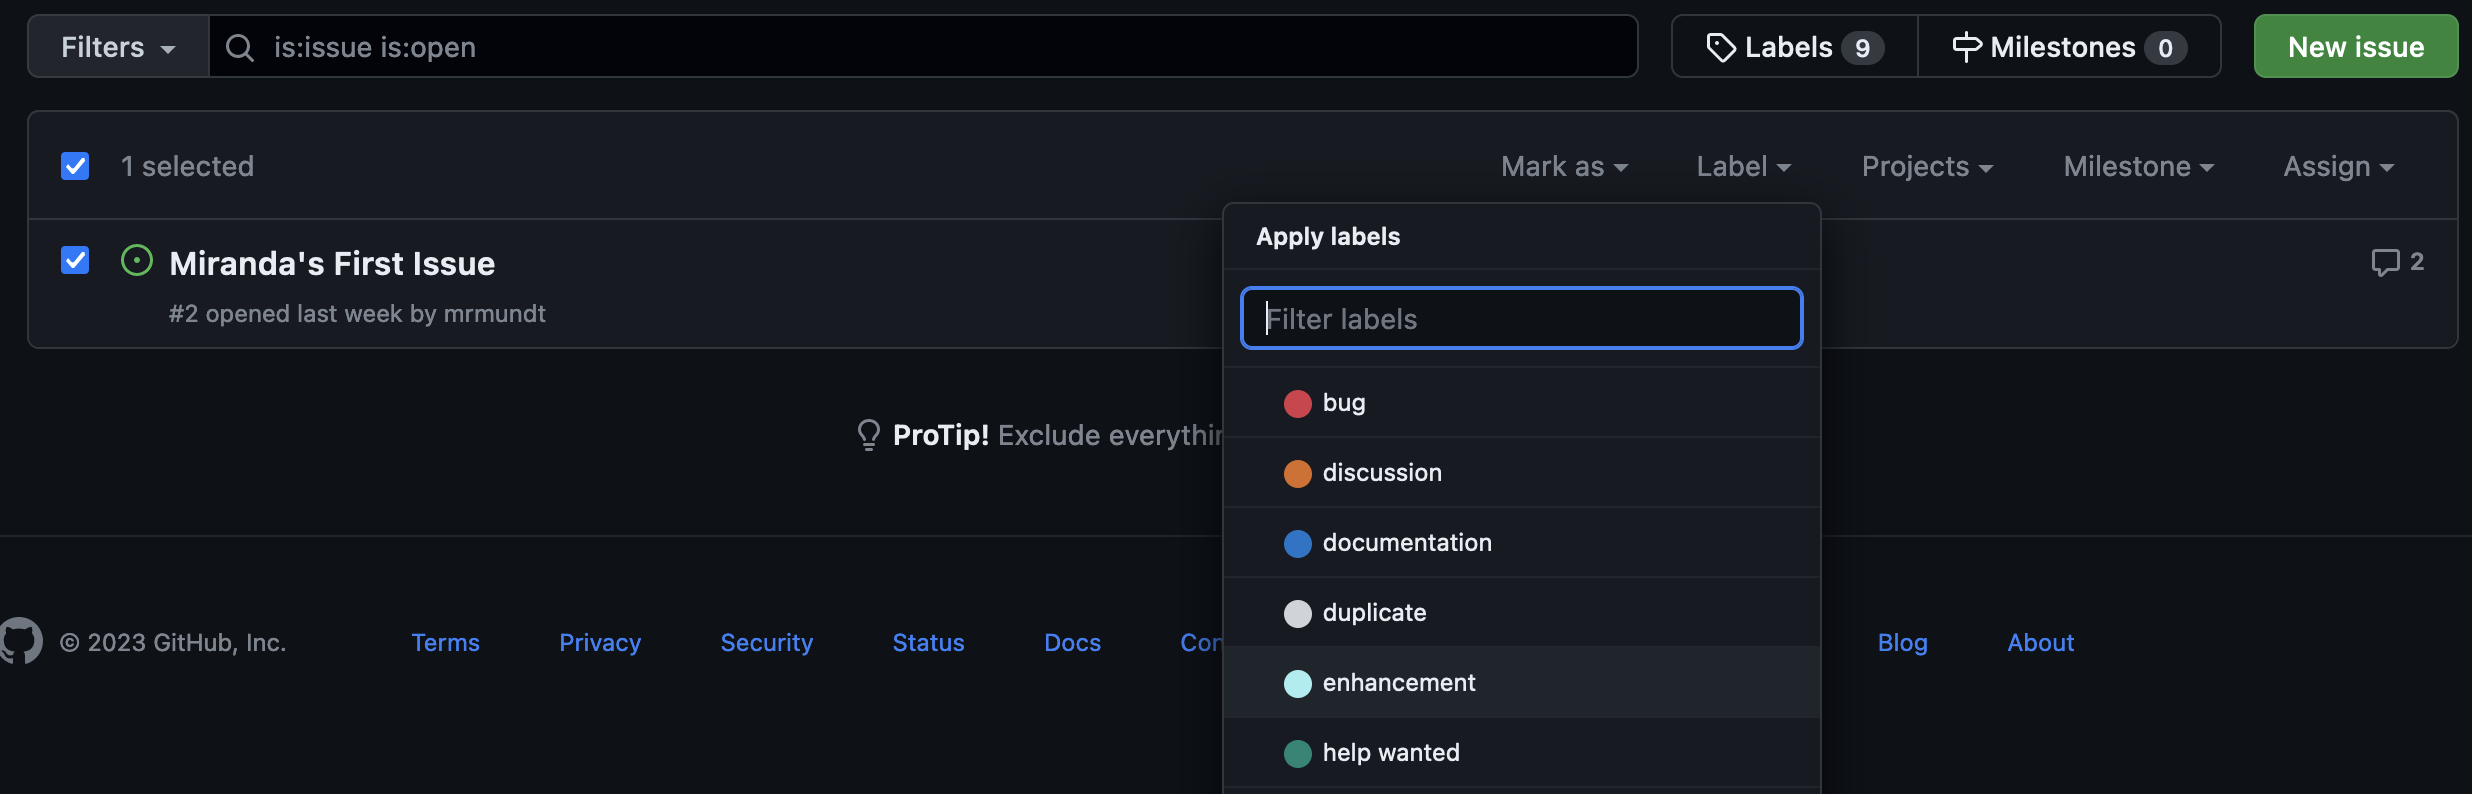
To apply within a single issue, click on the issue to open it. Then you will see the “Labels” option on the right-hand side.
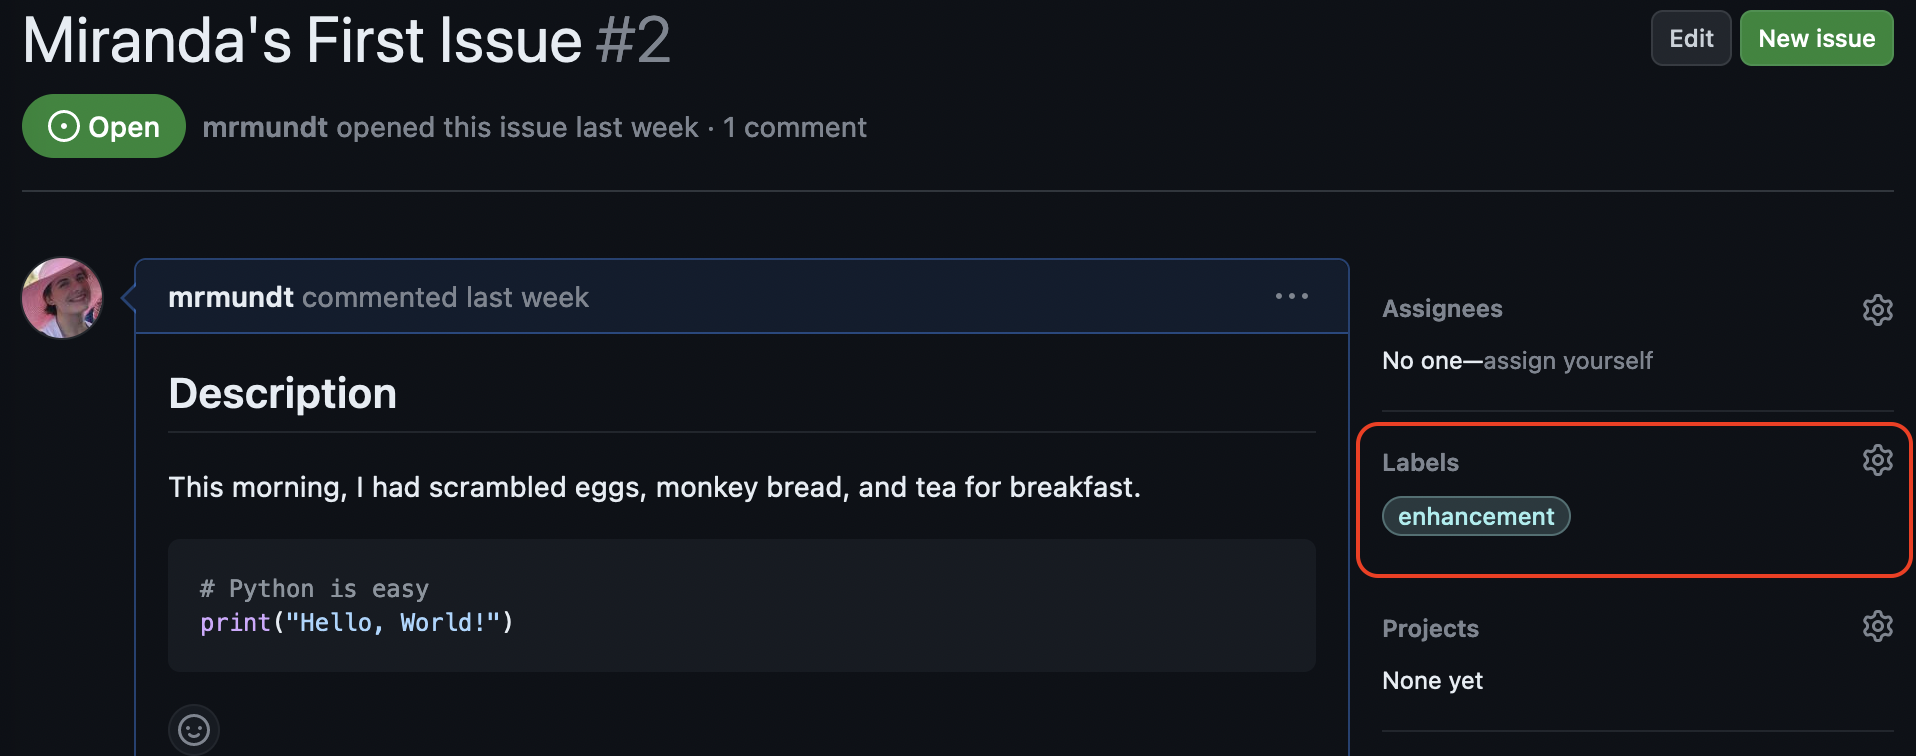
Click on “Labels”. A dropdown will appear in which you can select or deselect your preferred label(s).
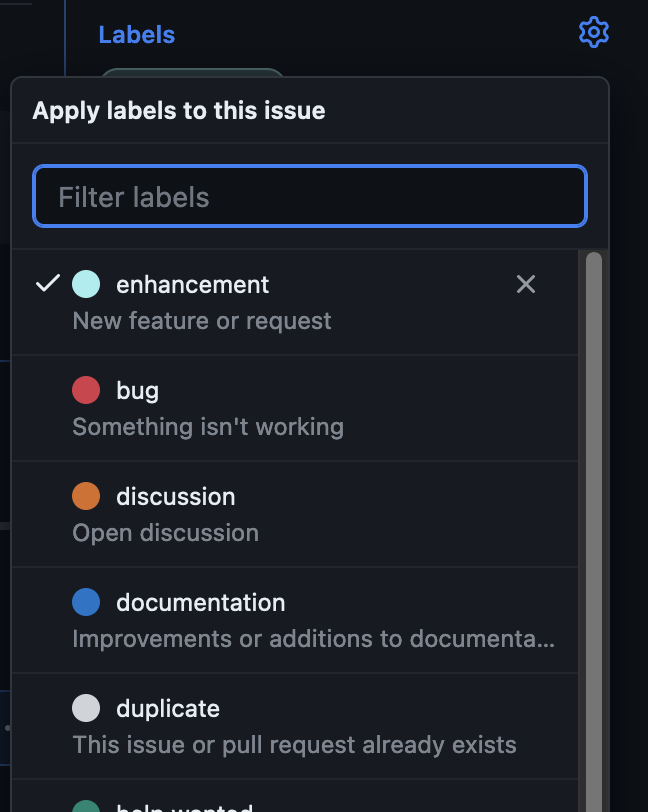
Triage Time
A new idea came in for StarSort: supporting a new image format. In your practice repository’s issue page:
- Create a new issue entitled “[YOUR NAME]: support FITS image format”
- Add the
discussionlabel so the team knows it needs further discussion
GenAI: Triage assistant
Faced with a backlog of 50 unlabeled issues? An LLM can read an issue’s text and suggest a label (bug, enhancement, question…) or even a priority. It’s a great way to get a first pass — but a human should confirm before the labels drive real decisions, since a mislabeled issue hides in the wrong filter.
Filter by Labels
Another feature of labels within GitHub is the ability to filter issues by them. This is a powerful and useful feature for any project that uses GitHub Issues for tracking, organizing, and prioritizing work.
To filter, navigate to the main Issues page. With no issue selected, click the “Labels” dropdown again. You’ll see that this dropdown now says “Filter by label” rather than “Apply labels.”
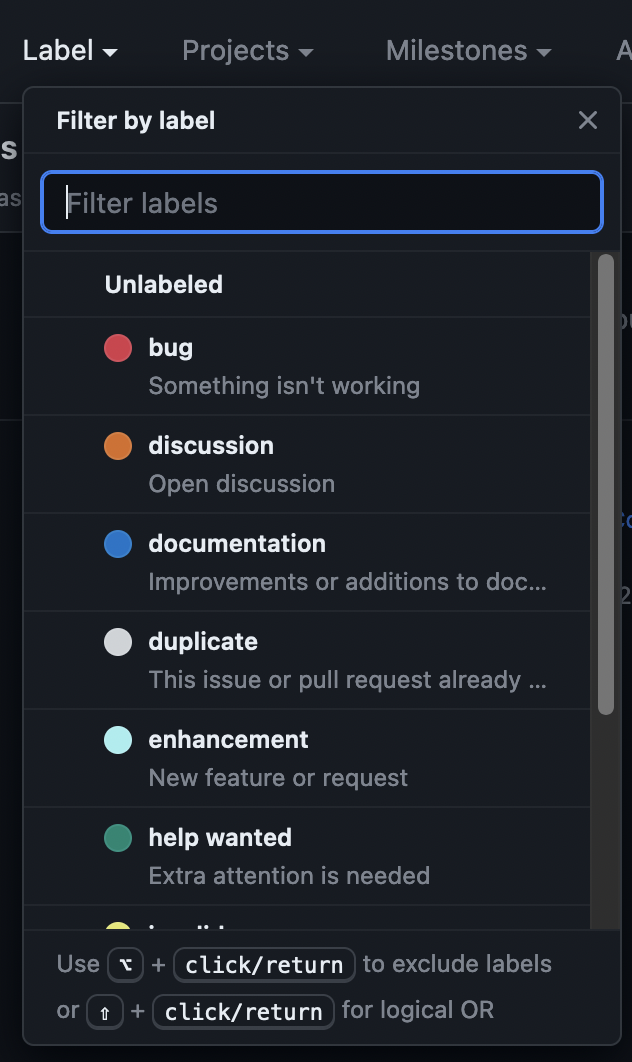
Click on a label in the list to filter by it. GitHub will only show issues that have that label applied.
You can select multiple labels or use the hints at the bottom of the “Labels” dropdown to do more advanced filtering, such as exclusion.
Filter Like a Pro
Let’s go back to some real research software. Navigate to https://github.com/spack/spack and find the issues page.
- Filter by the
environmentslabel? - Filter by both the
environmentsandbuglabels? - (CHALLENGE) Filter by
macOSbut excludebug?
The last one uses the exclusion syntax in the search bar:
is:issue is:open label:macOS -label:bug.
You now understand how to make, change, apply, and filter by labels in GitHub Issues.
- Labelling issues can help with organization and filtering.
- Curate the default label set to fit your project and team size.
- Filtering (including exclusion, e.g.
-label:bug) makes a big backlog manageable.
Content from Issue Templates
Last updated on 2026-07-13 | Edit this page
Estimated time: 16 minutes
Overview
Questions
- What are issue templates?
- How do you make issue templates?
- How do you customize the template chooser?
Objectives
- Learn how to make issue templates.
- Learn how to customize templates and their appearance.
What are Issue Templates?
Issue templates in GitHub are a way to pre-fill new issues with specific sections, data, instructions, etc.
They are customizable for every project. You can add as many templates as makes sense for your project, or you can have none at all.
Remember the good-issue table from earlier? A template is how you incorporate those items right into the “New issue” experience, so every contributor’s bug report comes with steps-to- reproduce and expected-vs-actual sections already laid out. It’s the StarSort maintainers’ favorite trick for getting reports they can actually act on.
In this episode, we will learn the basics of issue templates.
Default Issue Templates
GitHub has a quick start default feature for those wishing to use Issue Templates. This can be enabled through the graphical user interface.
Click on the “Settings” tab in your repository.

It will load to the “General settings” page, under which there is a “Feature” section. Here you will see “Issues” (already checkmarked) with a button to “Set up templates.”
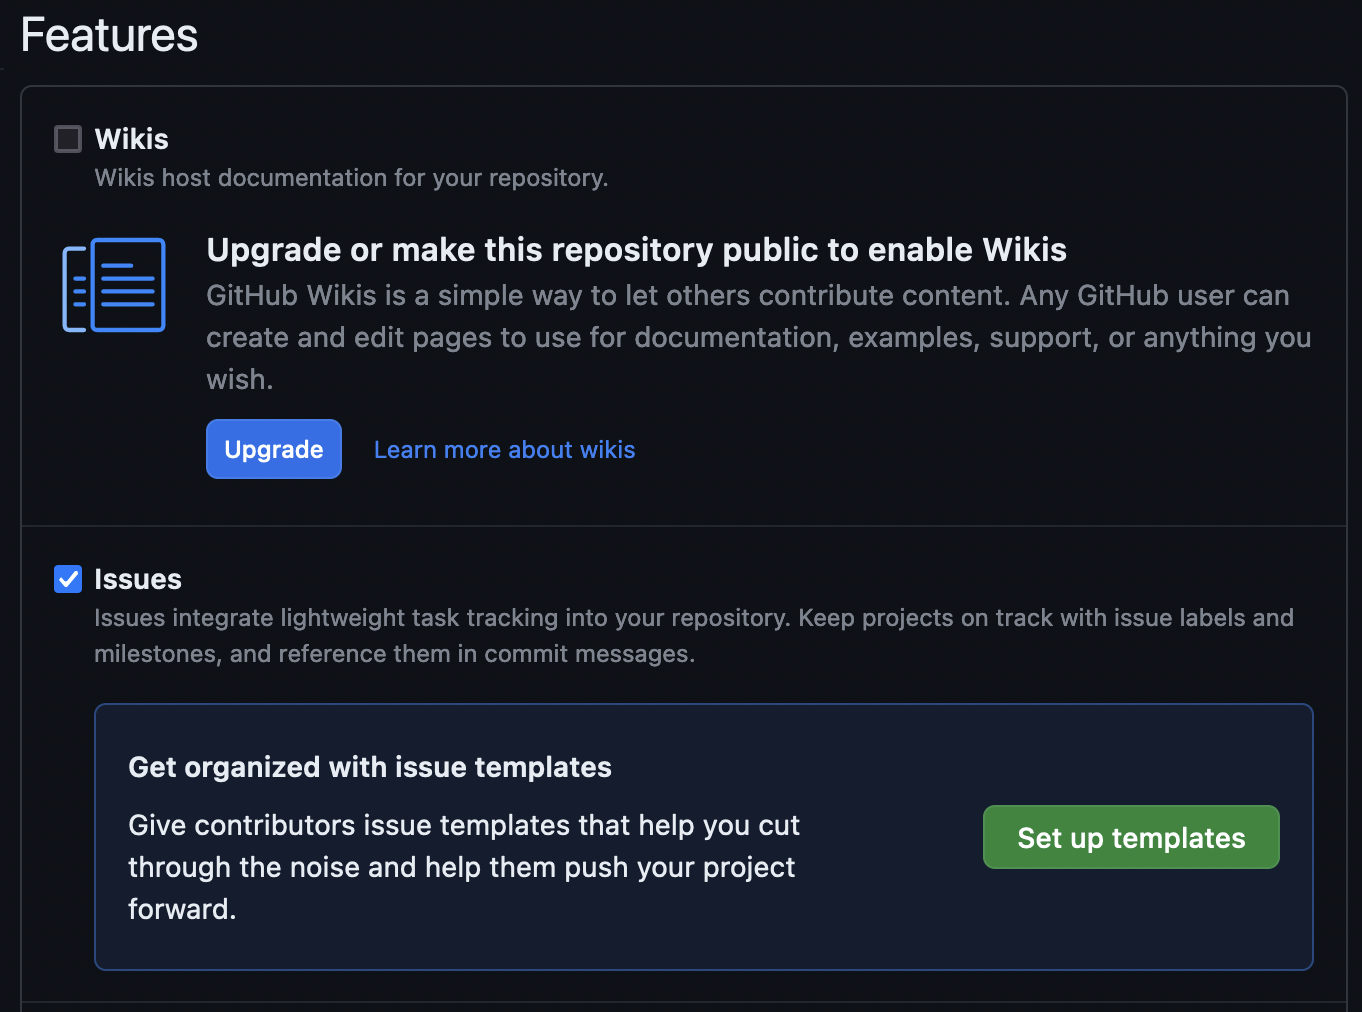
This will take you to a mostly blank screen on which there is an “Add template” dropdown with several options.
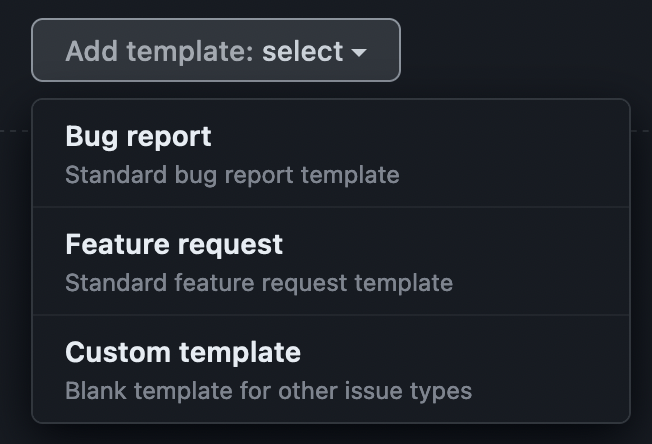
From this list, select “Bug report.” You will now see that the “Bug report” template shows up in the list of templates. Click “Preview and edit” to view the new template.
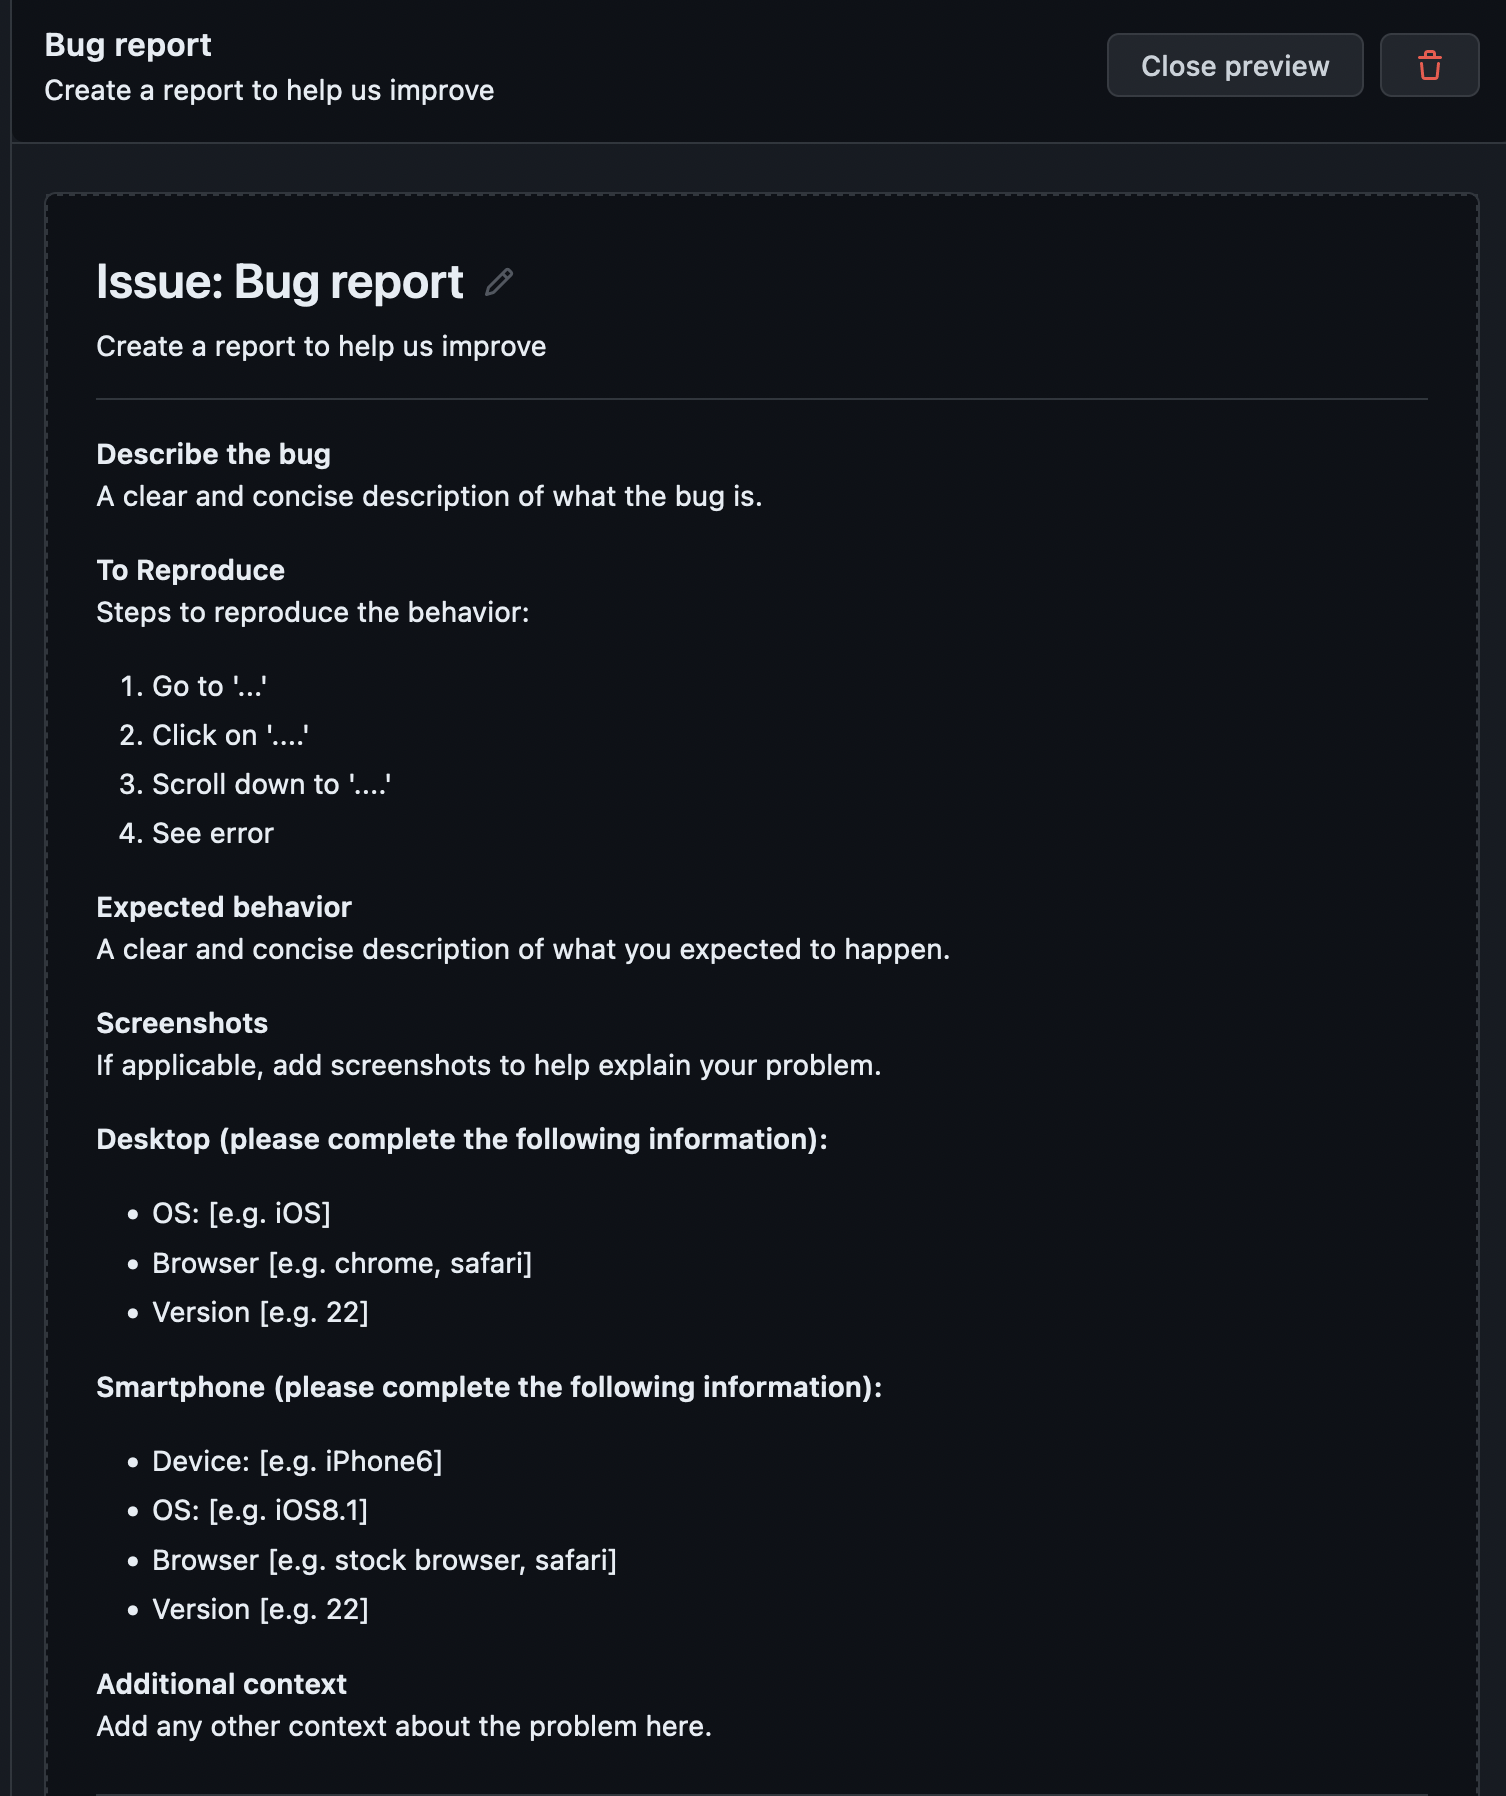
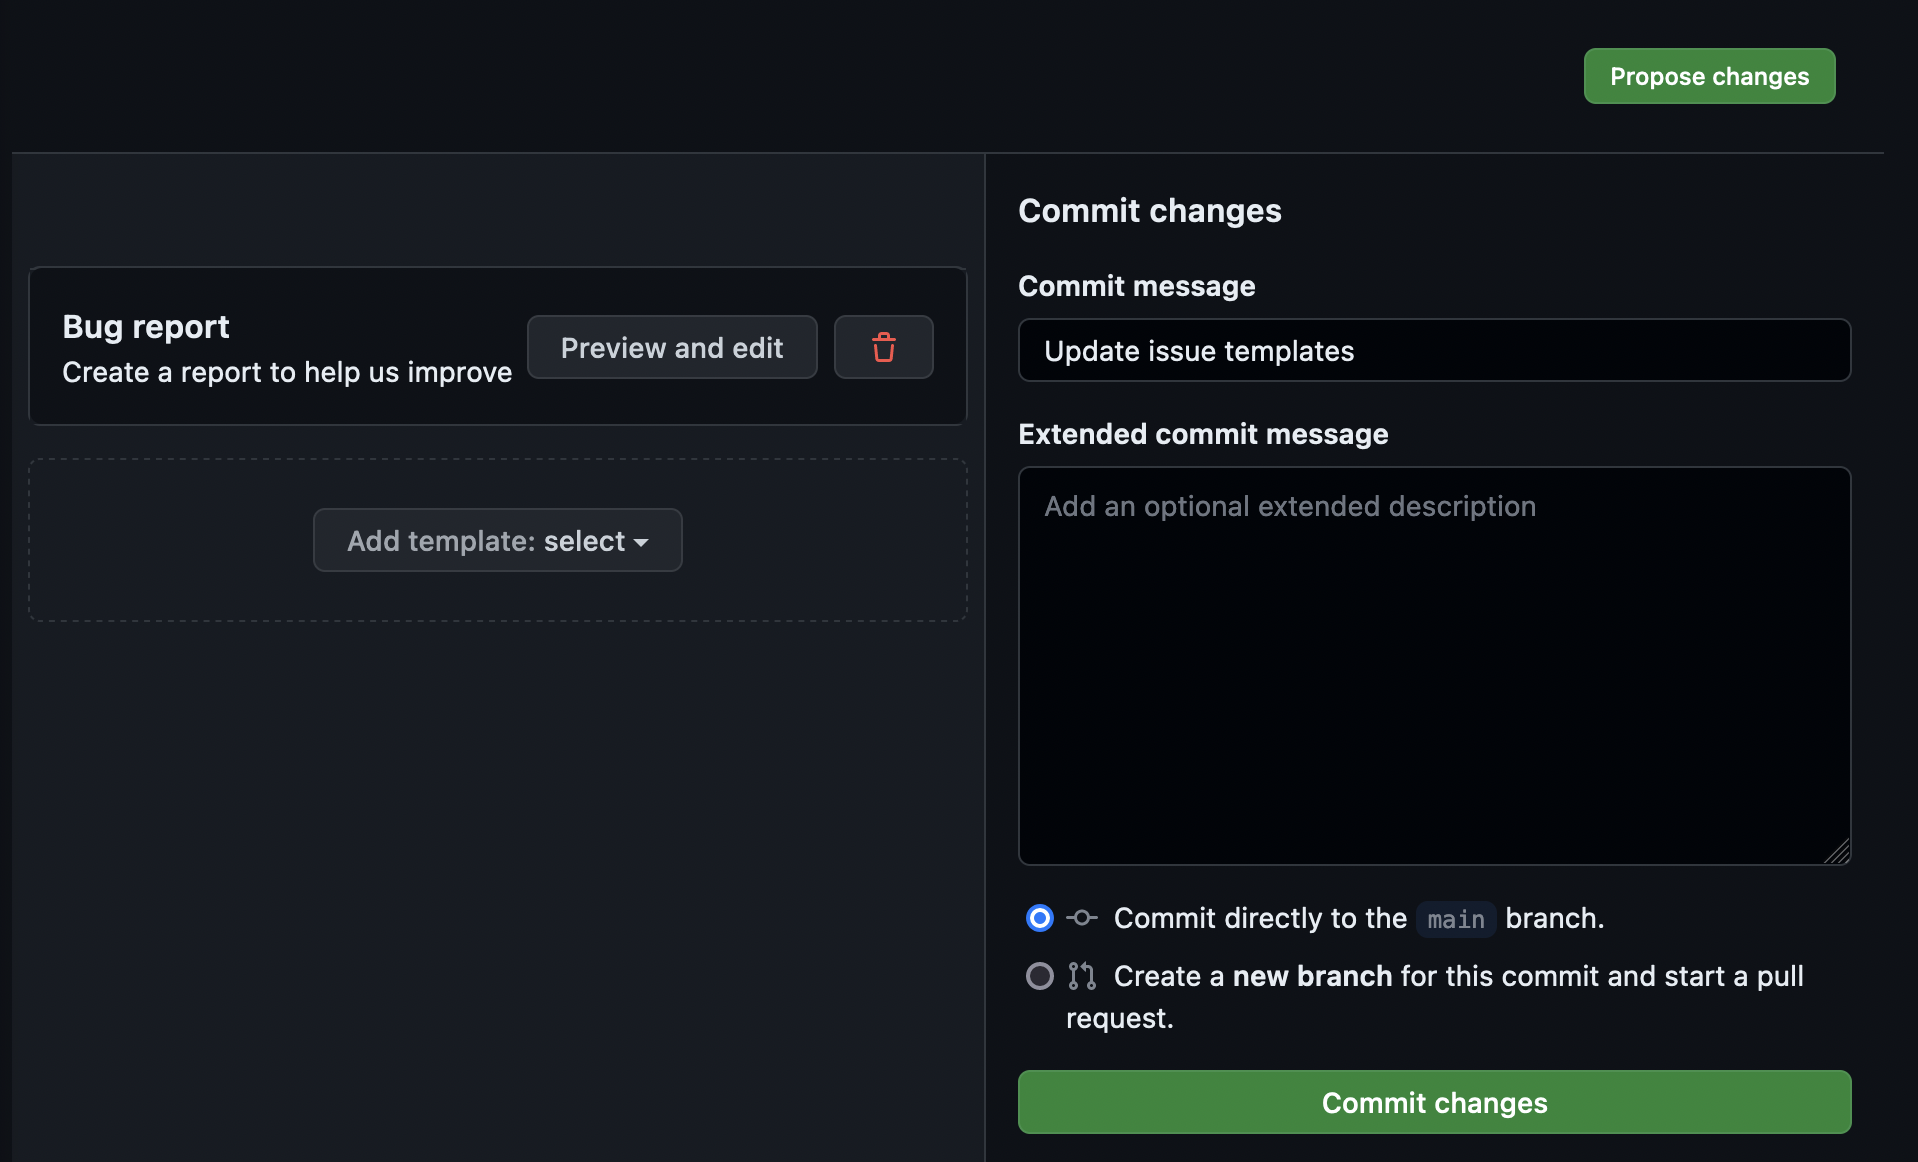
For now, we will leave this template as-is. To apply the new template to your repository, click the “Propose changes” button at the top of the page. This will load a commit message dialog box. Put whatever you desire in the commit message dialog box and commit the changes to your main branch.
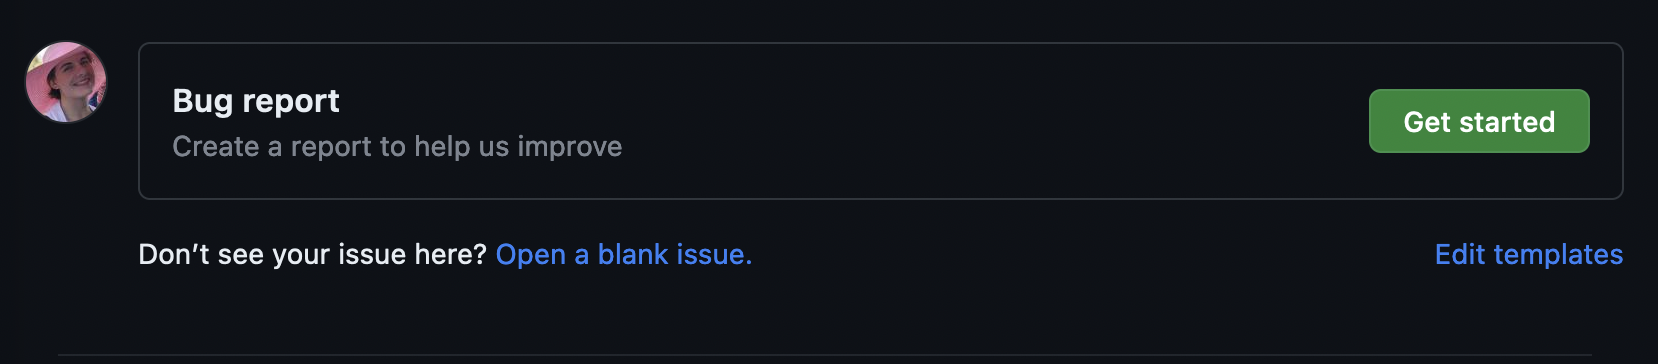
If we navigate to the Issues page now and click “New issue”, the template is now available in our options.
New Feature
Using the same steps covered, add the “Feature request” default template to your repository.
Now open an issue for each new template, filling out the sections with whatever you’d like.
Custom Issue Templates
We now have templates for both bug reports and feature requests. The StarSort maintainers have a request, though: they want a template for Design Discussions, so proposals like your “support FITS format” idea from earlier come in with a consistent shape. Let’s build that custom template.
When we created our first template, GitHub did the setup for us. If you navigate back to your main page, you will see a new directory has been created.

This new directory is where all the issue templates are located. The
directory currently has two files: bug_report.md and
feature_request.md. We are going to make a new one called
design_discussion.md.
Multiple Paths Available
We will do the rest of this lesson through the GUI; however, all of these steps can be done via command line and your preferred text editor. Do whatever feels right for you!
Issue Template Header
All issue templates start with a standard header that controls the appearance of the issue in GitHub. For our custom template, we will use:
MARKDOWN
---
name: Design Discussion
about: Start a design discussion for the project
title: ''
labels: ''
assignees: ''

---| Option | Purpose |
|---|---|
name |
The name of the issue template, as it appears on the “New issue” page |
about |
The description of the use of this template, as it appears on the “New issue” page |
title |
A default title to be applied to a new issue opened using this template |
labels |
Default labels to be applied to a new issue opened using this template |
assignees |
Default assignees to be assigned to a new issue opened using this template |
Issue Template Content
Following this header, we can add whatever other data or sections we desire, formatting the template using Markdown.
Discussion Section
Finish the “Design Discussion” template by adding the following sections:
- Description
- Motivation
Then commit the changes directly to your main branch.
The finished design_discussion.md combines the header
from above with two Markdown sections. Wording will vary, but it should
look something like:
MARKDOWN
---
name: Design Discussion
about: Start a design discussion for the project
title: ''
labels: ''
assignees: ''

---

## Description

<!-- A clear description of the design question or proposal. -->

## Motivation

<!-- Why does this matter? What problem or use case does it address? -->
After committing to main, the template appears as an
option on the “New issue” page.
GenAI: Draft a template in seconds
Templates are structured, repetitive text — exactly what LLMs do well. Try asking one: “Write a GitHub issue template (with YAML front matter) for reporting a performance problem in a scientific Python tool.” Then review and trim it to fit your project — AI tends to over-produce sections you don’t need, and “less is more” still applies.
We now have three issue templates available for use.
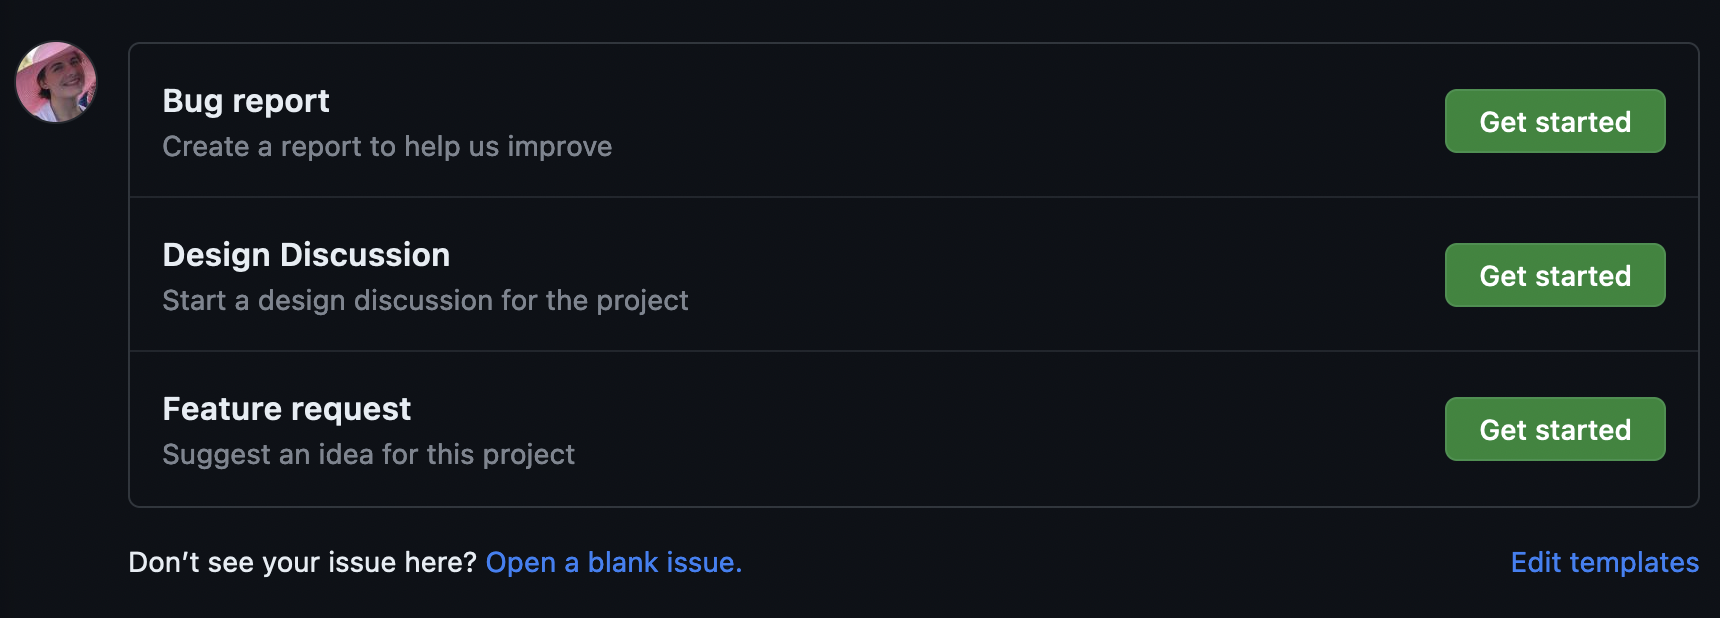
Incorporate External Links
Many projects have external websites or extra ways to get help outside of GitHub. Your project may, for example, have a Google Forum or a mailing list.
You can incorporate these into the “Template Chooser” page by using a
config.yml file in the .github/ISSUE_TEMPLATE
directory.
The config.yml file can have two different options:
blank_issues_enabled: # false or true
contact_links:
  - name: NAME
    url: LINK
    about: DESCRIPTION
The first option, blank_issues_enabled, controls whether
a user is allowed to open a blank issue if one of the provided templates
doesn’t quite fit their need.
The second option, contact_links, allows you to list
links to external sites that will show up in the template chooser.
Ask a Friend
Not every question belongs in the issue tracker — usage questions are
often better in a discussion forum or chat. StarSort has a community
discussions page, so let’s send people there instead of letting “how do
I…?” issues pile up. Create a config.yml for your
repository. In it:
- Enable blank issues
- Add a contact link named “StarSort Community Q&A” pointing to a discussions/forum URL of your choice (e.g., your repo’s GitHub Discussions page), with a description like “Ask usage questions here.”
Then commit the changes directly to your main branch.
Create .github/ISSUE_TEMPLATE/config.yml with the two
options filled in (your URL will differ):
YAML
blank_issues_enabled: true
contact_links:
  - name: StarSort Community Q&A
    url: https://github.com/YOUR-USERNAME/YOUR-REPO/discussions
    about: Ask usage questions here.
Once committed to main, the “New issue” template chooser
shows your existing templates plus a button for the “StarSort Community
Q&A” link. (Note: blank_issues_enabled: false would
hide the blank-issue option and push people toward your
templates and links instead.)
Our template chooser now shows our three templates plus the external community link.
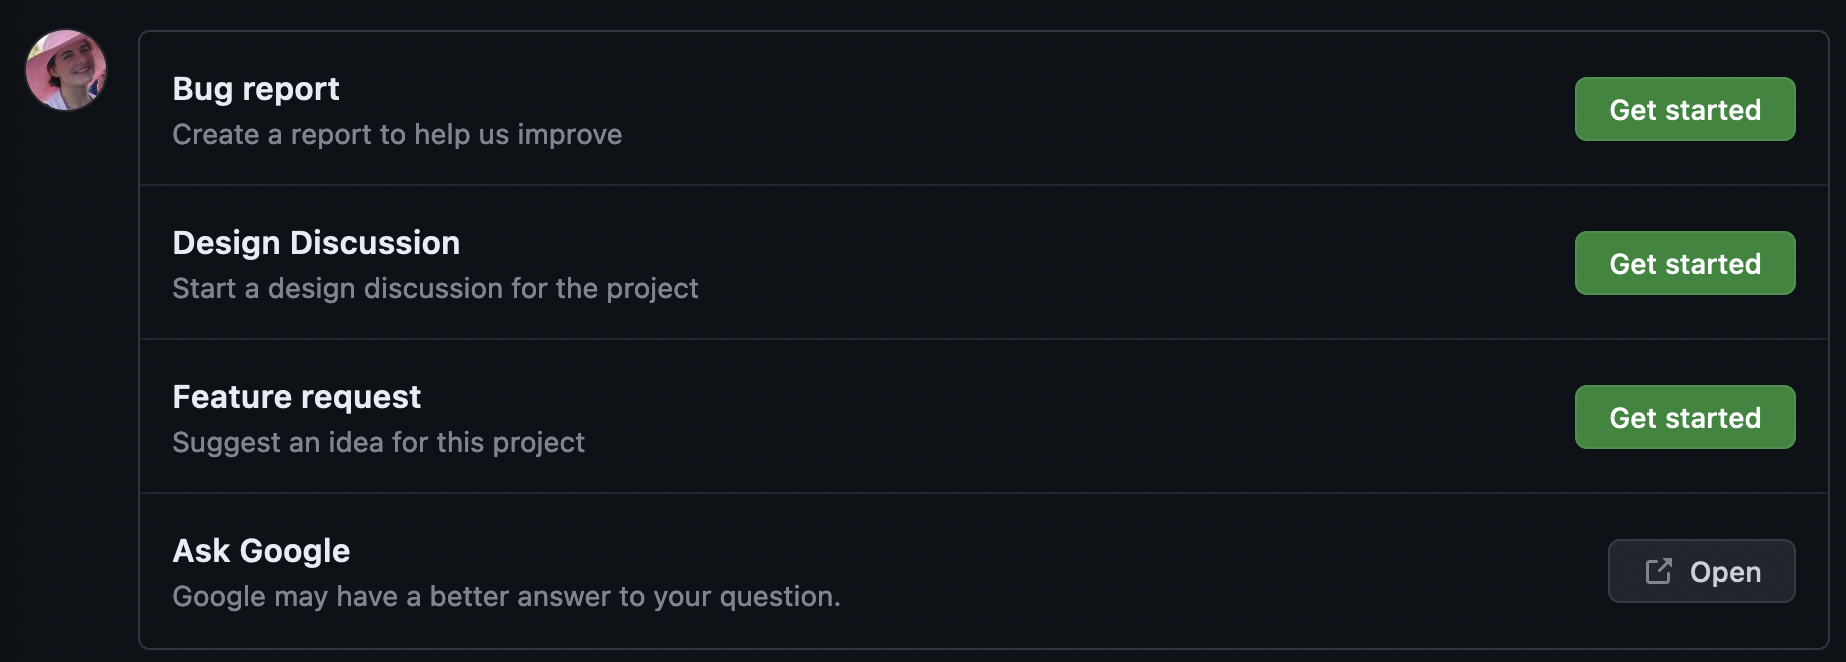
And that’s all, folks! You now know much more about GitHub Issues.
- Templates can be incorporated into any GitHub repository and can make issue creation more structured.
- A good template incorporates the “good issue” table into every new report.
- External links can be listed with the templates to help direct users to external resources.
- GenAI can draft a template quickly — review and trim it to fit your project.