Hello CI World
Last updated on 2025-07-17 | Edit this page
Overview
Questions
- How do I run a simple GitHub Actions job?
Objectives
- Add CI/CD to your project.
Now, we will be adding a GitHub Actions YAML file to a repository. This is all we will need to run CI using GitHub Actions.
If you haven’t already, use the Setup
instructions to get the example intersect-training-cicd
repository setup locally and remotely in GitHub.
Adding CI/CD to a project
The first thing we’ll do is create a
.github/workflows/main.yml file in the project.
Open .github/workflows/main.yml with your favorite
editor and add the following
Run GitHub Actions
We’ve created the .github/workflows/main.yml file but
it’s not yet on GitHub. Next step we’ll push these changes to GitHub so
that it can run our job. Since we’re adding a new feature (adding CI) to
our project, we’ll work in a feature branch.
BASH
git checkout -b add-ci
git add .github/workflows/main.yml
git commit -m "Adds initial GitHub Actions for CI"
git push --set-upstream origin add-ci
And that’s it! You’ve successfully run your CI job and you can view
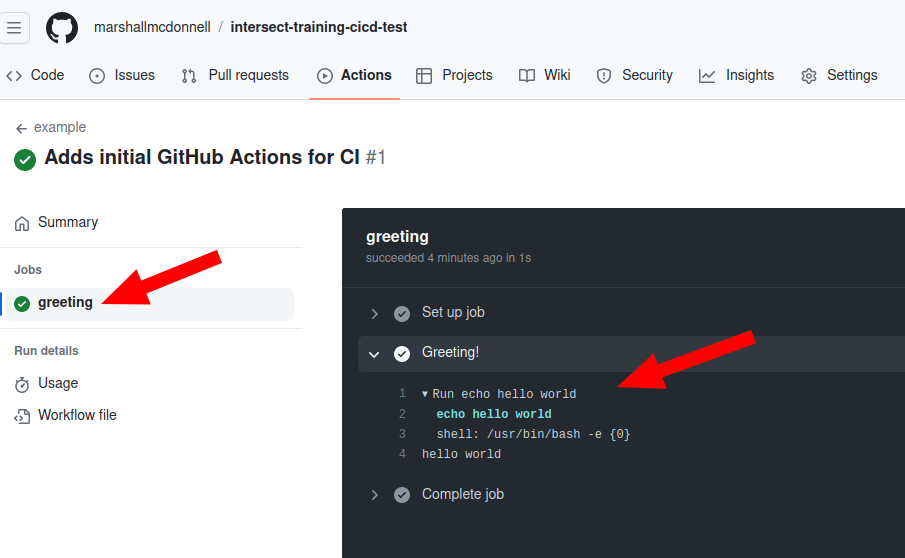
the output. You just have to navigate to the GitHub webpage for the
intersect-training-cicd project and hit Actions button.
There, you will find details of your job (status, output,…).

From this page, click through until you can find the output for the successful job run which should look like the following
Pull Request
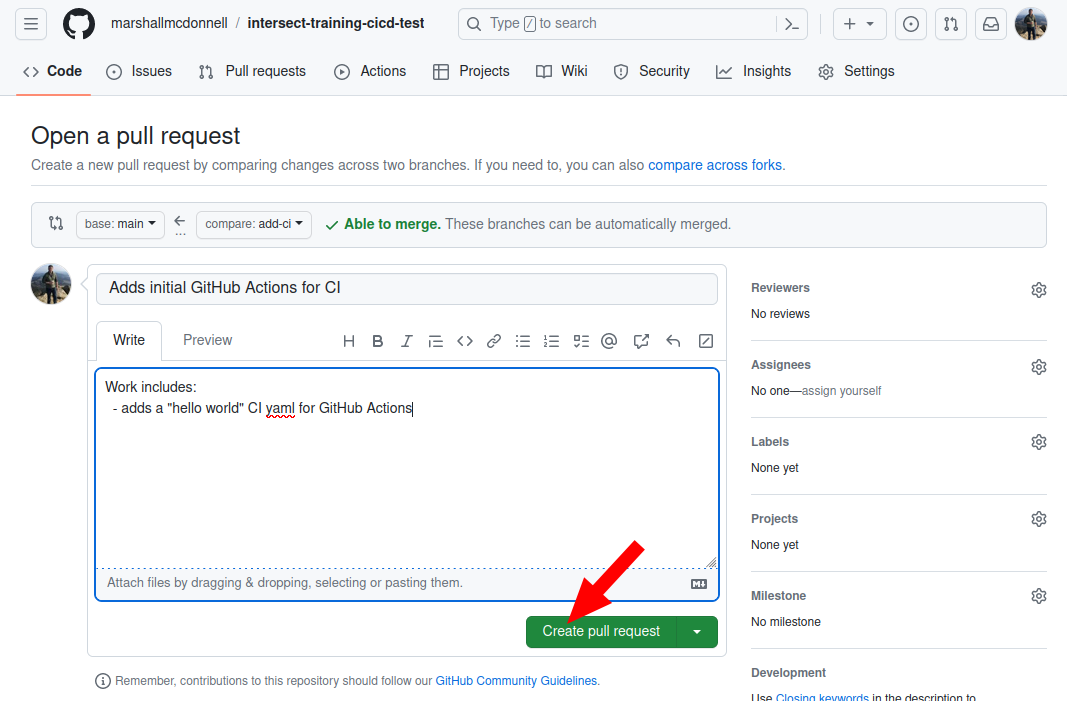
Lastly, we’ll open up a pull request for this branch, since we plan
to merge this back into main when we’re happy with the
first iteration of the Actions.
See the beauty of the passing CI checks for your pull request!
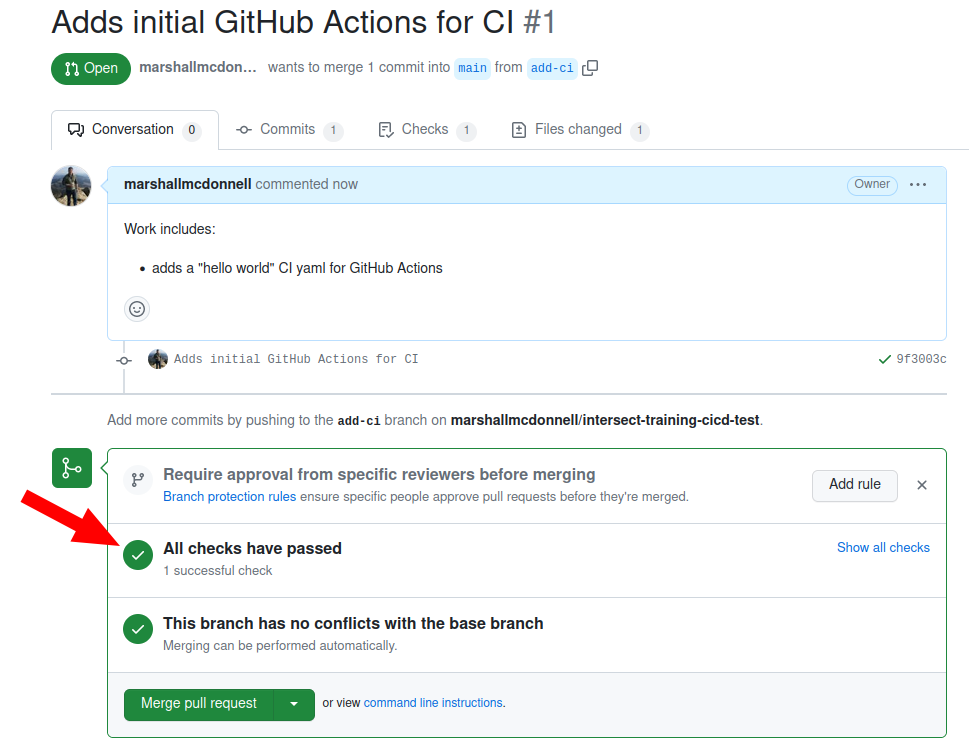
Don’t merge yet!
We will just continue this Pull Request as we continue. Don’t merge
into main yet.
- Creating
.github/workflows/main.ymlis the first step to CI/CD. - Pipelines are made of jobs with steps.