CD for Python Package
Last updated on 2025-07-18 | Edit this page
Overview
Questions
- How do I setup CD for a Python package in GitHub Actions?
Objectives
- Learn about building package using GitHub Actions
- Learn what is required to publish to PyPi
We have CI setup to perform our automated checks.
We have continued to add new features and now, we want to get these new features to our Users.
Just as we have automated code checks, we can automated deployment of our package to a package registry upon a release trigger.
Setup CD for Releases
We previously created our CI workflow YAML file.
We could keep using that one, possibly.
However, we previously were triggering on every single
push event (i.e. anytime we uploaded any commits to any
branch!)
Trigger for CD
Do we want to publish our Python Package for any pushed code? Definitely not!
We want to instead pick the trigger event and create a new GitHub Actions YAML just for our CD workflow.
There are different triggers we can use: * any tags pushed to the repository
- tags that match semantic version formatting (below is a regular expression used to match a pattern of text)
- manually triggered from UI and / or on GitHub Releases
Let’s continue using the “releases” one.
The first, workflow_dispatch,
allows you to manually trigger the workflow from the GitHub web UI for
testing.
The second, release,
will trigger whenever you make a GitHub
Release.
Now that we have our triggers, we need to do something with them.
We want to push our Python Package to a package registry.
But first, we must build our distrbution to upload!
Build job for CD
Let’s start on our new CD YAML for releases.
Write the following in
.github/workflows/releases.yaml
YAML
name: Releases
on:
    workflow_dispatch:
    release:
      types:
        - published
jobs:
dist:
runs-on: ubuntu-latest
steps:
- uses: actions/checkout@v4
- name: Build SDist & wheel
run: pipx run build
- uses: actions/upload-artifact@v3
with:
name: build-artifact
path: dist/*Here we have a job called “dist” that: * Checks out the repository
using the actions/checkout Action again. * Uses pipx to run the build of the
source (SDist) and build (wheels) distrubtions. This produces the wheel
and sdist in ./dist directory. * Use a new Action, called
actions/upload-artifact (Markplace
page)
From the actions/upload-artifact Markplace
page, we can see this saves artifacts between jobs by uploading and
storing them in GitHub.
Specifically, we are uploading and storing the artifacts from the
./dist directory in the previous step and naming that
artiface “build-artifact”. We will see, this is how we can pass the
artifacts to another job or download ourselves from the GitHub UI.
This gives us our first step in the CD process, building the artifacts for a software release!
Test using build artifacts in another job
Now, we want to take the artifact in the dist job and
use it in our next phase.
To do so, we need to use the complimentary Action to
actions/upload-artifact, which is
action/download-artifact.
From the Marketplace
page, we can see this simply downloads the artifact that is stored
using the path.
Let’s add a “test” publish job.
YAML
name: Releases

on:
    workflow_dispatch:
    release:
      types:
        - published

jobs:
  dist:
    runs-on: ubuntu-latest
    steps:
      - uses: actions/checkout@v4

      - name: Build SDist & wheel
        run: pipx run build

      - uses: actions/upload-artifact@v3
        with:
          name: "build-artifact"
          path: dist/*

  publish:
    runs-on: ubuntu-latest
    steps:
      - uses: actions/download-artifact
        with:
          name: "build-artifact"
          path: dist

      - name: Publish release
        run: echo "Uploading!"
Using the above test YAML, let’s upload this and perform a release to run the CD pipeline.
First, checkout a new branch for CD from main.
BASH
git checkout -b add-cd
git add .github/workflows/releases.yml
git commit -m "Adds build + test publish to CD"
git push -u origin add-cd
Go ahead and merge this in main as well.
Then, let’s go into the Actions tab and run the Release job from the UI:
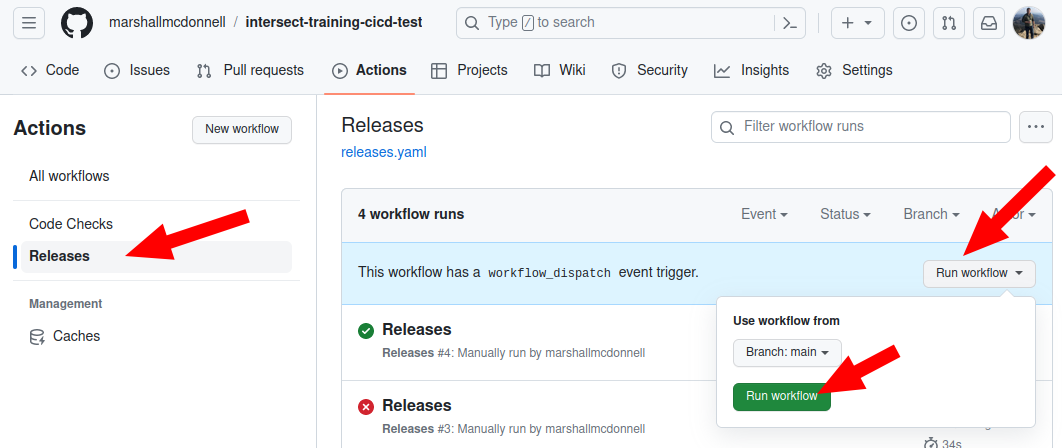
Action: Test out the publish YAML
Does the CD run successfully?
Nope!
The dist job passes but the publish job
fails. The publish job cannot fine the artifact. 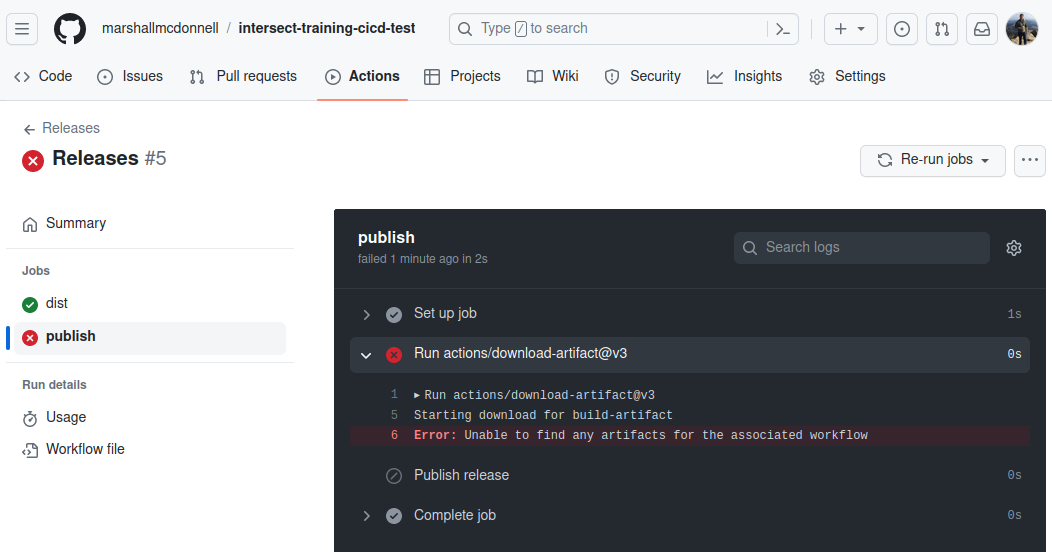
We previously asked about jobs running in sequence or parallel.
By default, jobs run in parallel.
Yet, here, we clearly need to operate in sequence since the build must occur before the publish.
To define this dependency, we need the needs
command.
From the documentation, needs takes either a previous
job name or a list of previous job names that are required before this
one runs:
Let’s add a “test” publish job.
Action: Test out the publish YAML - Take 2!
Re-write the current YAML using needs to fix the
dependency issue. Mainly, we need to specify that the
publish job needs the dist job to
run first.
YAML
name: Releases

on:
  workflow-dispatch:
  release:
    types:
      - published

jobs:
  dist:
    runs-on: ubuntu-latest
    steps:
      - uses: actions/checkout@v3

      - name: Build SDist & wheel
        run: pipx run build

      - uses: actions/upload-artifact@v3
        with:
          name: "build-artifact"
          path: dist/*

  publish:
    needs: dist
    runs-on: ubuntu-latest
    steps:
      - uses: actions/download-artifact
        with:
          name: "build-artifact"
          path: dist

      - name: Publish release
        run: echo "Uploading!"
Let’s add these changes and push!
BASH
git add .github/workflows/releases.yml
git commit -m "Fixes build + test publish to CD"
git push
Perform another manual run for the Releases workflow and check the results!
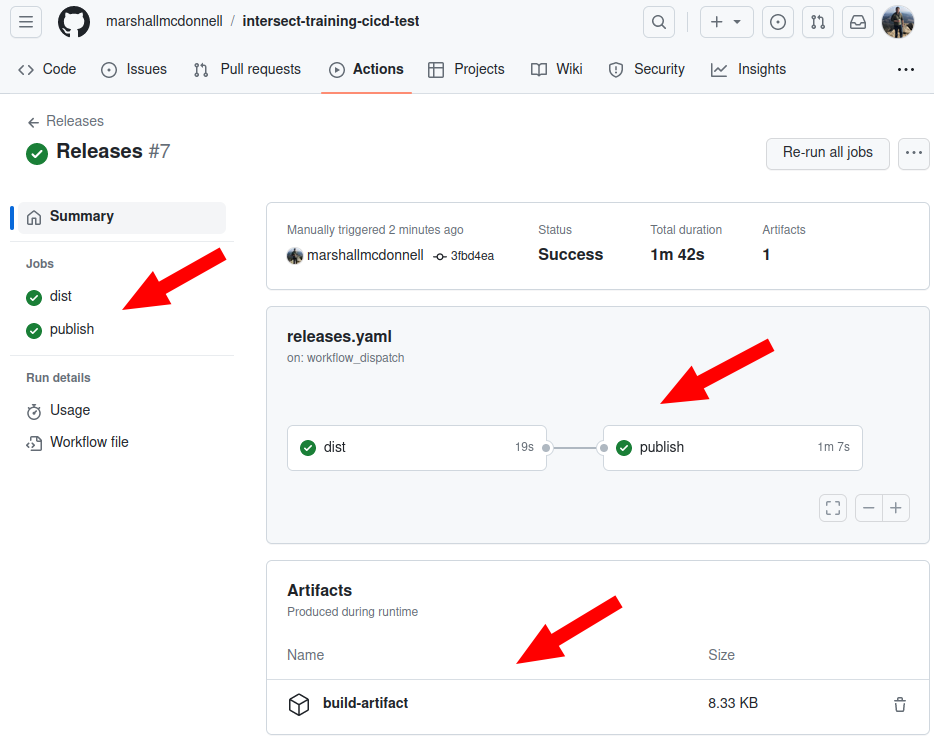
We have a successfful pipeline with the proper dependencies and the artifacts!
We are ready to swap out the test publishing step with a more realistic example.
Publish to Test PyPi package repository
Instead of creating a “production” version in PyPi, we can use Test PyPi instead.
Get API token from TestPyPi -> GitHub Actions
Notice: The following requires createing an account on TestPyPi, putting secrets in the GitHub repository, and uploading a Python package to TestPyPi.
If you do not feel comfortable with these tasks, feel free to just read along
To setup using TestPyPi, we need to:
- Register for an account on TestPyPi
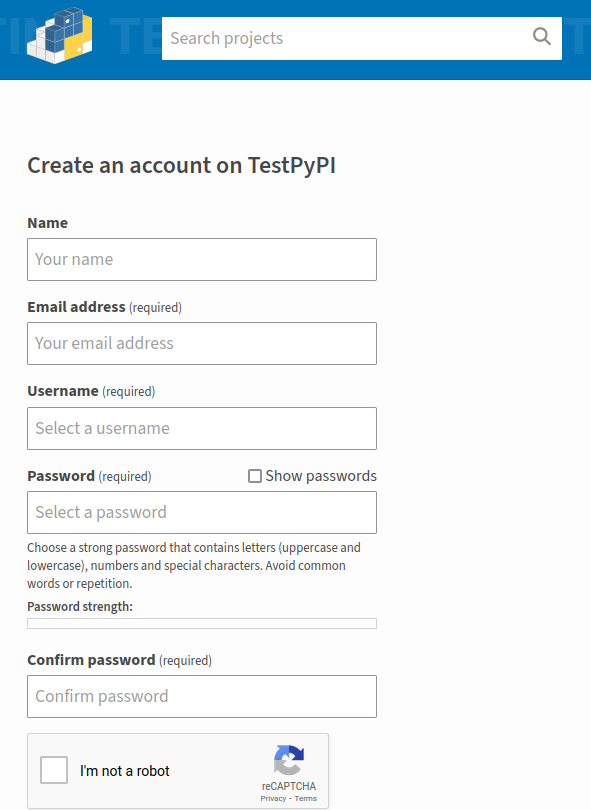
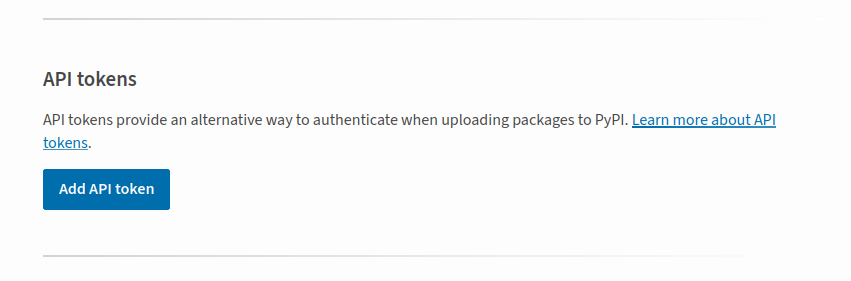
- Get an API token so we can have GitHub authenticate to TestPyPi on our behalf. Go to the TestPyPi and get an API token
- Go to
Settings->Secrets->Actionsin the GitHub UI
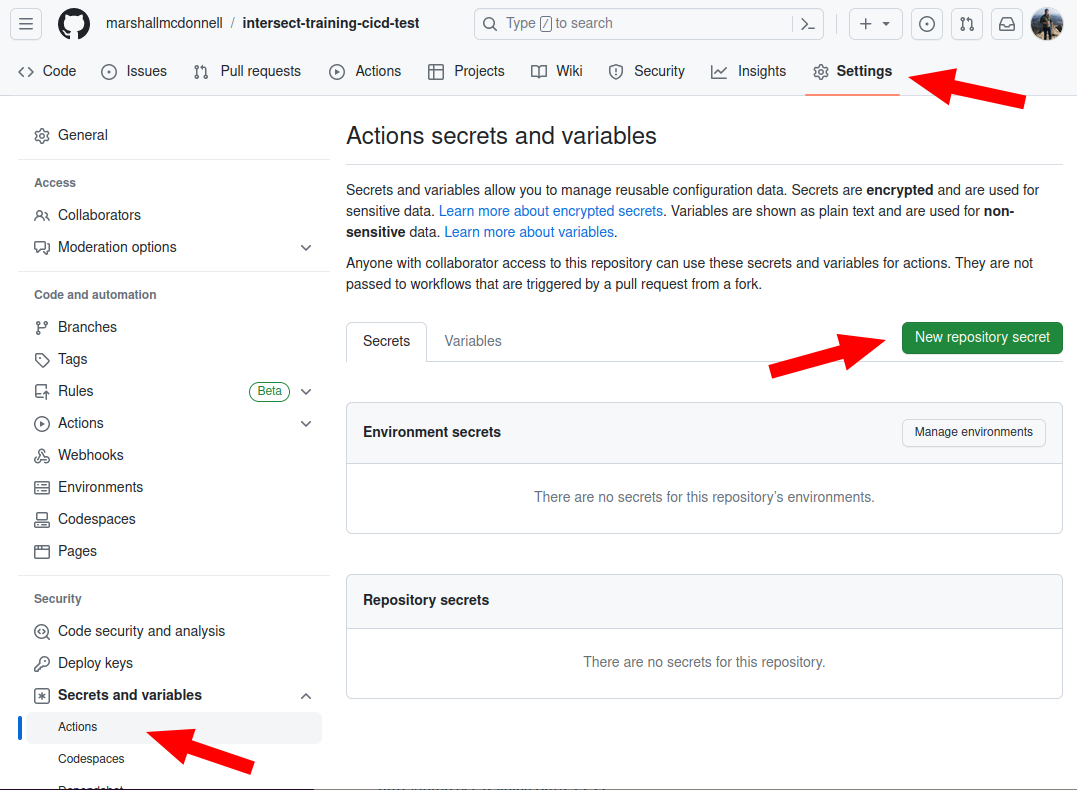
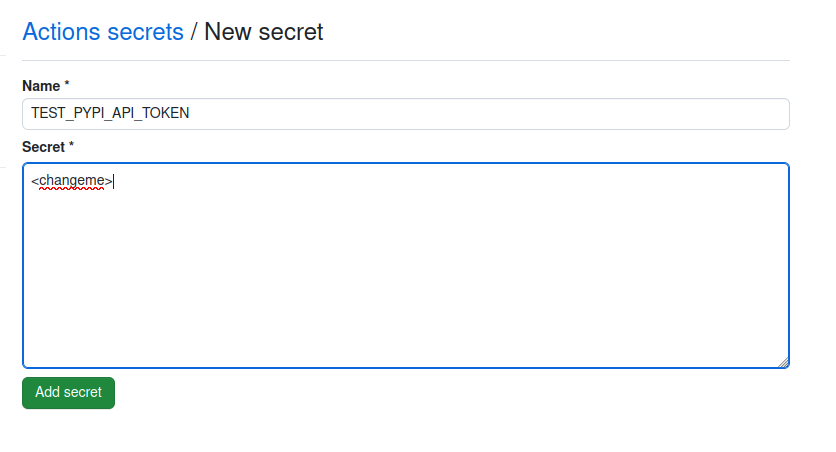
- Add the TestPyPi API token to GitHub Secrets (call it
TEST_PYPI_API_TOKEN)
Now that we have the credentials in GitHub for our PyPi package repository, let us write out the YAML.
Setup CD for publishing to TestPyPi
For GitHub Actions, we can use the Action actions/gh-action-pypi-publish.
Mainly, we need the following to replace our test publish step:
YAML
  - uses: pypa/gh-action-pypi-publish@release/v1
    with:
      password: ${{ secrets.TEST_PYPI_API_TOKEN }}
      repository-url: https://test.pypi.org/legacy/
The secrets is a way to gain access to and pull in
secrets stored in GitHub into CI/CD using GitHub Actions.
DISCLAIMER
Since we will be trying to upload a package, we might get a “clash” with an existing name. If so, change the name of the project to something unique in the pyproject.toml.
After uploading the following, commiting the changes, and doing a “release”, you will see something like the following:
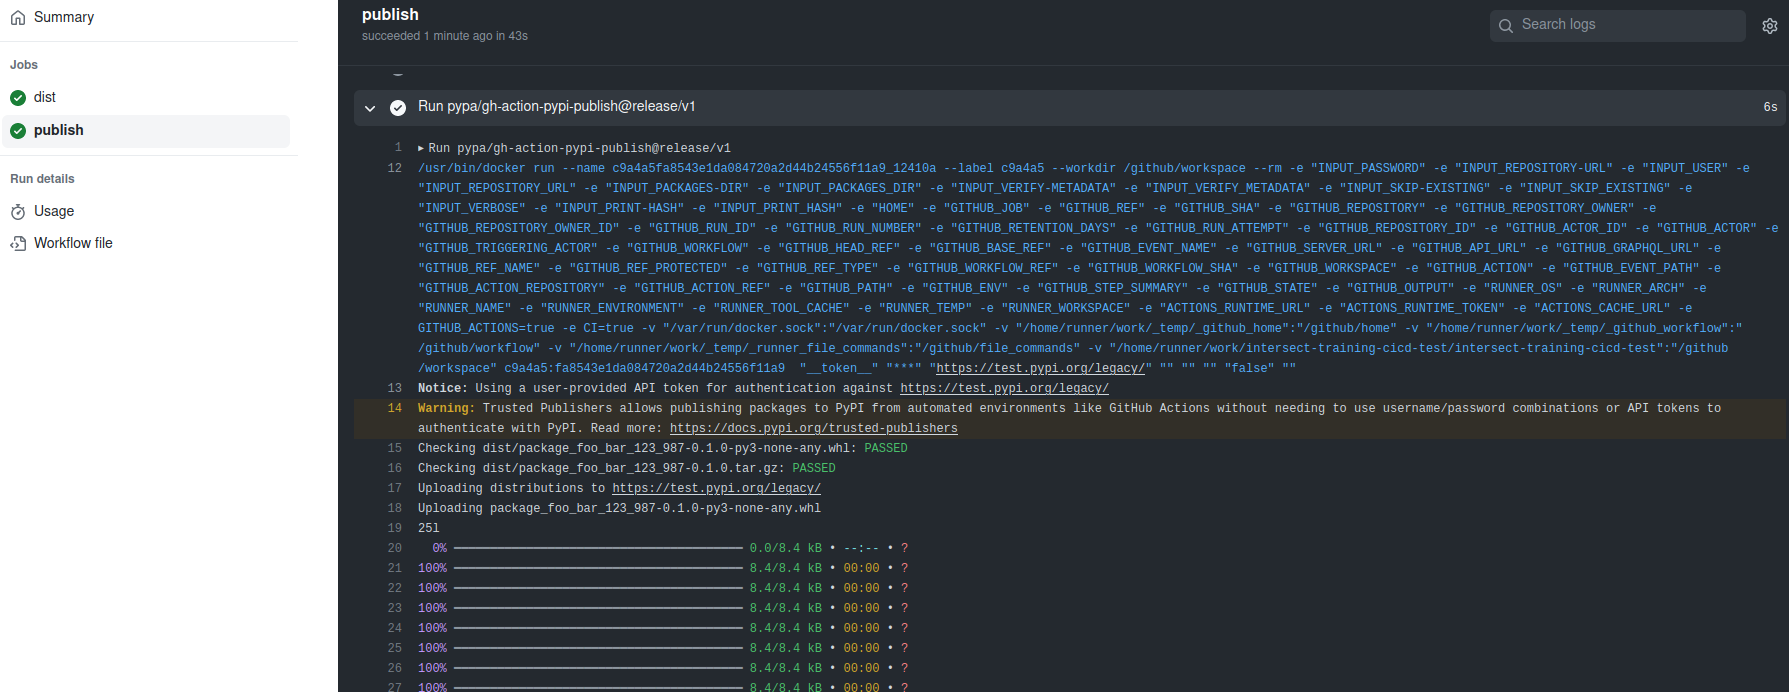
Also, you can go to your projects page and be able to see the new package show up! - https://test.pypi.org/manage/projects/