Introduction
Overview
Teaching: 5 min
Exercises: 5 minQuestions
What is issue tracking?
Why is issue tracking useful?
Objectives
Understand the purpose and benefits of issue trackers
Become familiar with GitHub Issues
What is Issue Tracking?
Issue tracking is an activity that happens as part of Project Management. In this activity, a record is made of bugs, enhancements, and requests in such a way that the team is able to view and access the list of work to be done.
Issues are used to collaborate, solve problems, and plan work, which is enabled by software tools such as GitLab issues, Jira story boards, and GitHub issues.
![]()
Issue trackers can be internal (team-facing) or external (user-facing). In this lesson, students will learn about issue tracking through the use of GitHub Issues.
The Benefits of Issue Tracking
Issue tracking has numerous benefits. Some of the main ones are:
- Visibility: Work to be done is captured in one location where all team members can access it
- Collaboration: Issue trackers enable good project collaboration. Work can be captured, organized, managed, and discussed in a single location
- Transparency: If the issue tracking system is user-facing, users can see the status of work completed and add more information
GitHub Issues
Numerous different issue tracking systems exist - both commercial and open-source, integrated and stand-alone.
GitHub integrates issue tracking into their version control system. Every project on GitHub can enable an integrated issue tracker.

To access a repository’s issues, simply navigate to the repository root page and click on “Issues” in the navigation bar. This will take you to the page of all “Open” issues.
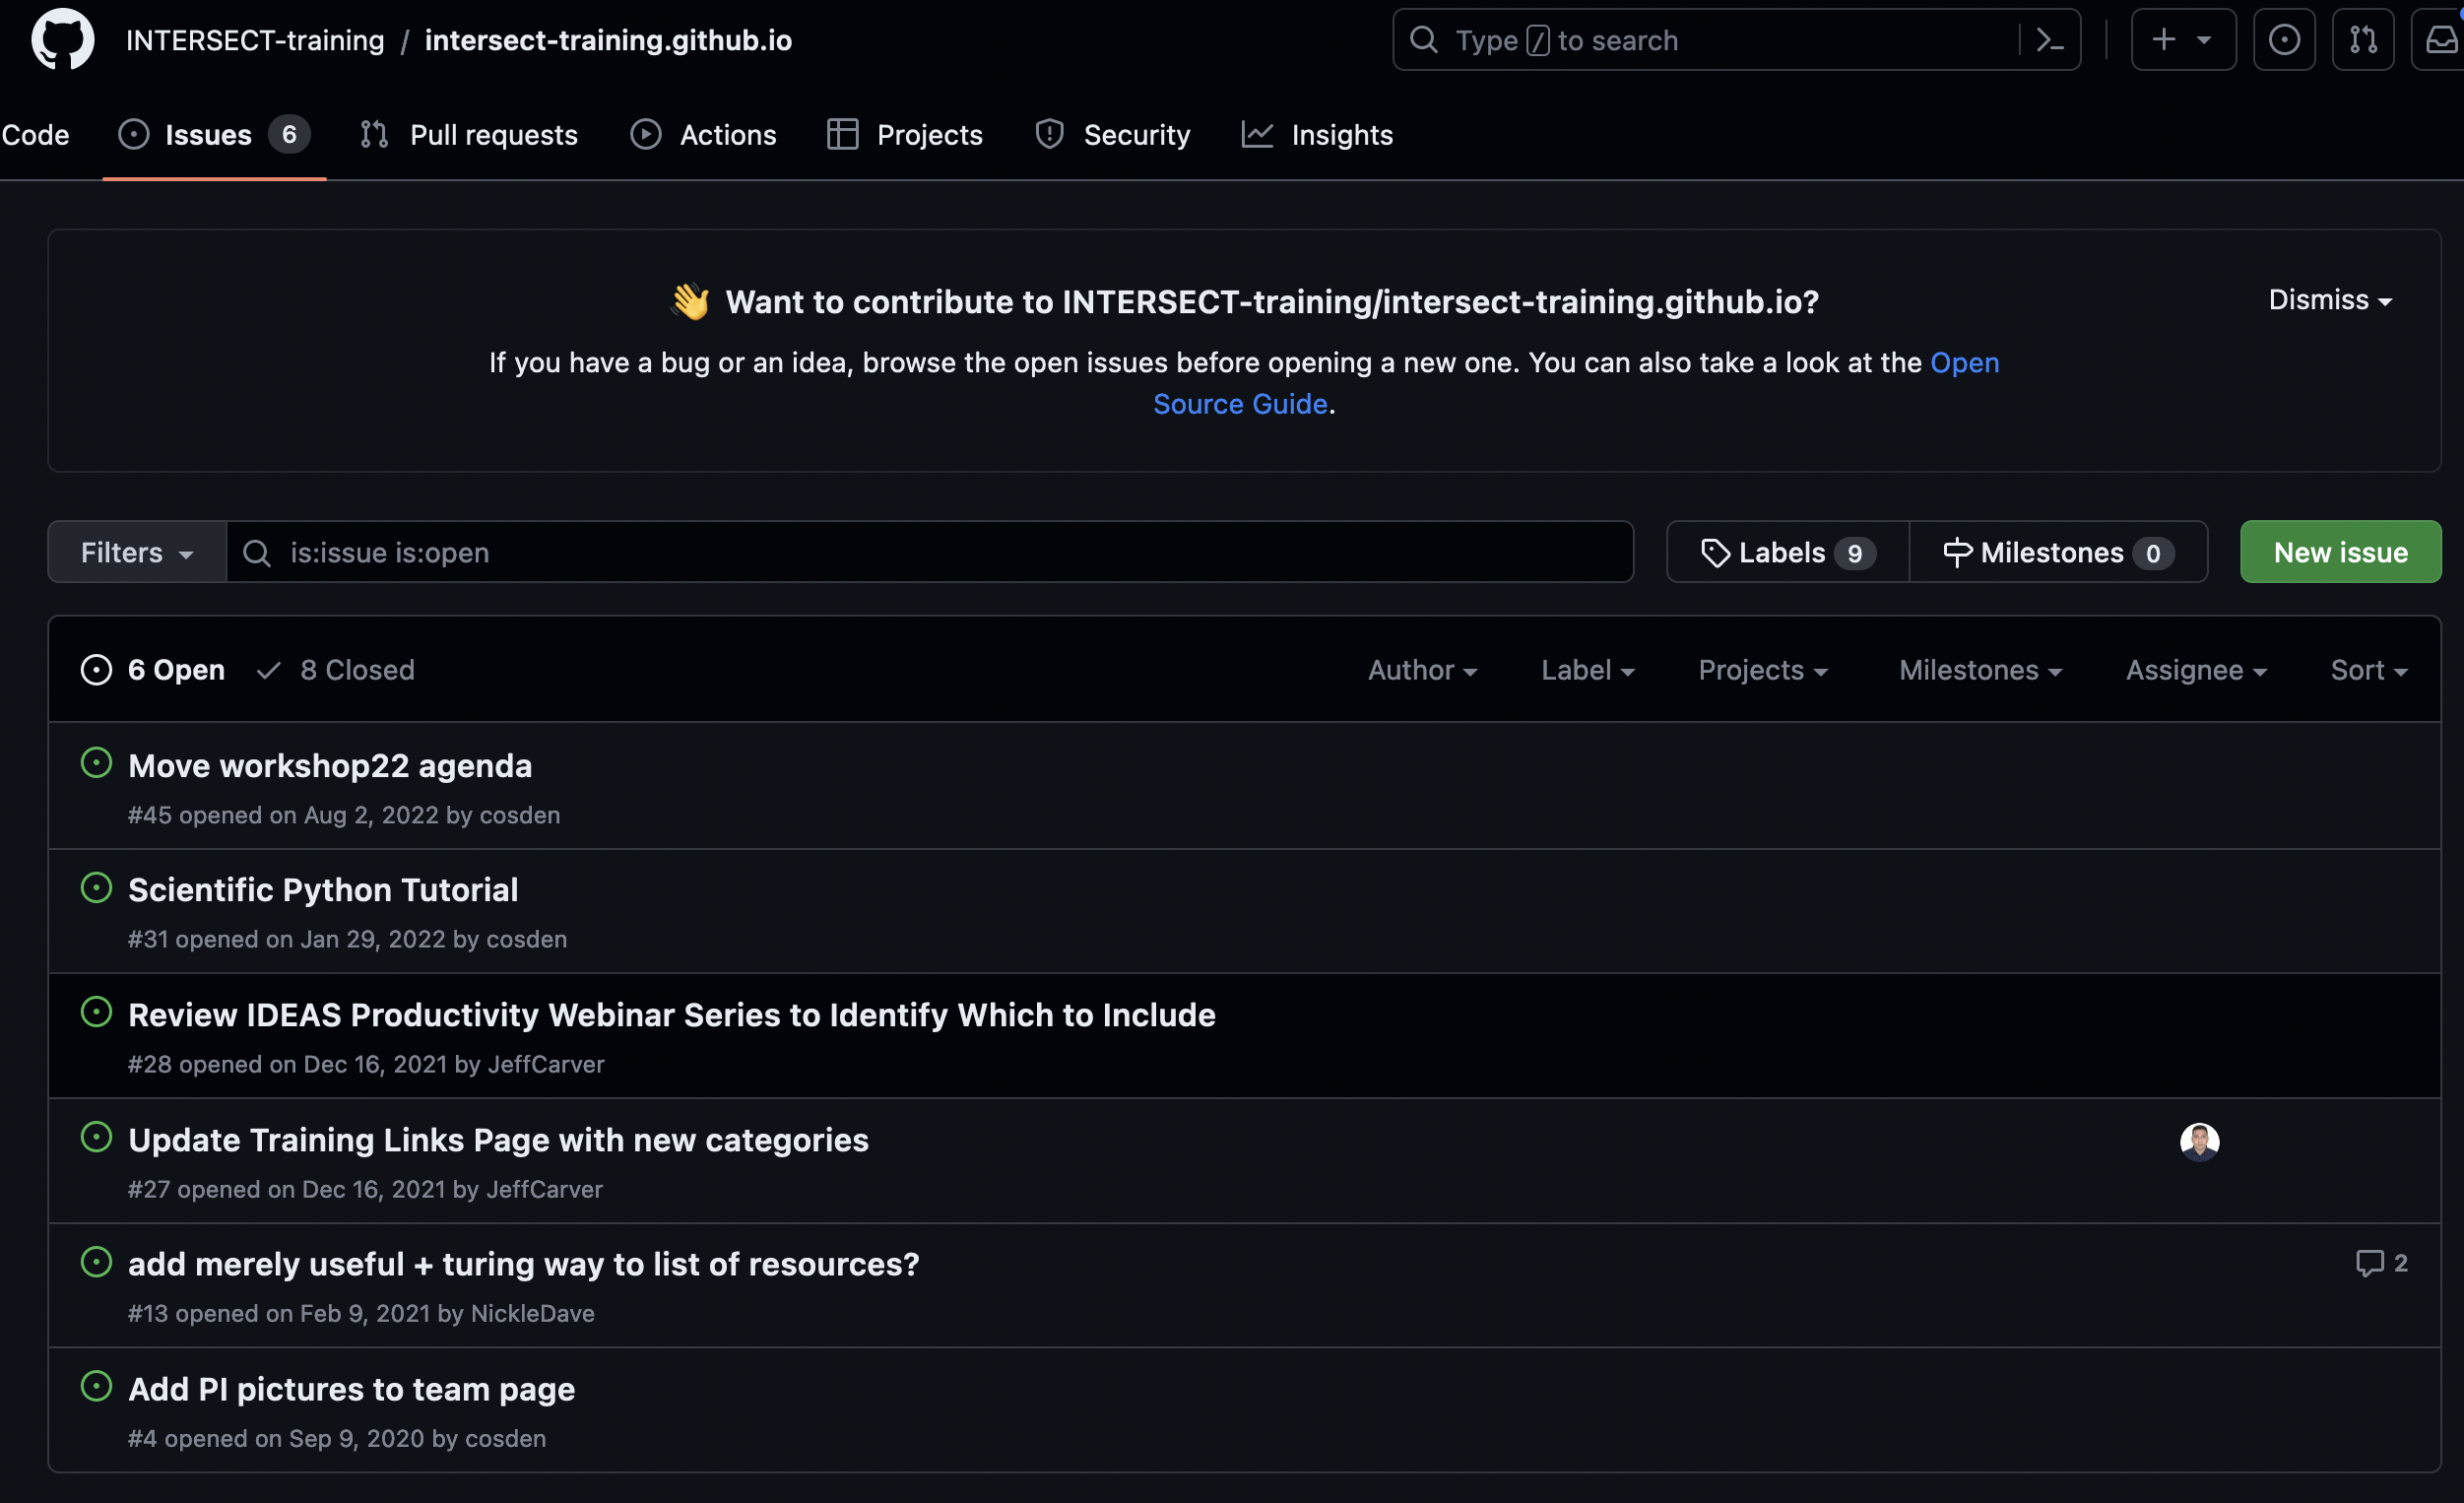
Click on an issue to open it and read its details, plus any discussion on that issue.
You can also change the default filter on the Issues page by status (“Open” or “Closed”), author, and more.

Browsing Open Issues
Navigate to https://github.com/spack/spack and find the issues page.
- How many issues are currently open?
- How many have been closed?
- How many labels are there?
Key Points
Issue tracking is the process of monitoring problems and requests for a software product.
Issue tracking enables a software development team to capture, organize, and manage work collaboratively.
Basic Issue Tracking
Overview
Teaching: 10 min
Exercises: 10 minQuestions
How do you make an issue?
How do you interact with an open issue?
How do you close an issue?
Objectives
Become familiar with basic actions on GitHub Issues
Open an Issue
To open a new issue, navigate to the issue page. Here you will see a green “New issue” button. Click this to start the creation of a new issue.

This will load a new page with an empty issue.
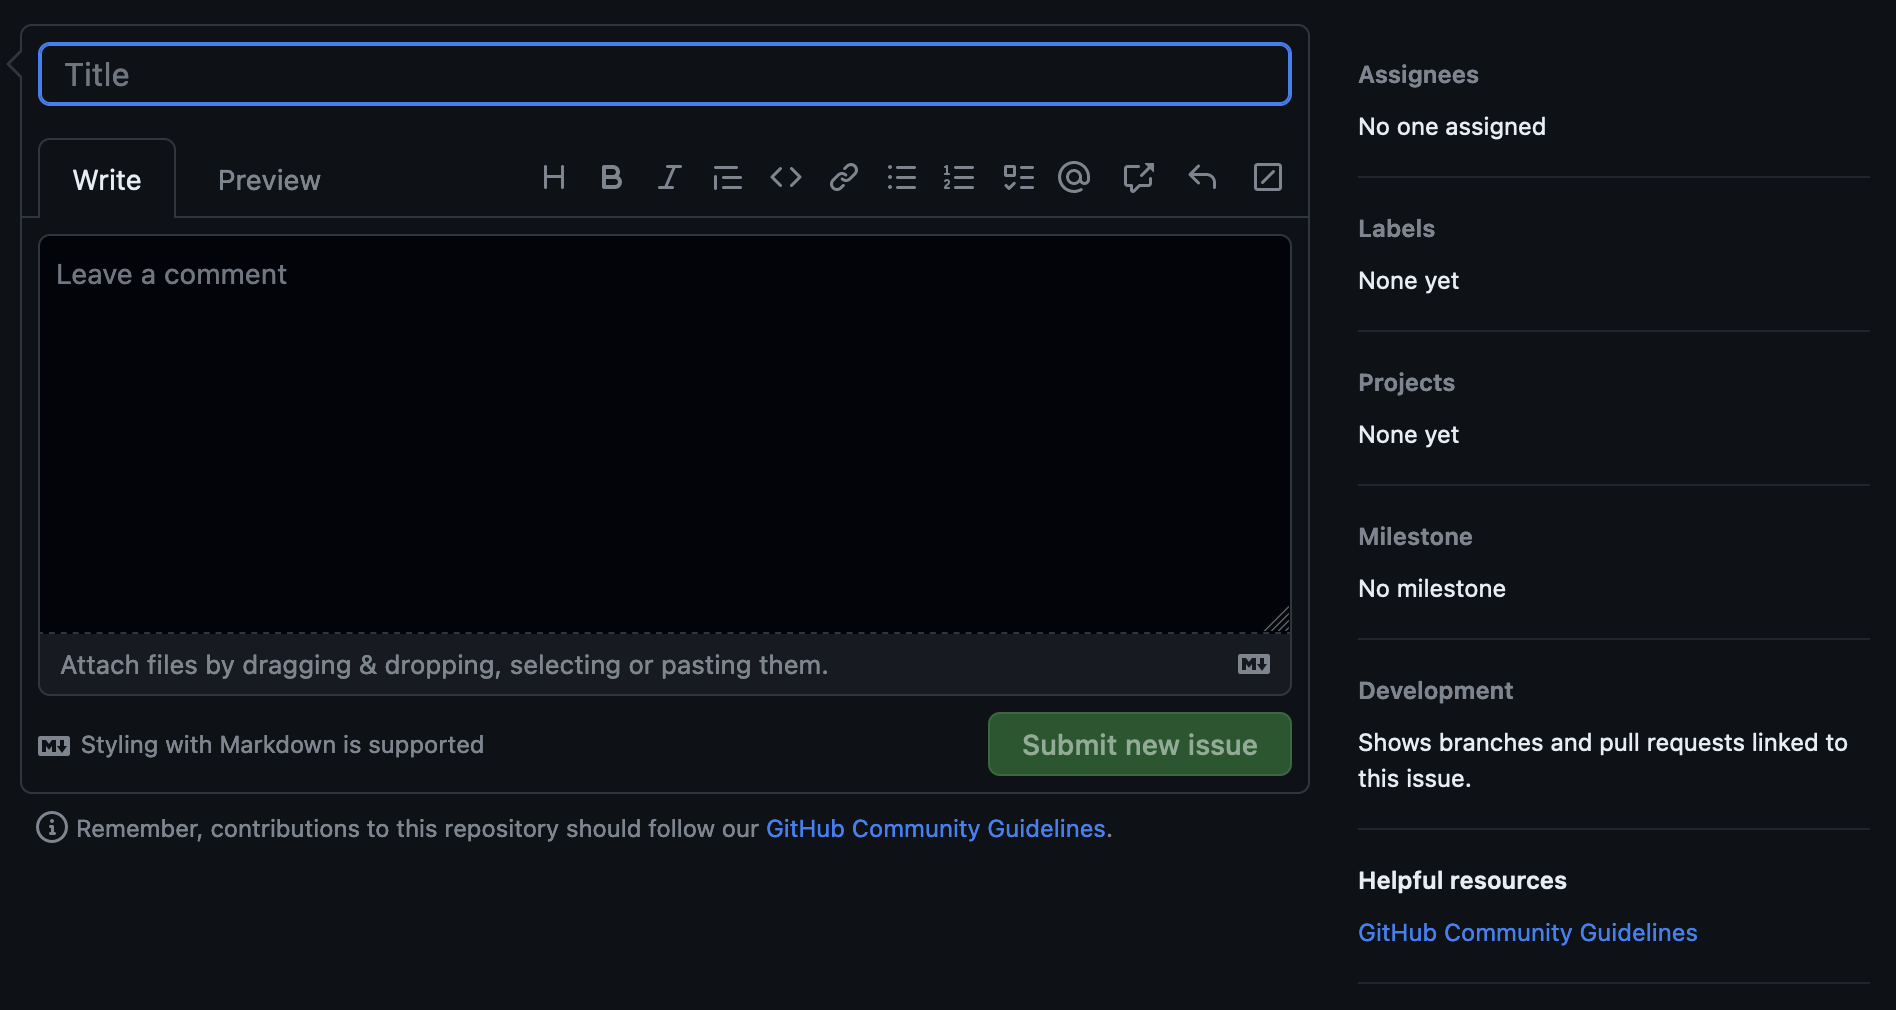
A new issue has several parts:
- Title: This will display on the main “Issue” page.
- Write: This is an open area for the details of the issue. GitHub support Markdown formatting.
- Preview: This will preview the Markdown-rendered version of the details.
Once an issue is filled out, the “Submit new issue” button will highlight.

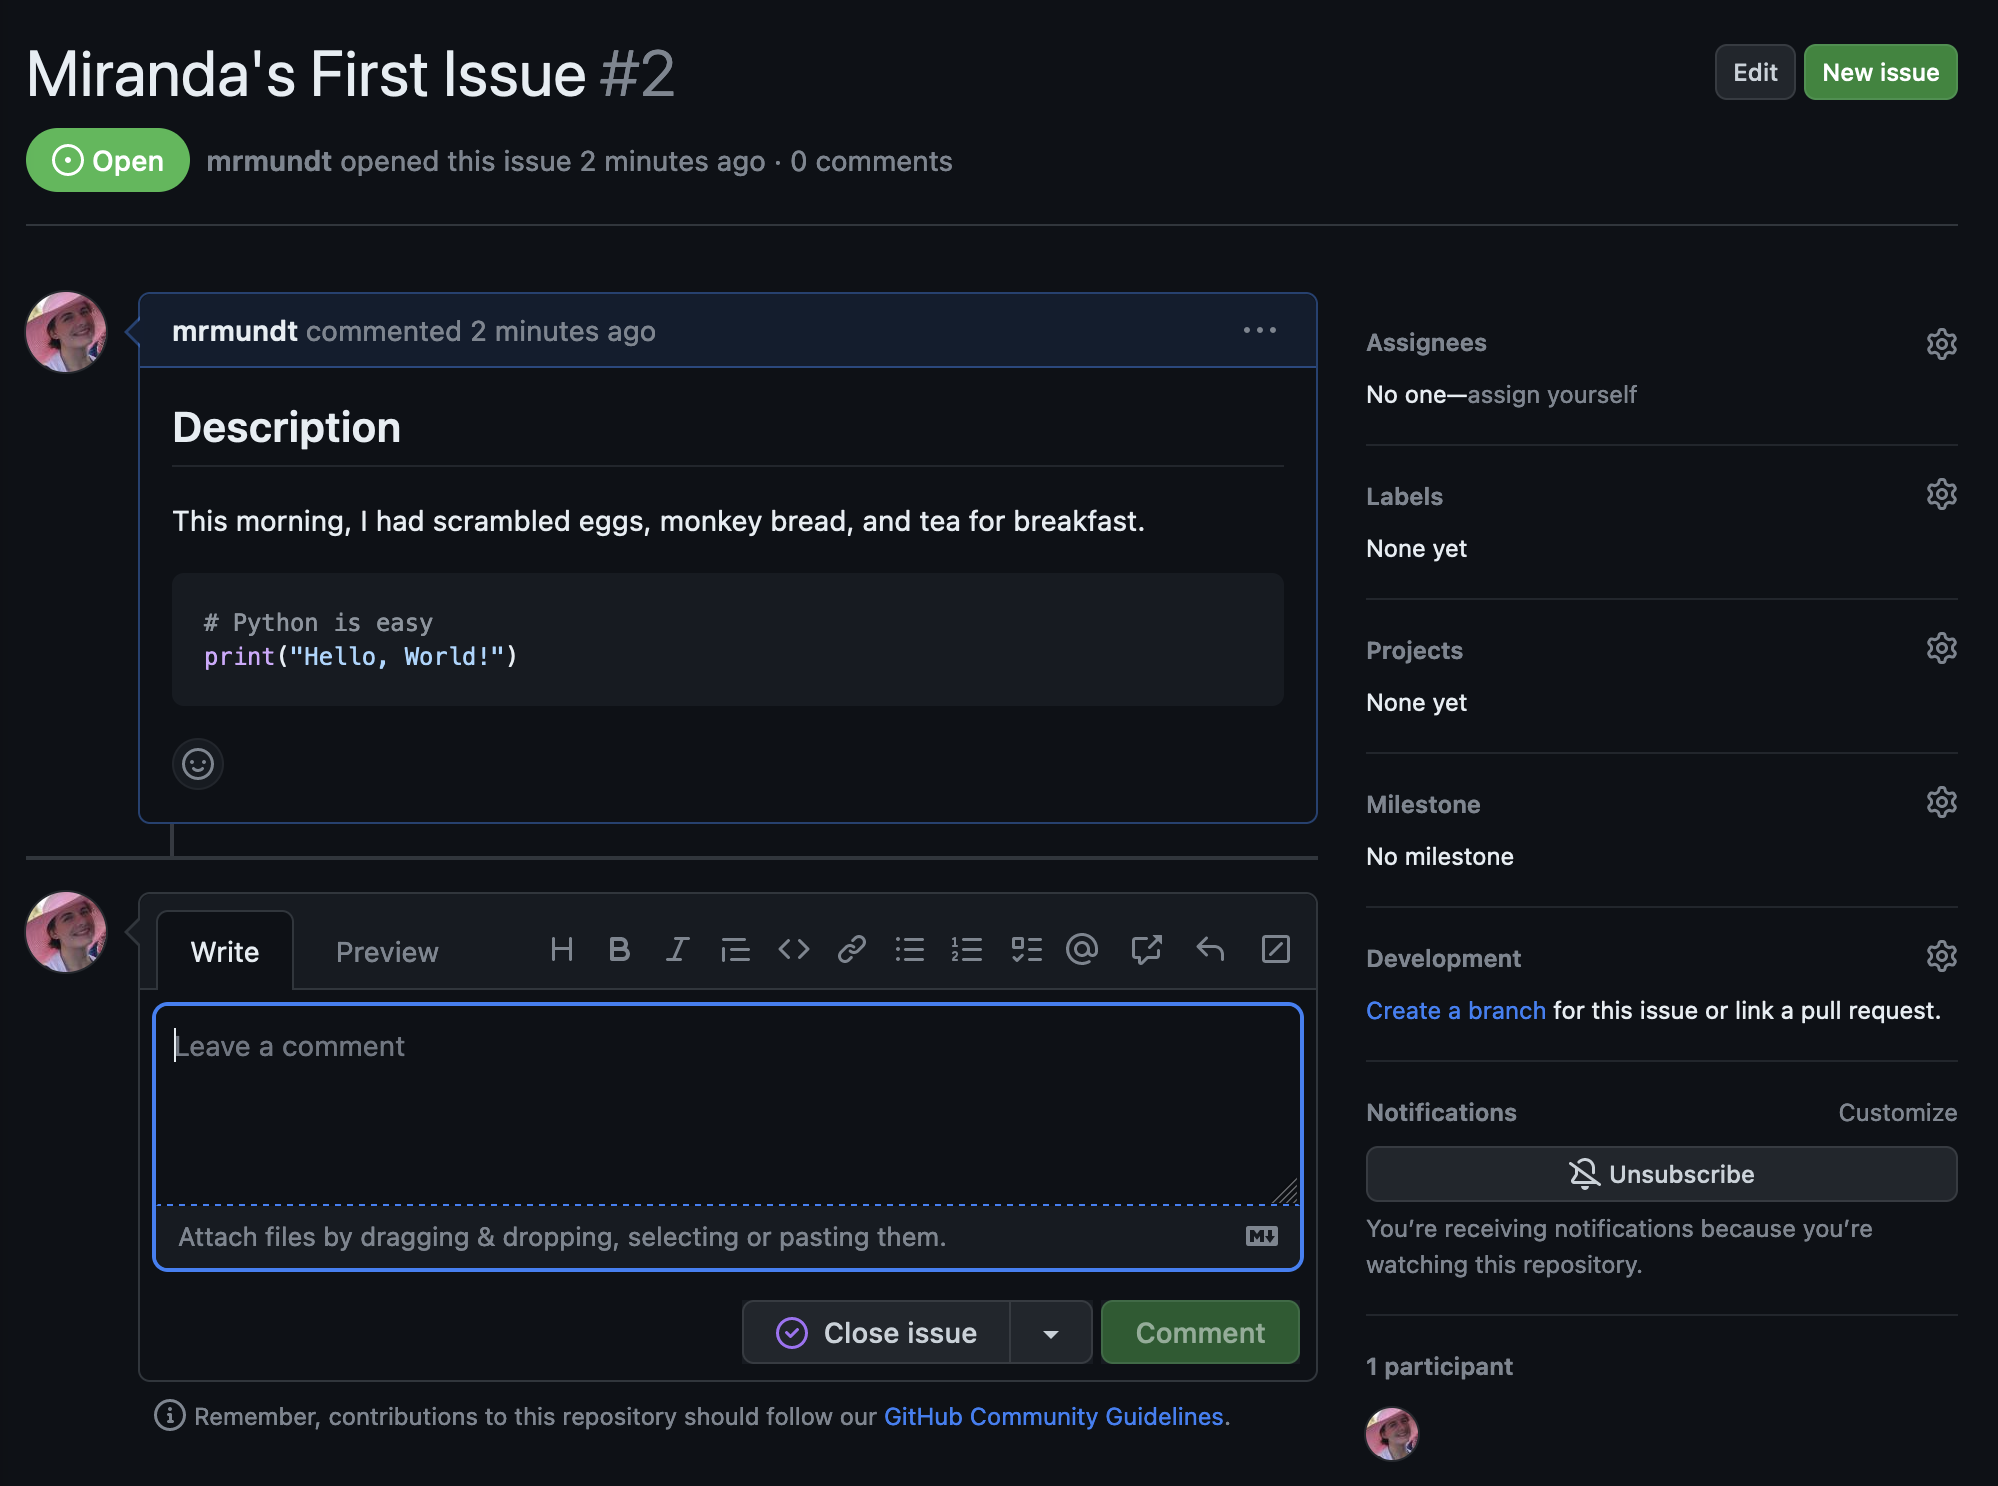
Open a New Issue
Navigate to your practice repository’s issue page.
- Open a new issue titled “[YOUR NAME]’s First Issue”
- In the “Write” section, make a heading entitled “Description”
- Write a short sentence telling us what you ate for breakfast this morning
- Add a code block with “Hello, World” coded in your favorite language
- Preview your issue to make sure it looks right
- Submit the issue!
On the right-hand side, there are more options that can be modified.
- Assignee: Here you can choose a specific person to this issue.
- Labels: Here you can add a label to the issue (we will discuss this more later!).
- Projects: Here you can add the issue to a project board.
- Milestone: Here you can add the issue to a milestone.
Authorization Required
You will only be able to edit these options if you have the appropriate permissions!
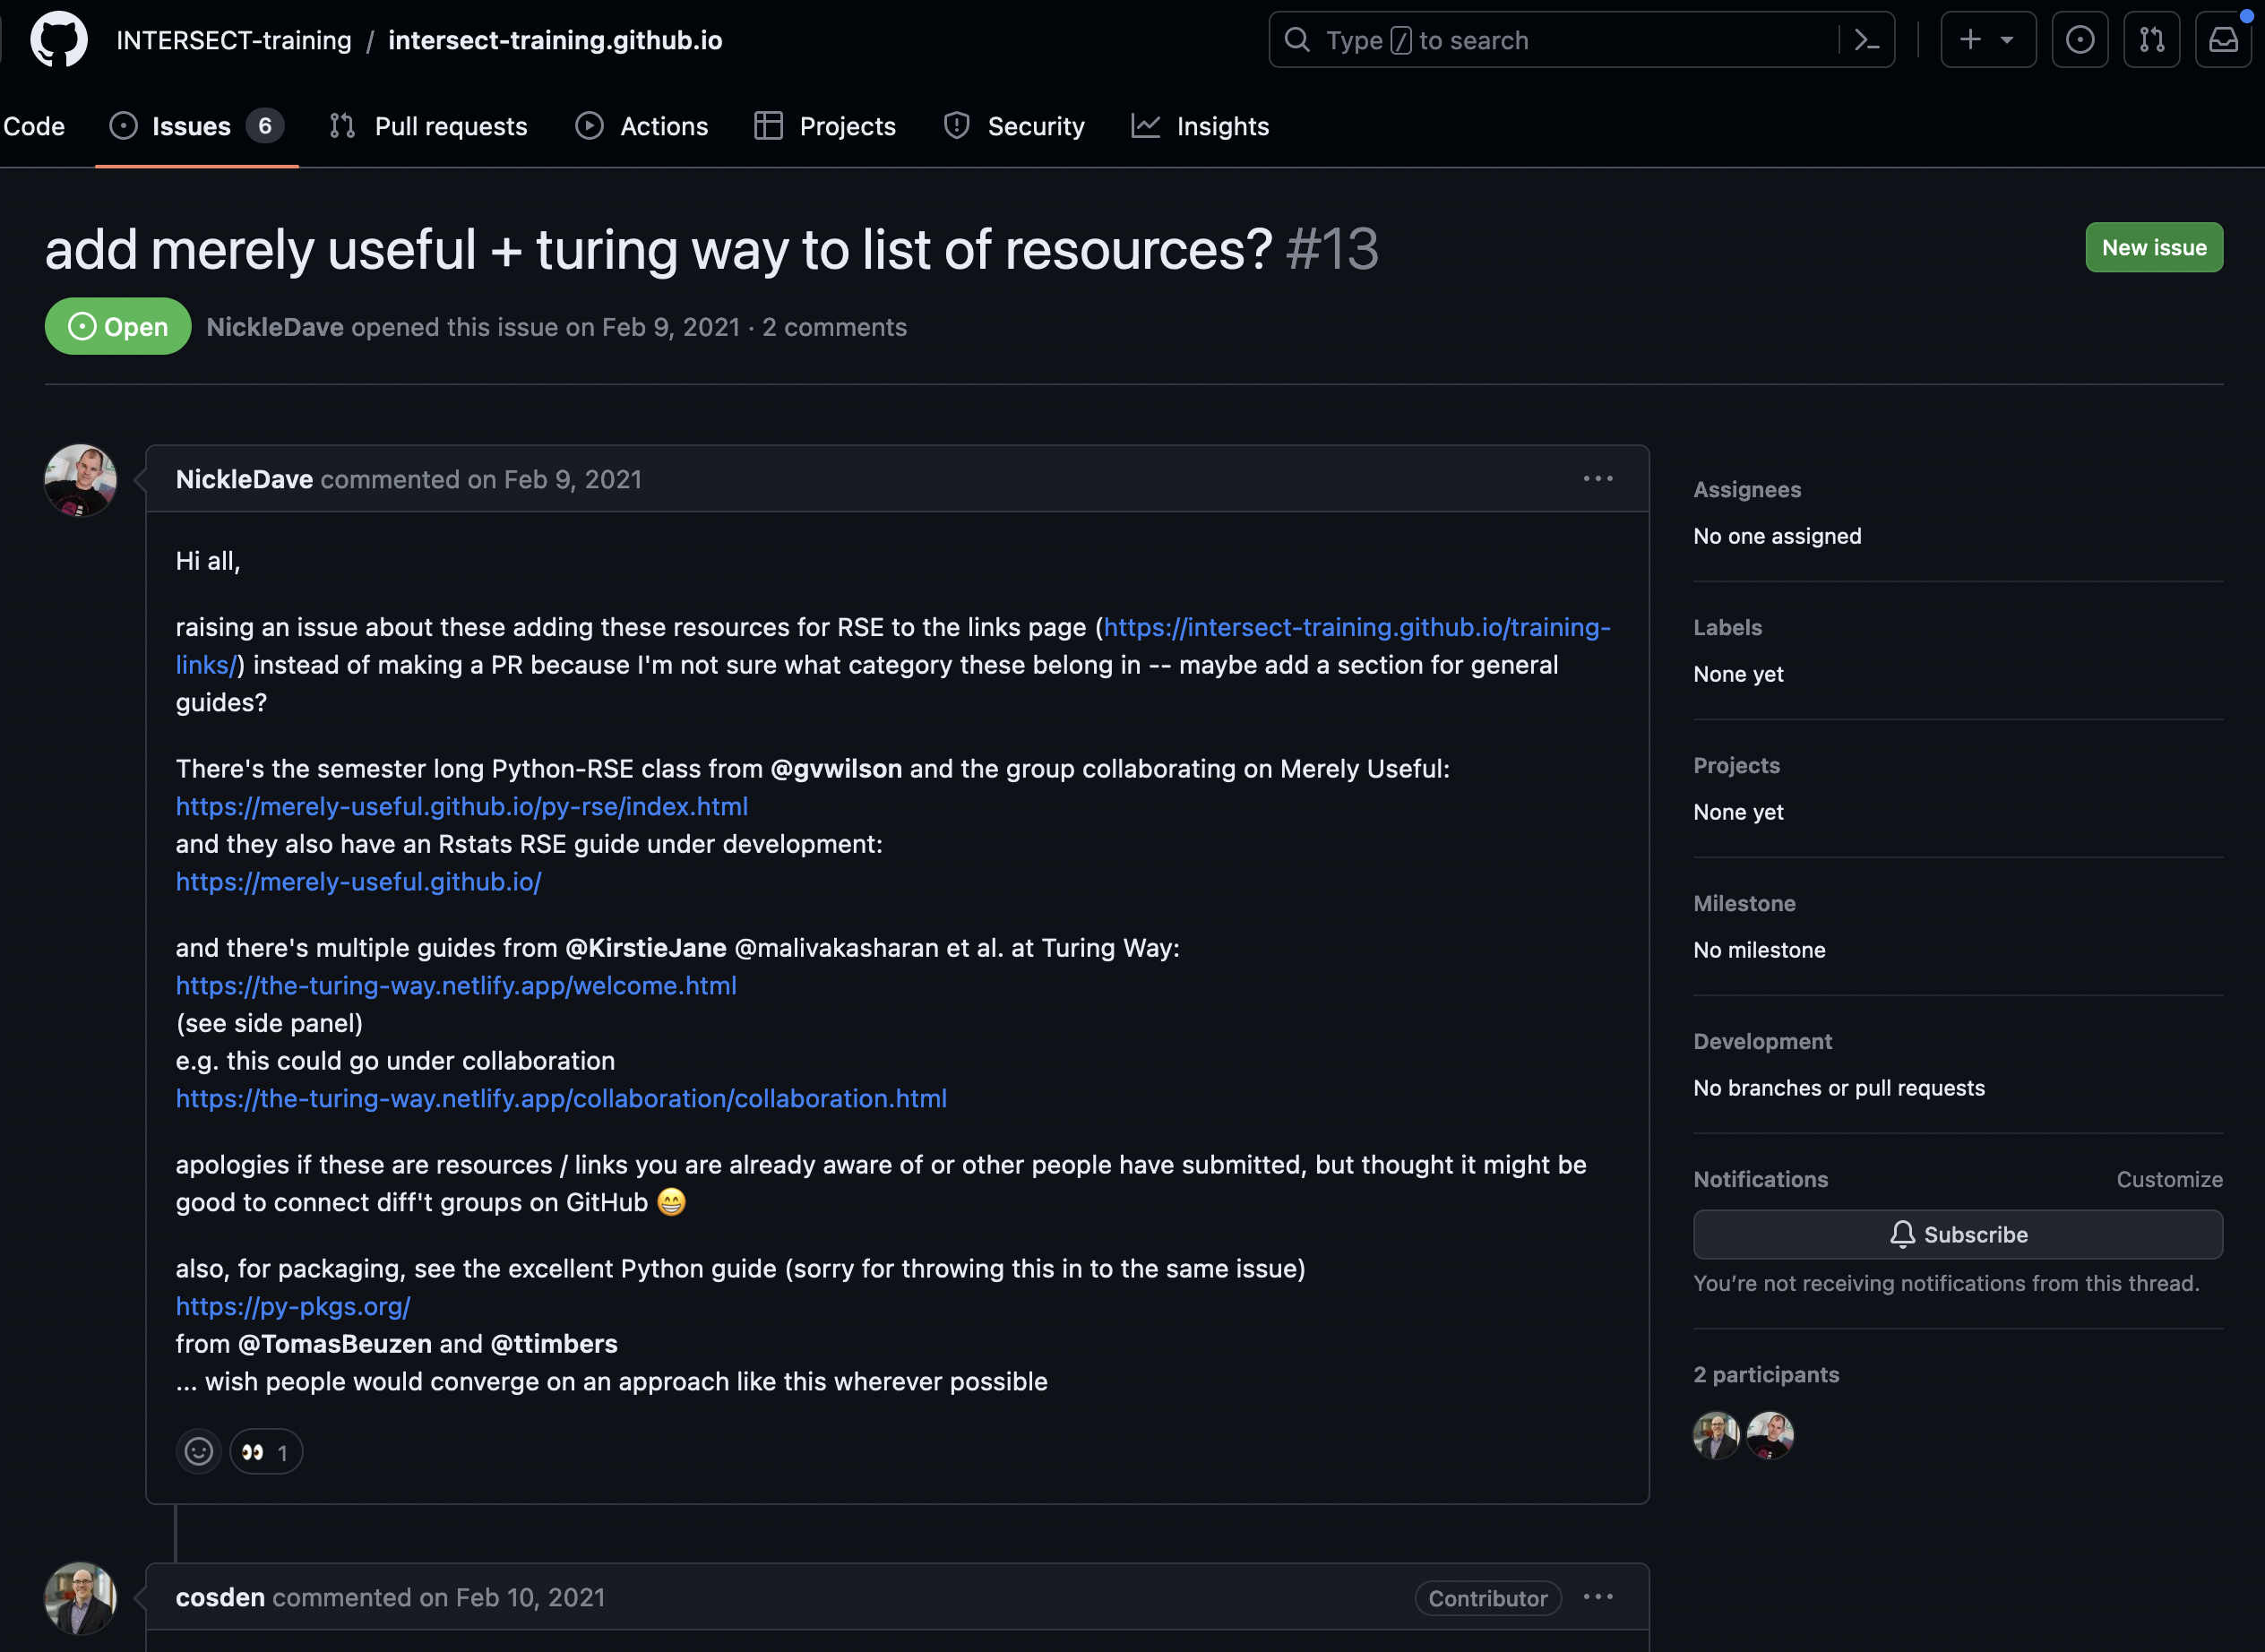
Interact with an Open Issue
There are many interactions available on an open issue.
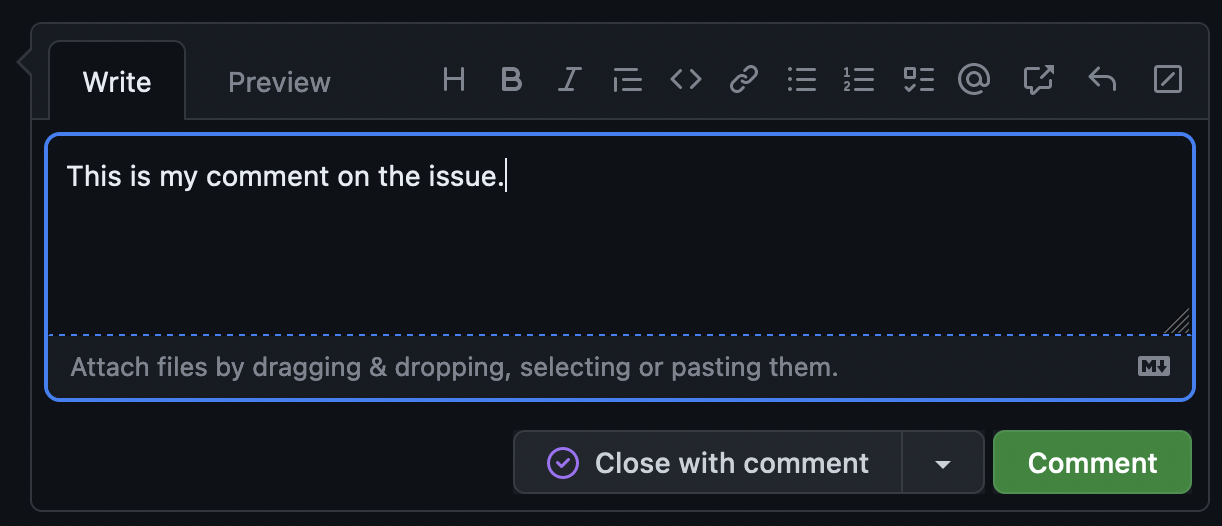
The most basic interaction with an open issue is leaving a comment. This is how you can interact with the issue author, the assignee, and others who have commented on or subscribed to the issue.
Simply click in the comment box at the bottom of the issue, type whatever you’d like, and click “Comment.”
Close by mistake?
Did you accidentally click “Close with comment”? No worries, you can easily reopen it by clicking the “Reopen” button!
You can do other actions like “Edit” the title or original issue information, tag other users, link to other issues or pull requests, and more.
Tag Your Instructor
Navigate to your issue from the previous exercise.
- Write a new comment on the issue, mentioning your instructor using the
@symbol.- Add the comment to the issue
Close an Issue
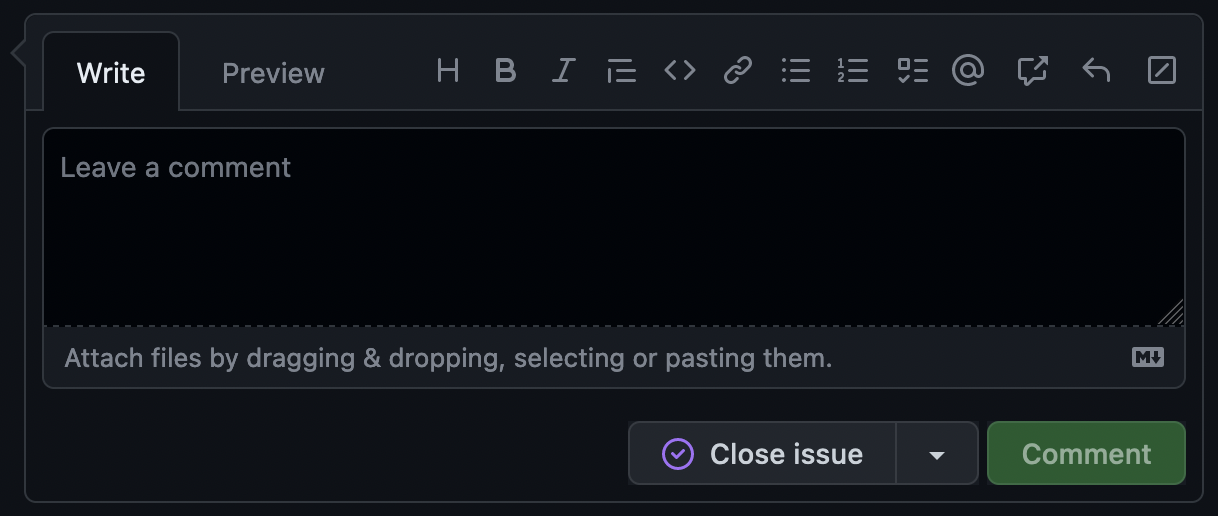
We are done with this issue. We have completed the work on it, had our discussion, and now we don’t want it cluttering up our issue list.
Closing an issue is simple - just click the “Close issue” button.
If you start to type in the comment box, this will change into a “Close with comment” button.
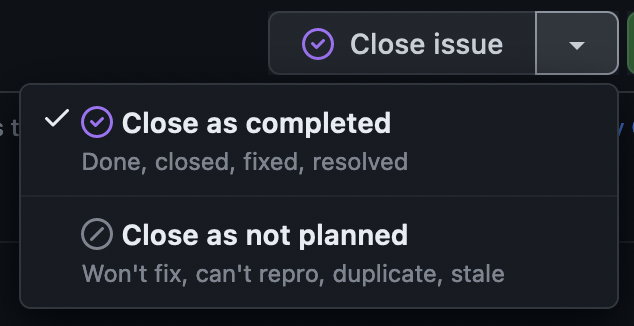
The dropdown to the right shows two more options:
Issue Completed
Navigate to your issue from the previous exercises.
- Close the issue (no comment!)
- Reopen the issue
- Close the issue again with a comment of your choice
You now know the basic actions you can take on a GitHub issue!
Key Points
New issues can be opened in a repository using the ‘New issue’ button.
Text on issues use Markdown styling for formatting.
A user can interact with issues in multiple ways: commenting, mentioning others, linking to other issues and pull requests, and more.
Labelling Issues
Overview
Teaching: 5 min
Exercises: 5 minQuestions
How do you make and assign labels to issues?
Objectives
Learn how to use labels for GitHub issues.
GitHub Labels
Each new GitHub repository comes with a set of default labels that can be assigned to issues, pull requests, or discussions.
From GitHub’s official documentation:
| Label | Description |
|---|---|
bug |
Indicates an unexpected problem or unintended behavior |
documentation |
Indicates a need for improvements or additions to documentation |
duplicate |
Indicates similar issues, pull requests, or discussions |
enhancement |
Indicates new feature requests |
good first issue |
Indicates a good issue for first-time contributors |
help wanted |
Indicates that a maintainer wants help on an issue or pull request |
invalid |
Indicates that an issue, pull request, or discussion is no longer relevant |
question |
Indicates that an issue, pull request, or discussion needs more information |
wontfix |
Indicates that work won’t continue on an issue, pull request, or discussion |
These labels can be viewed from the Issues and Pull Requests pages.

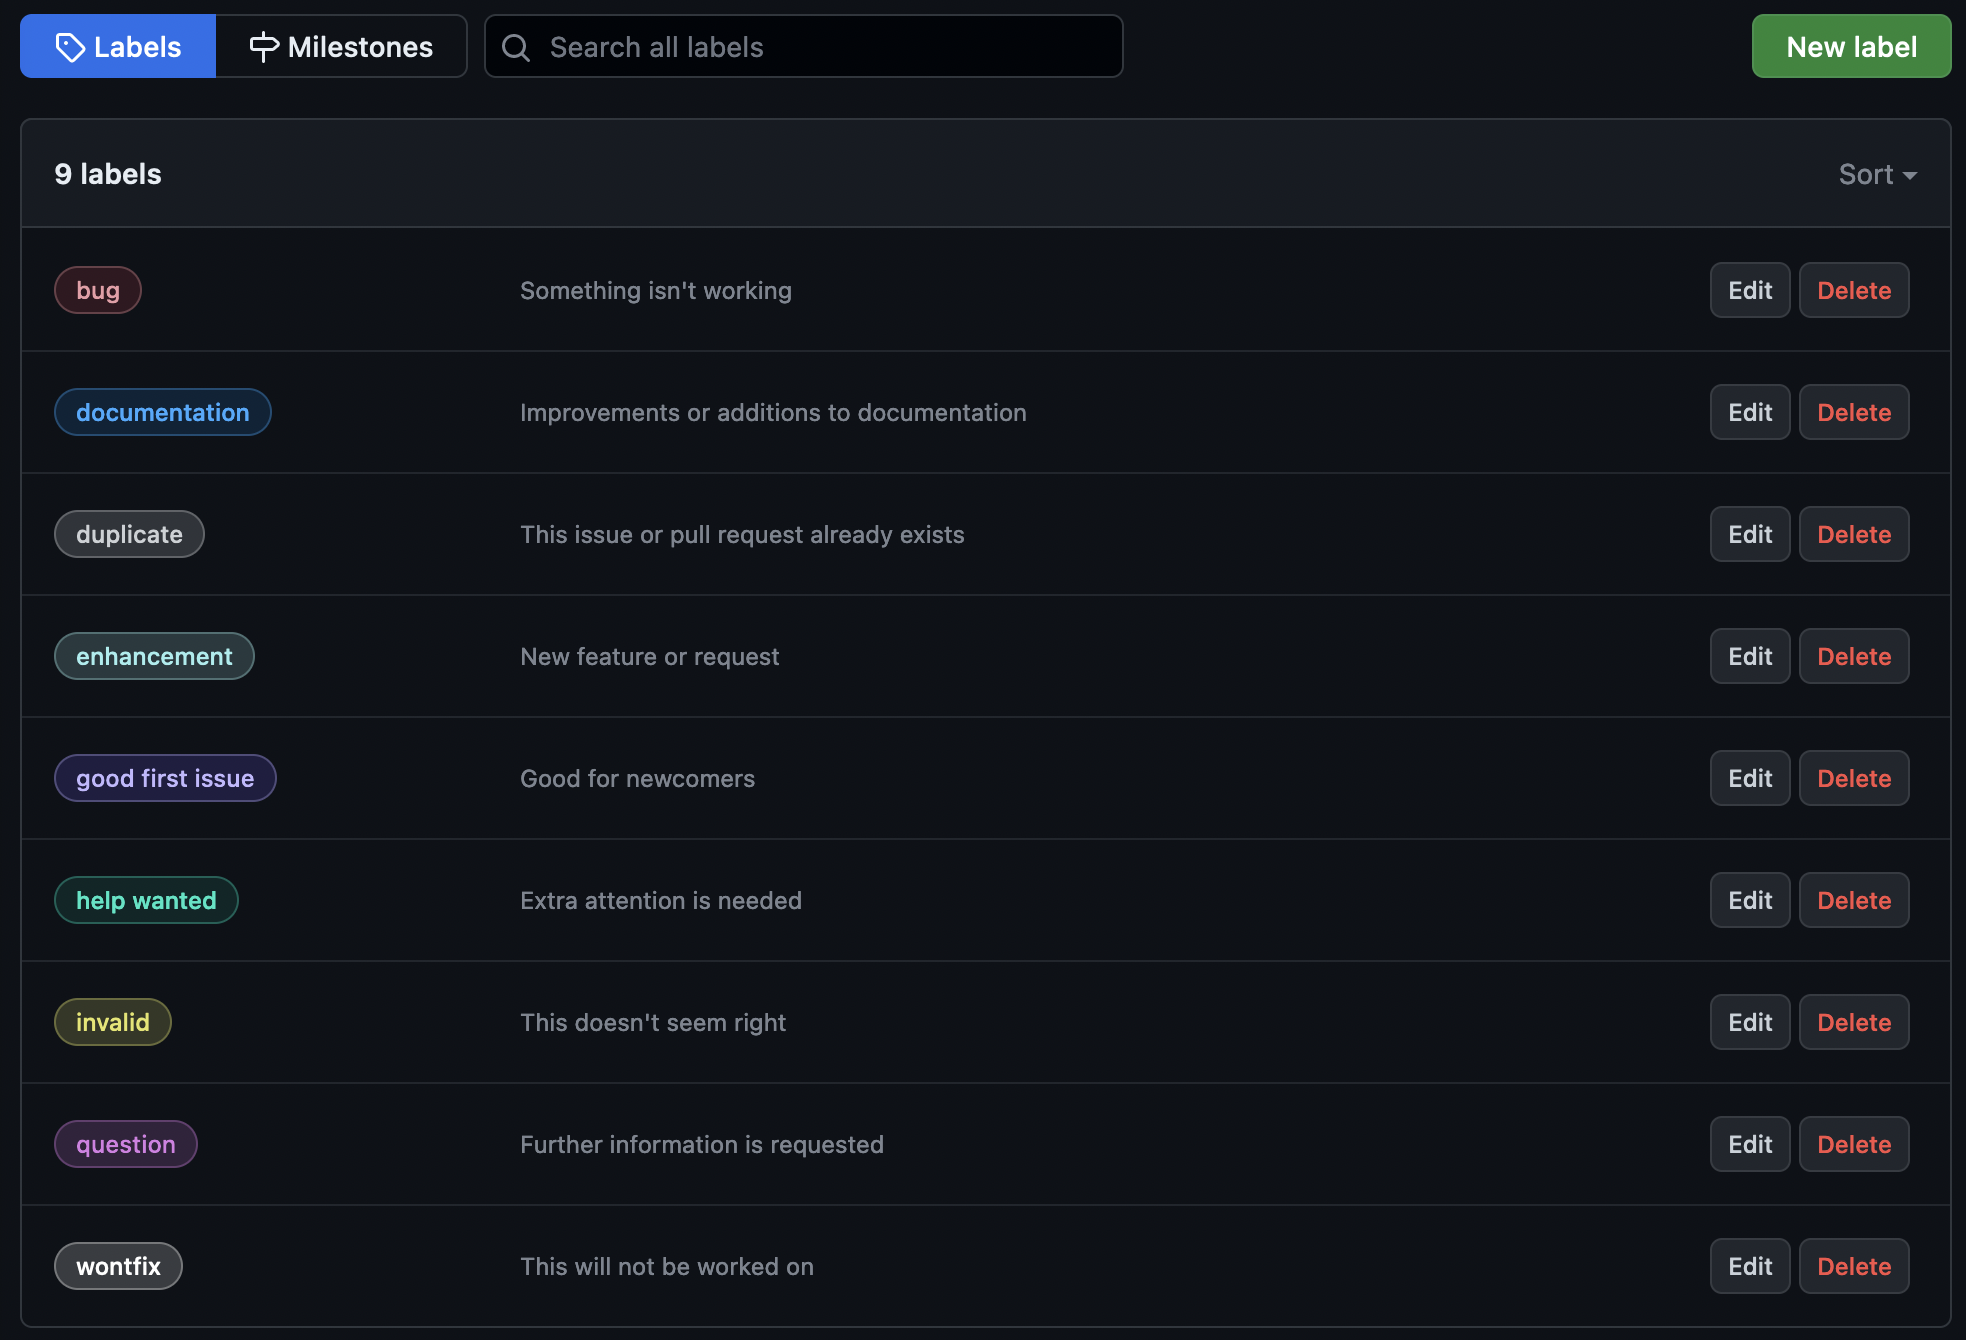
As you can see, several of these are aimed towards large, open-source communities with many collaborators. This is not always the case in Research Software Engineering, however, so we will need to modify these.
Modifying Labels
Labels can be added, edited, or deleted from the labels page.
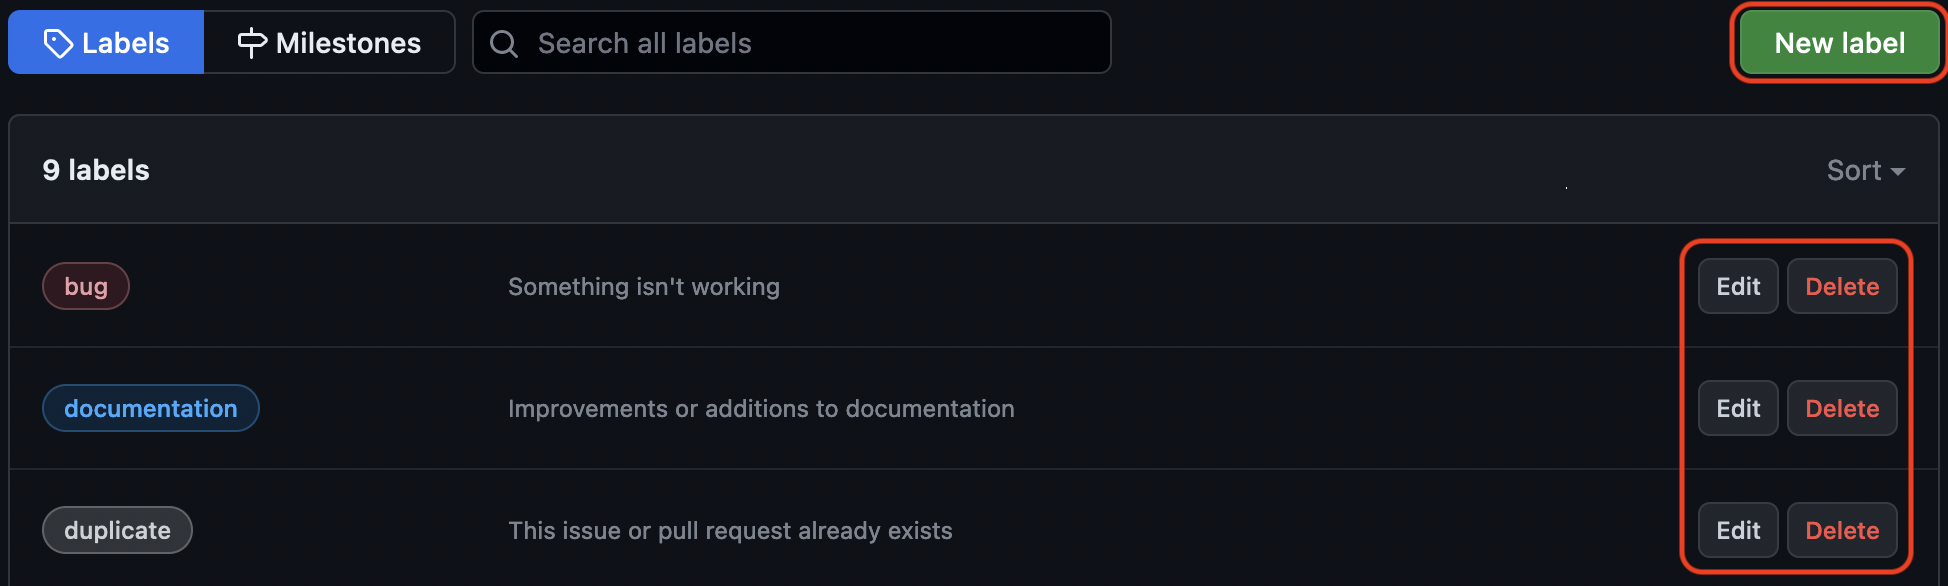
Each label has three attributes:
- Label name
- Description
- Color (Hex code)

Label Maker
Navigate to your practice repository’s label page.
- Add a new label for
discussion- Remove the label for
good first issue- Modify the color on the
wontfixlabel to your favorite color
Using Labels
Now that the labels are created, they can be assigned to issues.
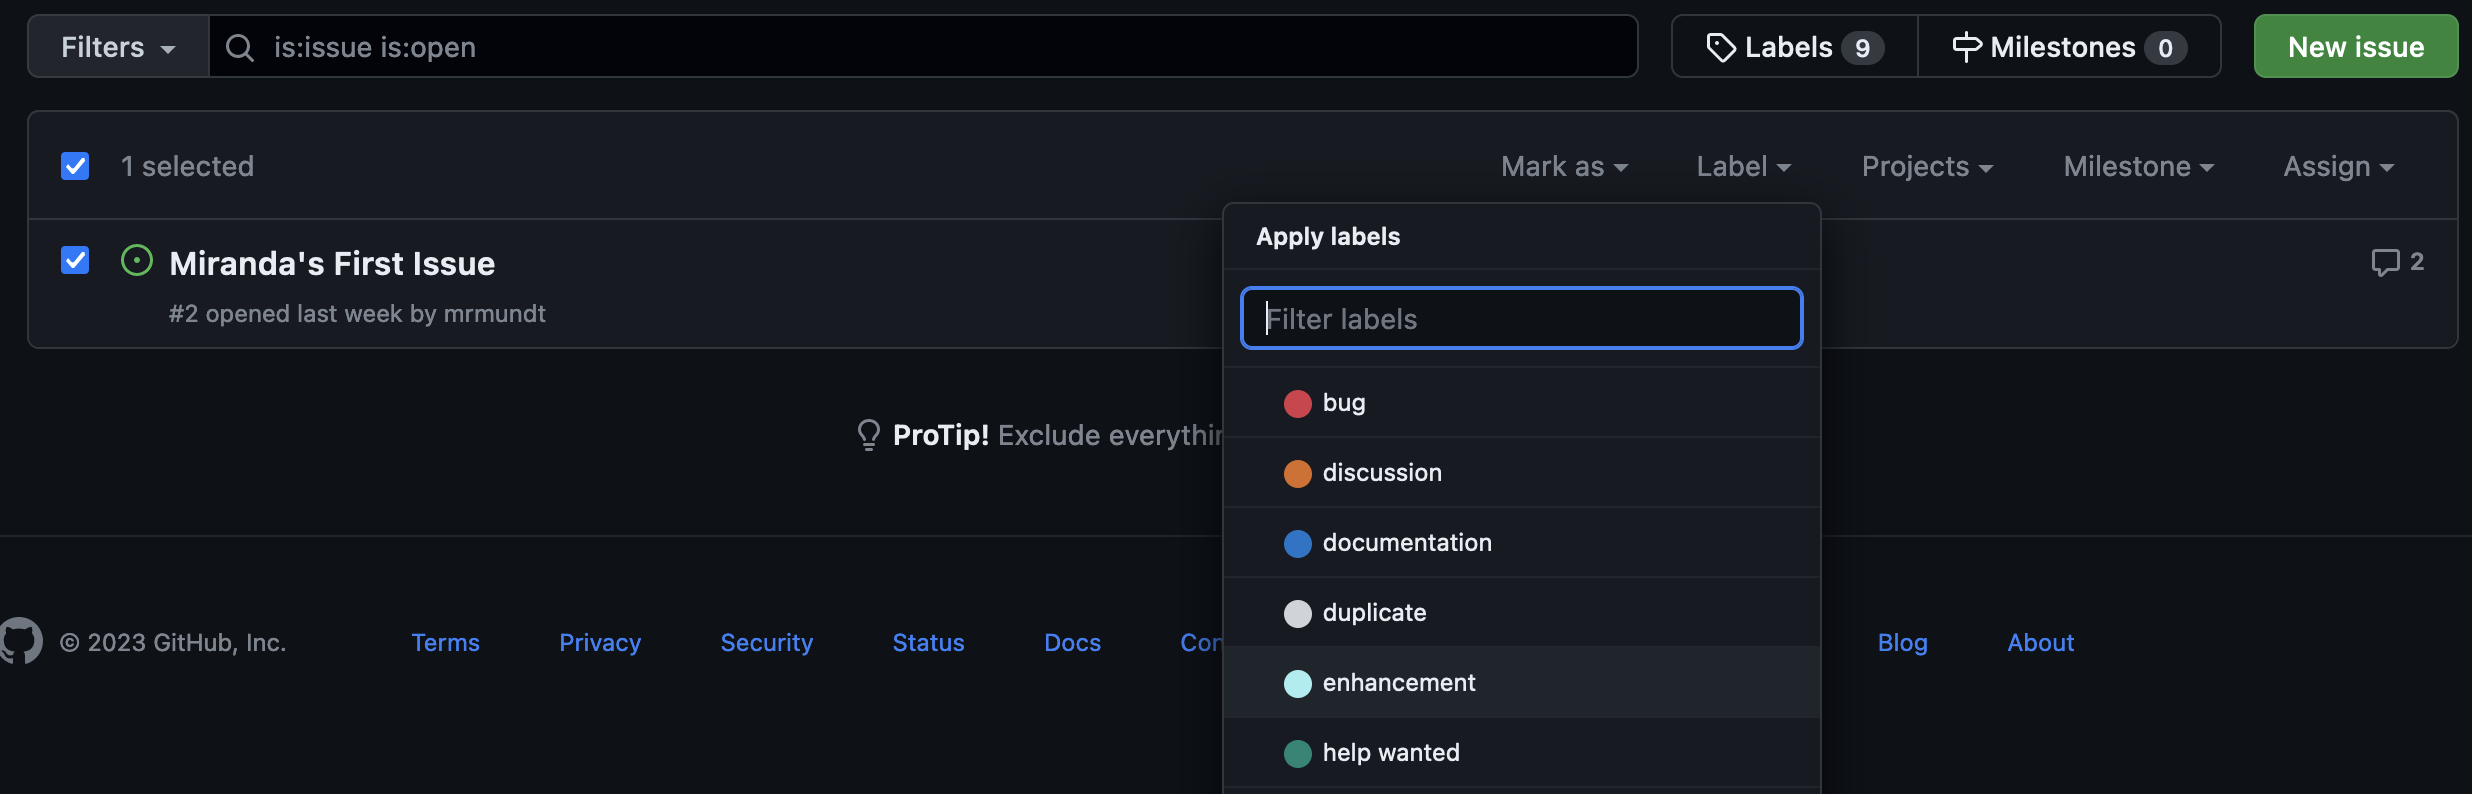
Labels can be applied from the main Issues page or within a single issue.
From the main Issues page, simply checkmark the issue, hit the “Label” dropdown, select your preferred label(s), and click outside of the dropdown.
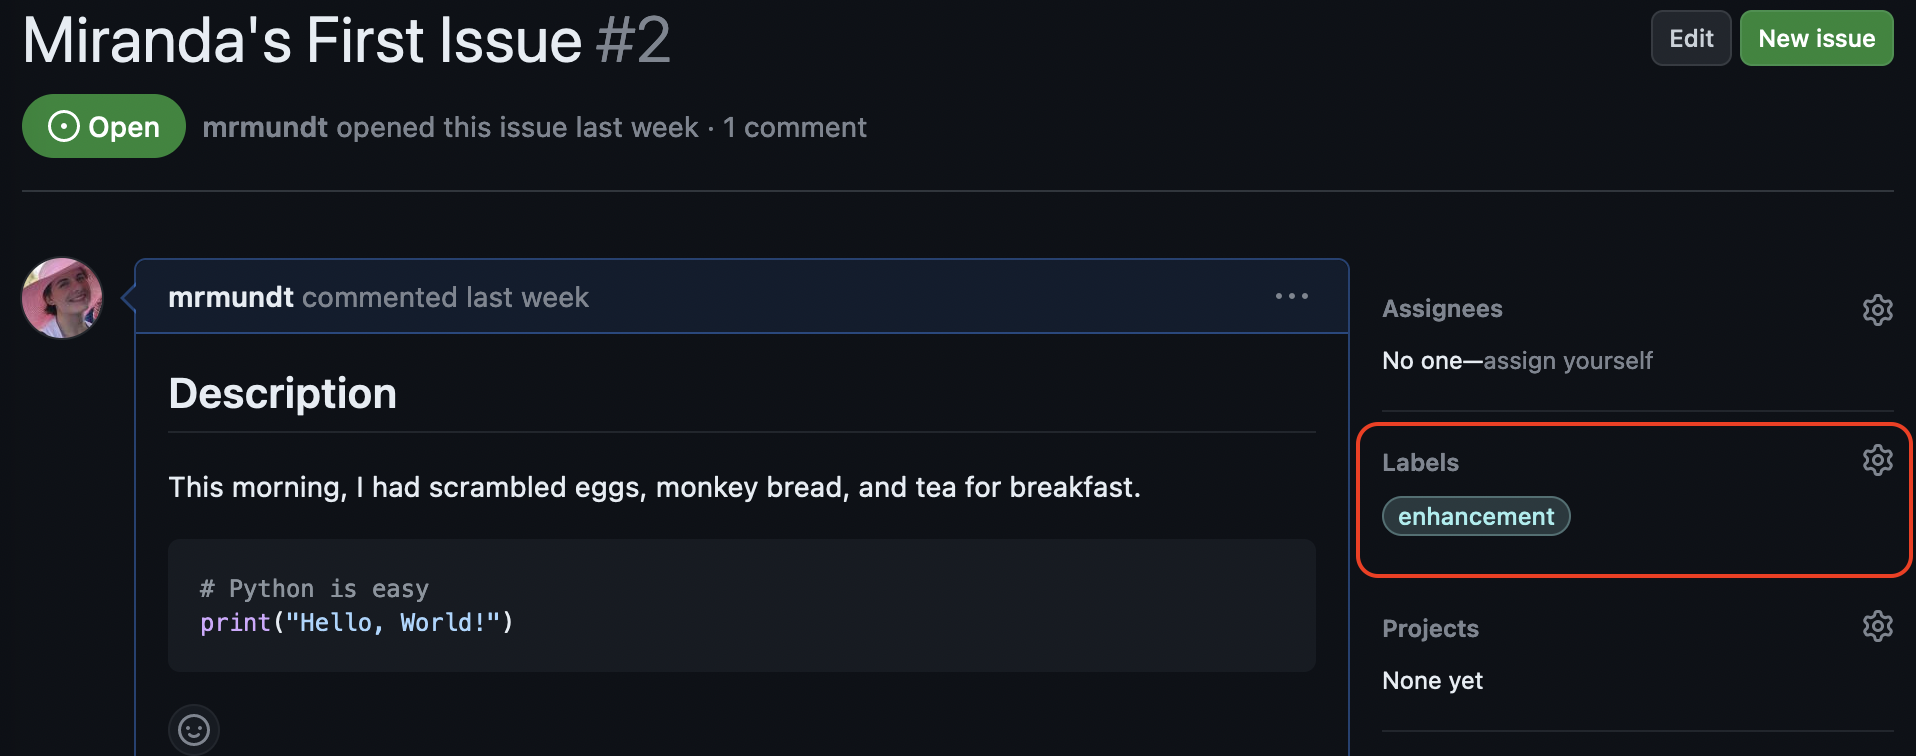
To apply within a single issue, click on the issue to open it. Then you will see the “Labels” option on the right-hand side.
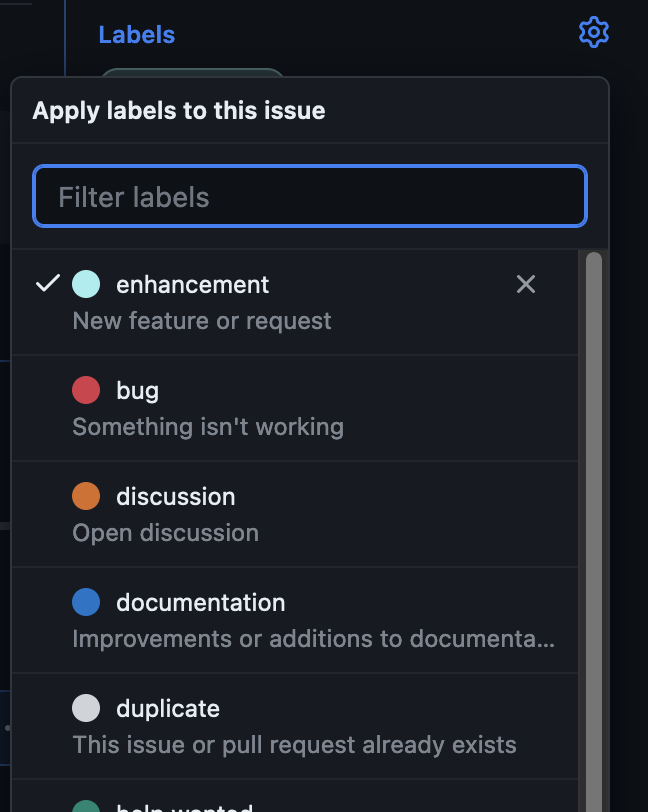
Click on “Labels”. A dropdown will appear in which you can select or deselect your preferred label(s).
Stick the Label
Navigate to your practice repository’s issue page.
- Create a new issue entitled “[YOUR NAME]’s label issue”
- Add the
discussionlabel
Filter by Labels
Another feature of labels within GitHub is the ability to filter issues by them. This is a powerful and useful feature for any project that uses GitHub Issues for tracking, organizing, and prioritizing work.
To filter, navigate to the main Issues page. With no issue selected, click the “Labels” dropdown again. You’ll see that this dropdown now says “Filter by label” rather than “Apply labels.”
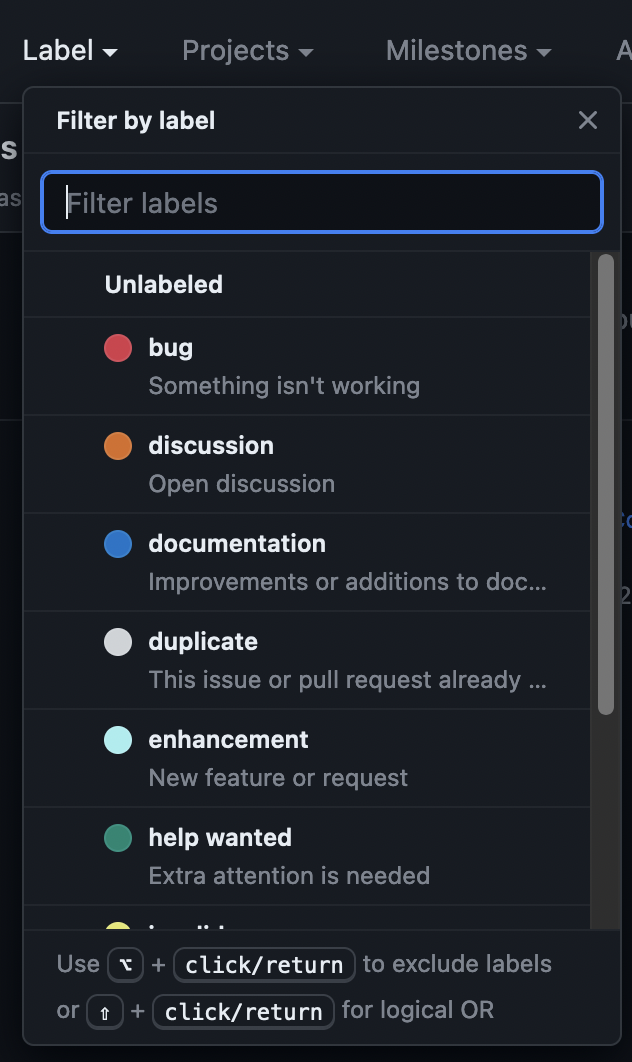
Click on a label in the list to filter by it. GitHub will only show issues that have that label applied.
You can select multiple labels or use the hints at the bottom of the “Labels” dropdown to do more advanced filtering, such as exclusion.
Practice Filtering
Navigate to https://github.com/spack/spack and find the issues page.
- Filter by the
architecturelabel- Filter by both the
architectureandarchitectureslabels- (CHALLENGE) Filter by
questionbut excludebug
You now understand how to make, change, apply, and filter by labels in GitHub Issues.
Key Points
Labelling issues can help with organization and filtering.
Issue Templates
Overview
Teaching: 10 min
Exercises: 10 minQuestions
What are issue templates?
How do you make issue templates?
How do you customize the template chooser?
Objectives
Learn how to make issue templates.
Learn how to customize templates and their appearance.
What are Issue Templates?
Issue templates in GitHub are a way to pre-fill new issues with specific sections, data, instructions, etc.
They are customizable for every project. You can add as many templates as makes sense for your project, or you can have none at all.
In this episode, we will learn the basics of issue templates.
Default Issue Templates
GitHub has a quick start default feature for those wishing to use Issue Templates. This can be enabled through the graphical user interface.
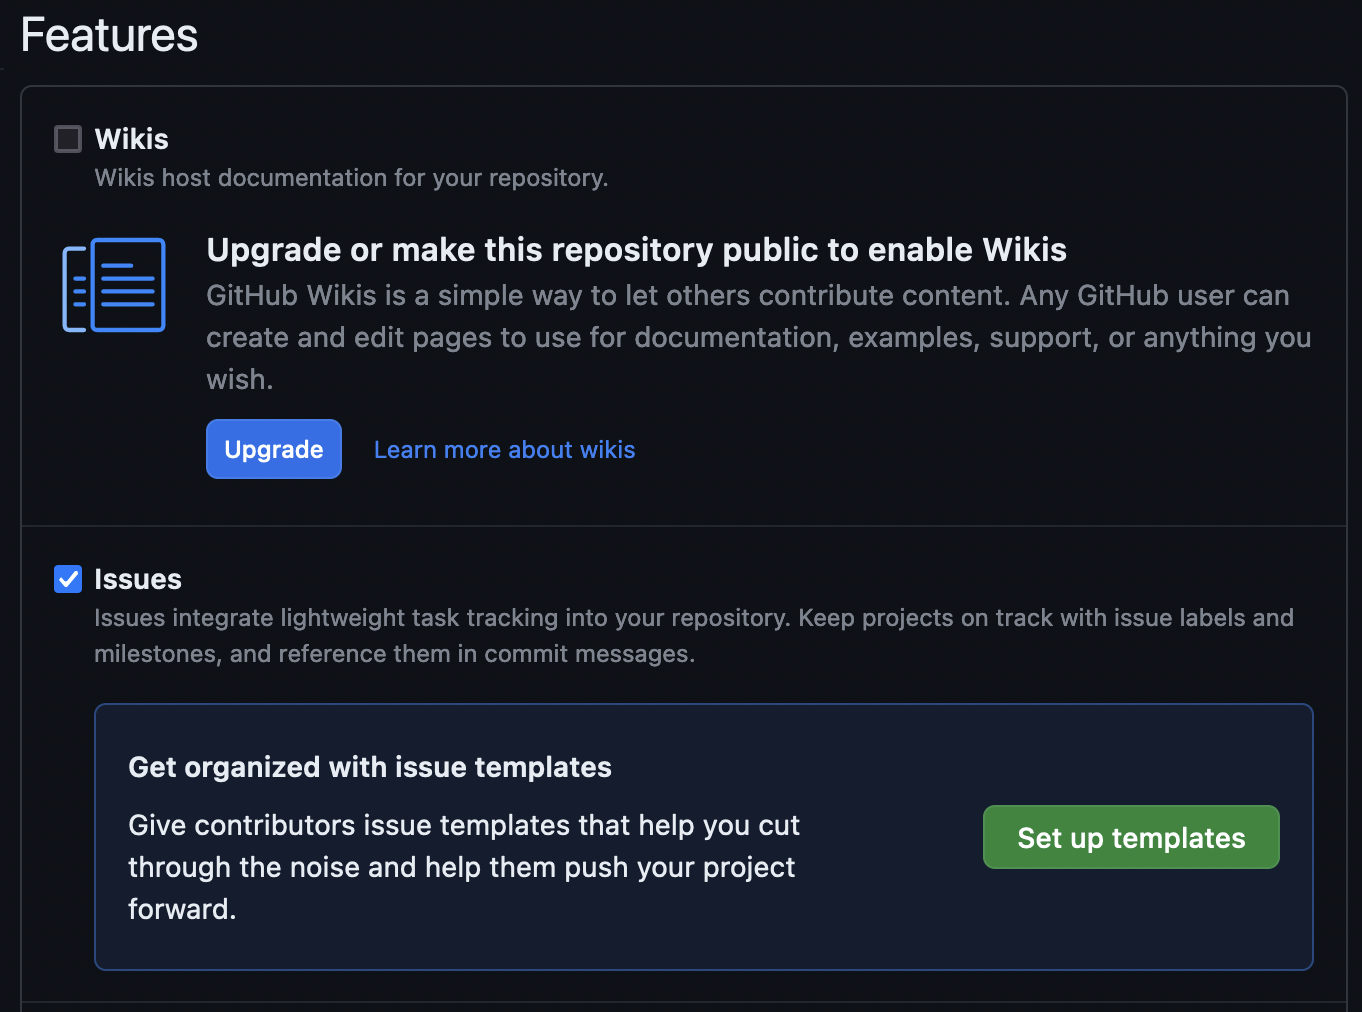
Click on the “Settings” tab in your repository.

It will load to the “General settings” page, under which there is a “Feature” section. Here you will see “Issues” (already checkmarked) with a button to “Set up templates.”
This will take you to a mostly blank screen on which there is an “Add template” dropdown with several options.
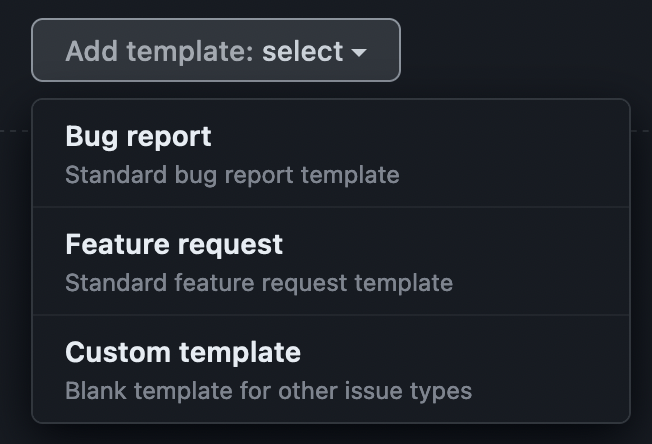
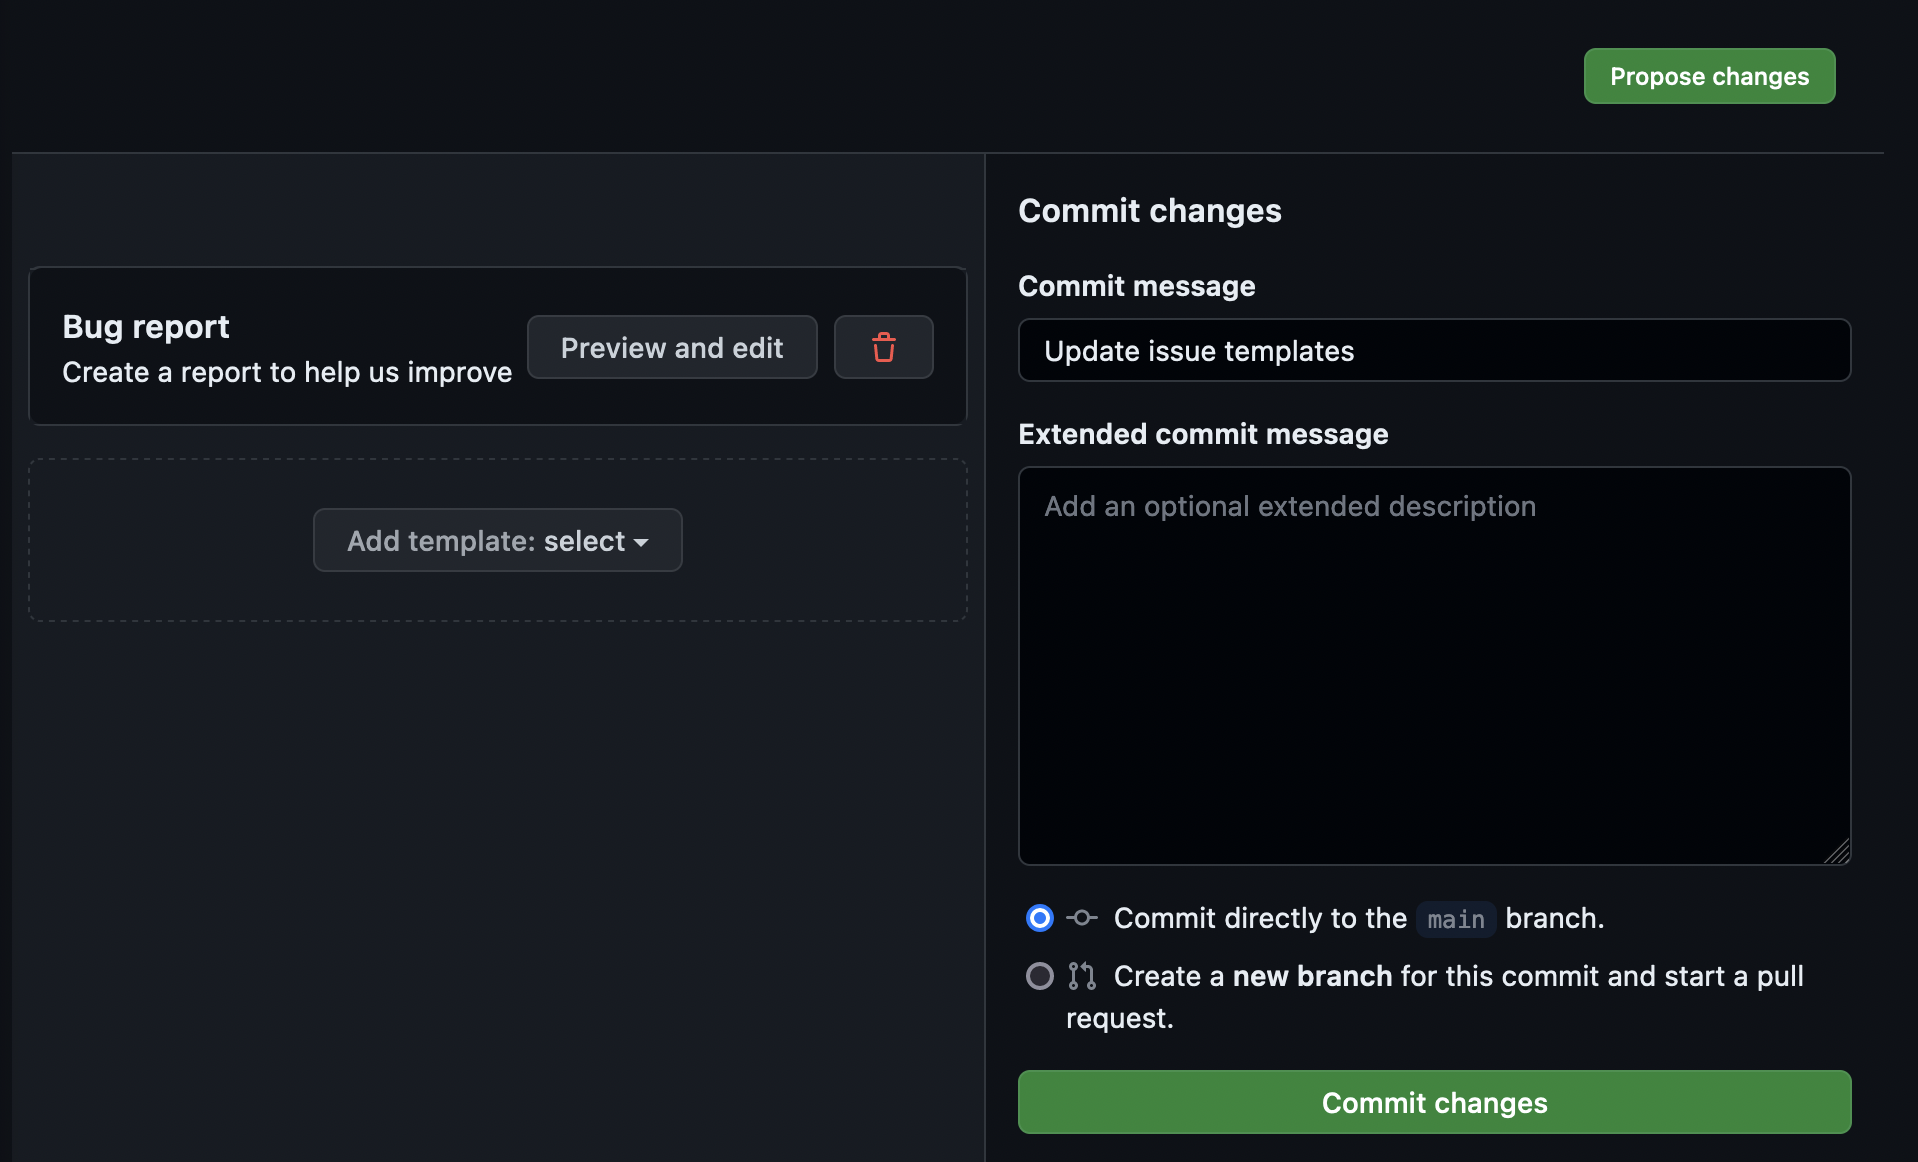
From this list, select “Bug report.” You will now see that the “Bug report” template shows up in the list of templates. Click “Preview and edit” to view the new template.
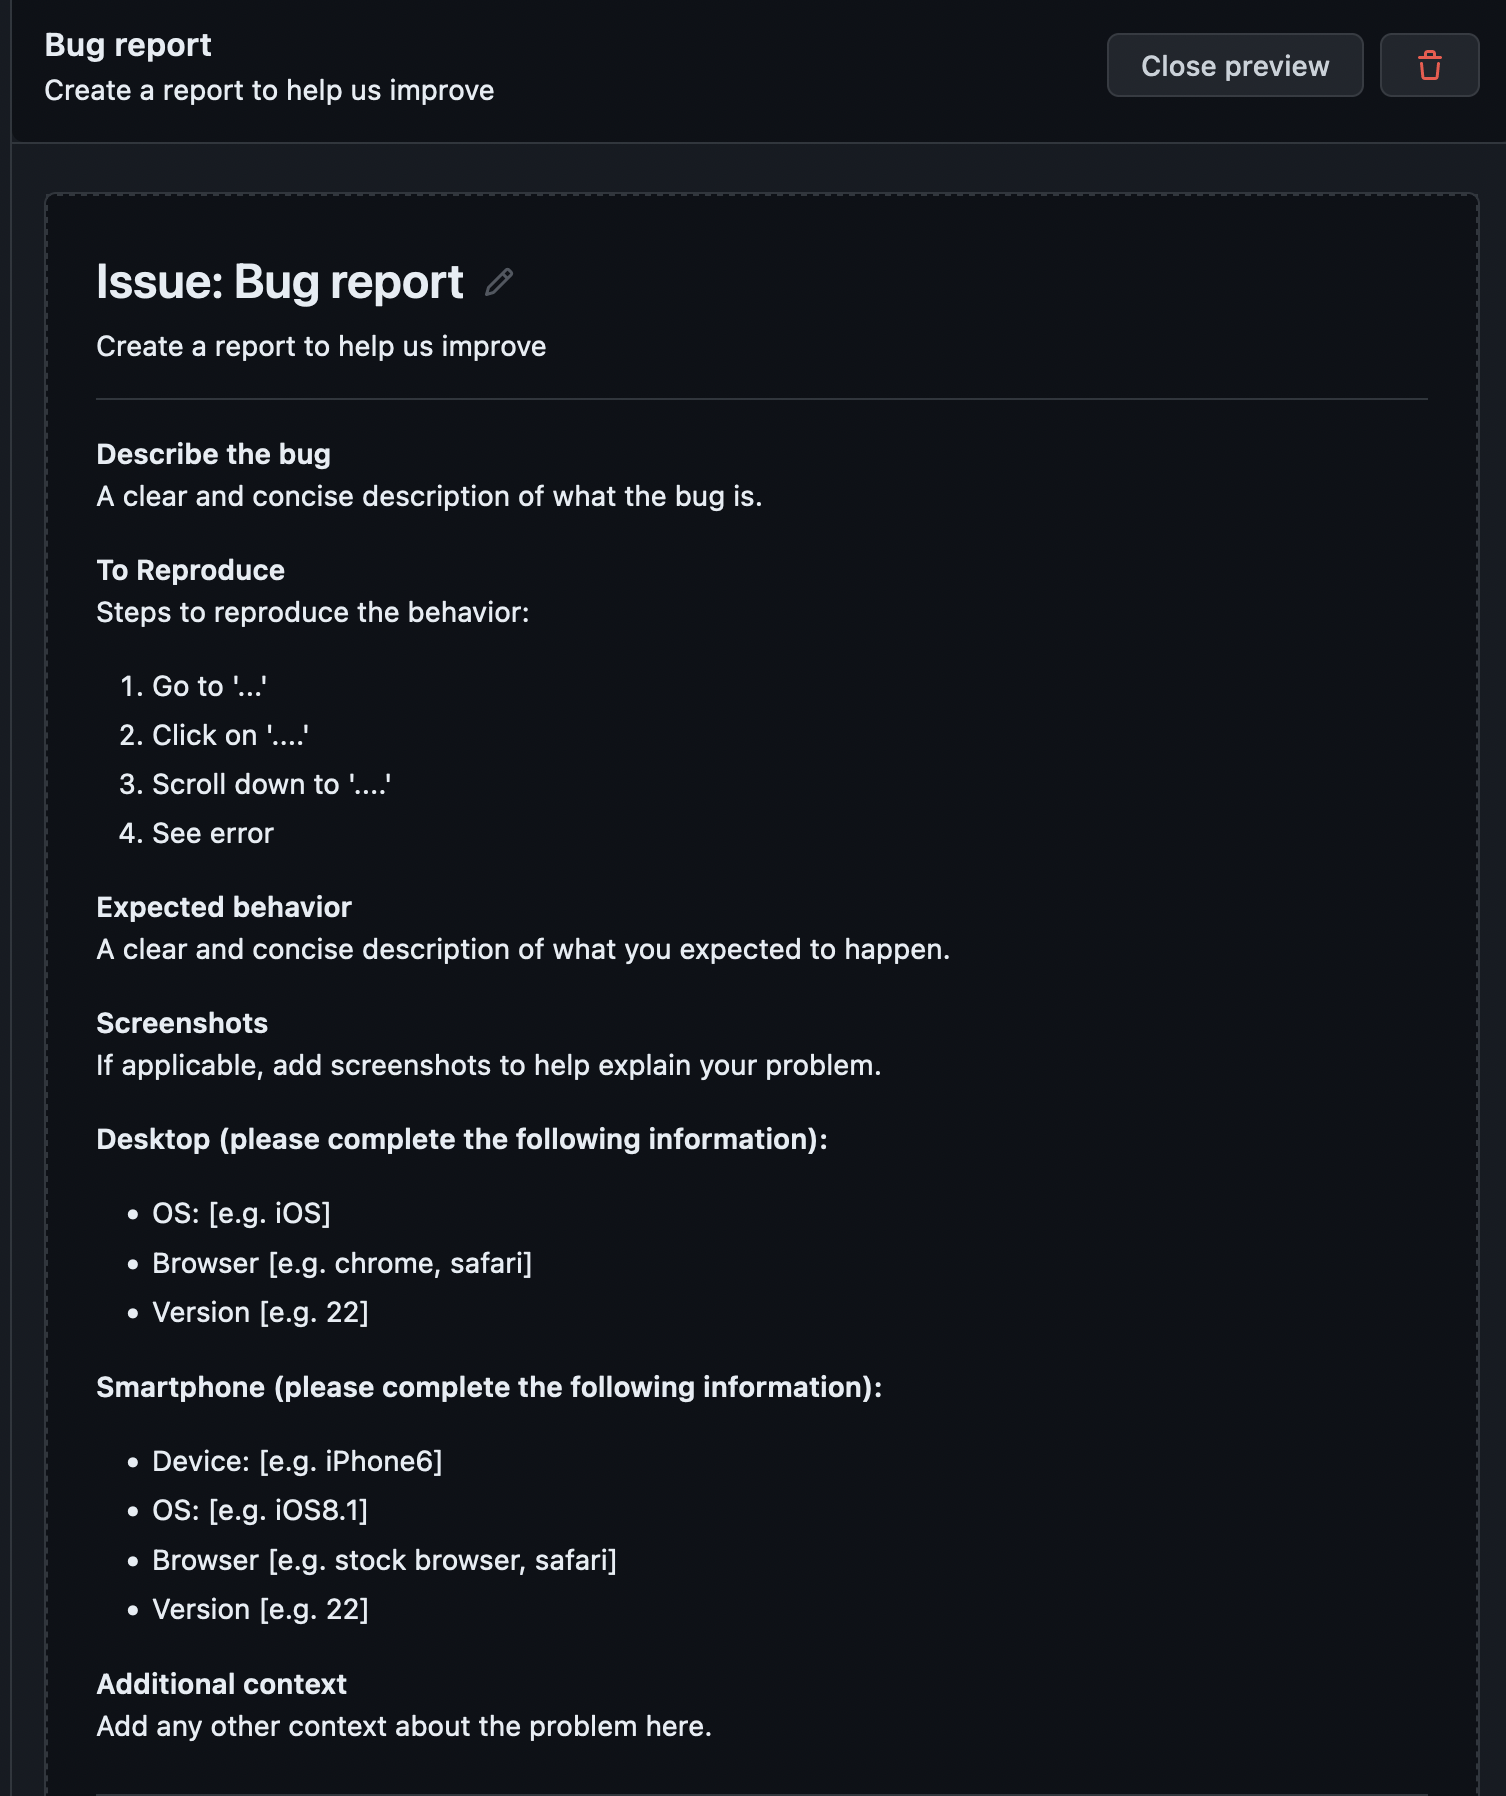
For now, we will leave this template as-is. To apply the new template to your repository, click the “Propose changes” button at the top of the page. This will load a commit message dialog box. Put whatever you desire in the commit message dialog box and commit the changes to your main branch.
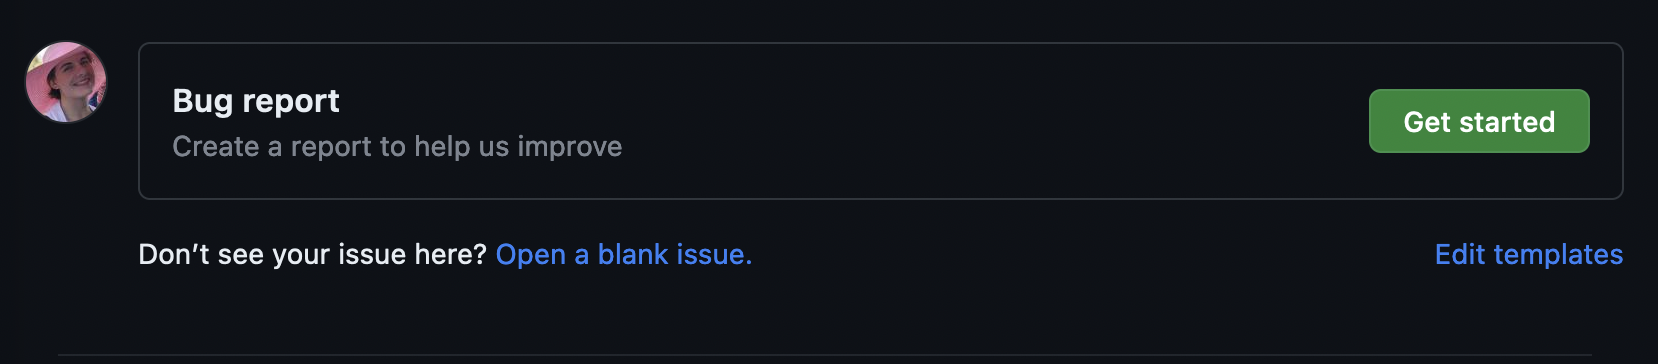
If we navigate to the Issues page now and click “New issue”, the template is now available in our options.
New Feature
Using the same steps covered, add the “Feature request” default template to your repository.
Now open an issue for each new template, filling out the sections with whatever you’d like.
Custom Issue Templates
We now have templates for both bug reports and feature requests. For this project, however, we also want to create a template for Design Discussions. Let’s make this custom template.
When we created our first template, GitHub did the setup for us. If you navigate back to your main page, you will see a new directory has been created.

This new directory is where all the issue templates are located. The directory
currently has two files: bug_report.md and feature_request.md. We are going
to make a new one called design_discussion.md.
Multiple Paths Available
We will do the rest of this lesson through the GUI; however, all of these steps can be done via command line and your preferred text editor. Do whatever feels right for you!
Issue Template Header
All issue templates start with a standard header that controls the appearance of the issue in GitHub. For our custom template, we will use:
---
name: Design Discussion
about: Start a design discussion for the project
title: ''
labels: ''
assignees: ''

---
| Option | Purpose |
|---|---|
name |
The name of the issue template, as it appears on the “New issue” page |
about |
The description of the use of this template, as it appears on the “New issue” page |
title |
A default title to be applied to a new issue opened using this template |
labels |
Default labels to be applied to a new issue opened using this template |
assignees |
Default assignees to be assigned to a new issue opened using this template |
Issue Template Content
Following this header, we can add whatever other data or sections we desire, formatting the template using Markdown.
Discussion Section
Finish the “Design Discussion” template by adding the following sections:
- Description
- Motivation
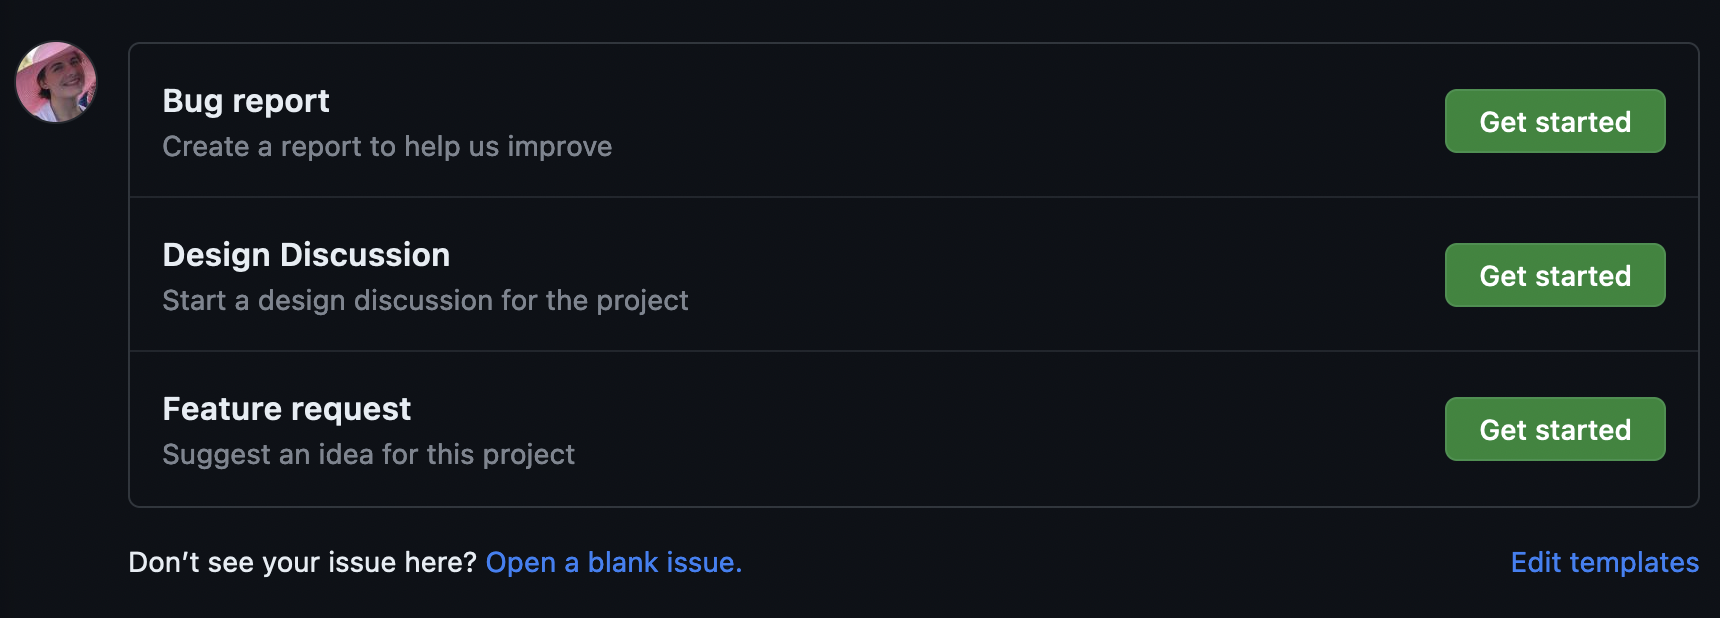
Then commit the changes directly to your main branch.
We now have three issue templates available for use.
Incorporate External Links
Many projects have external websites or extra ways to get help outside of GitHub. Your project may, for example, have a Google Forum or a mailing list.
You can incorporate these into the “Template Chooser” page by using a
config.yml file in the .github/ISSUE_TEMPLATE directory.
The config.yml file can have two different options:
blank_issues_enabled: # false or true
contact_links:
  - name: NAME
    url: LINK
    about: DESCRIPTION
The first option, blank_issues_enabled, controls whether a user is allowed
to open a blank issue if one of the provided templates doesn’t quite fit their
need.
The second option, contact_links, allows you to list links to external sites
that will show up in the template chooser.
Ask Google
Create a
config.ymlfor your repository. In theconfig.yml:
- Enable blank issues
- Create a link with the name, “Ask Google,” a link to www.google.com, and the description, “Google may know your answer.”
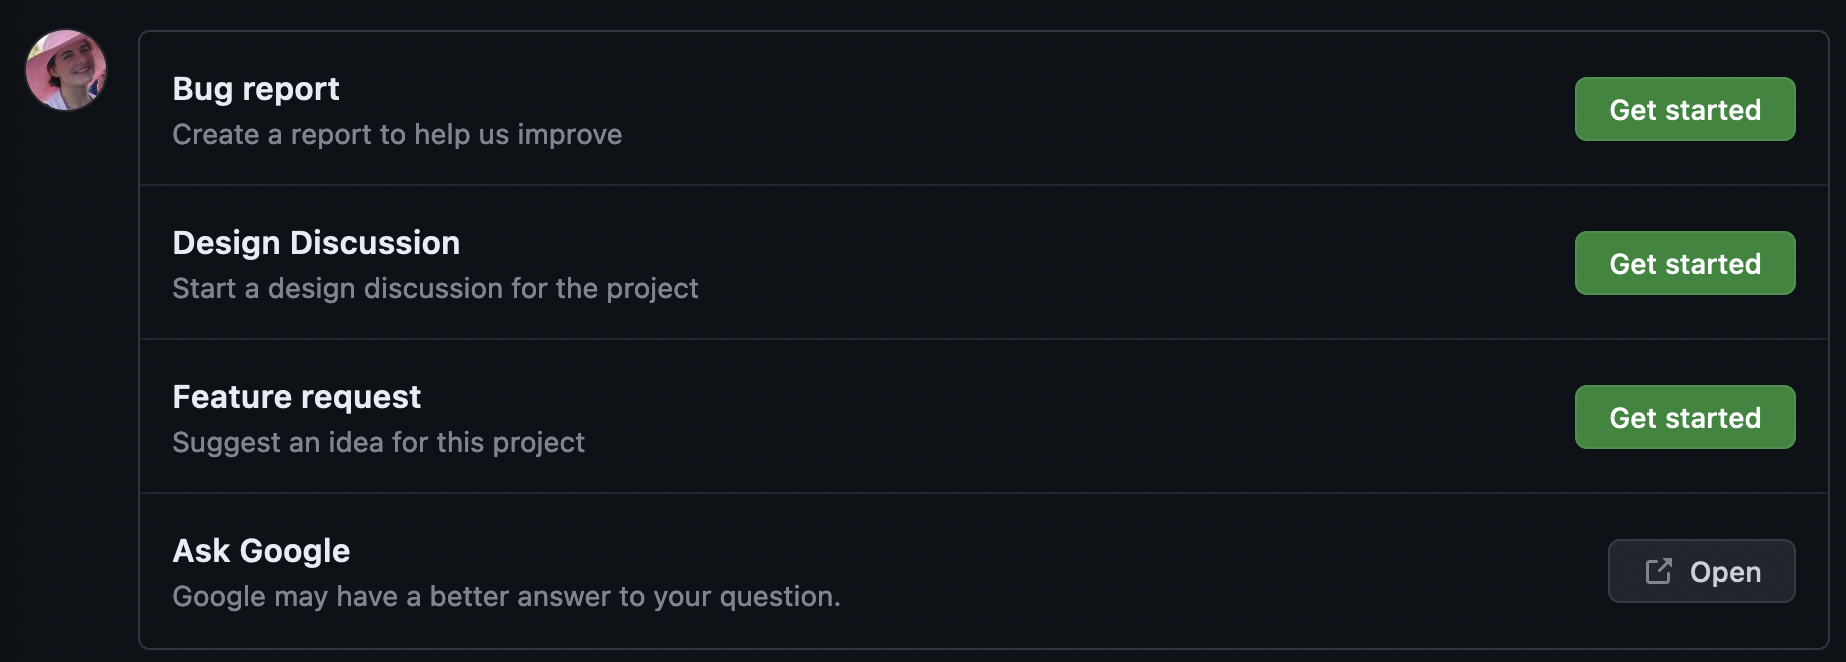
Then commit the changes directly to your main branch.
Our template chooser now has our three templates and a link to Google.
And that’s all, folks! You now know much more about GitHub Issues.
Key Points
Templates can be incorporated into any GitHub repository and can make issue creation more structured.
External links can be listed with the templates to help direct users to external resources.