Labelling Issues
Overview
Teaching: 5 min
Exercises: 5 minQuestions
How do you make and assign labels to issues?
Objectives
Learn how to use labels for GitHub issues.
GitHub Labels
Each new GitHub repository comes with a set of default labels that can be assigned to issues, pull requests, or discussions.
From GitHub’s official documentation:
| Label | Description |
|---|---|
bug |
Indicates an unexpected problem or unintended behavior |
documentation |
Indicates a need for improvements or additions to documentation |
duplicate |
Indicates similar issues, pull requests, or discussions |
enhancement |
Indicates new feature requests |
good first issue |
Indicates a good issue for first-time contributors |
help wanted |
Indicates that a maintainer wants help on an issue or pull request |
invalid |
Indicates that an issue, pull request, or discussion is no longer relevant |
question |
Indicates that an issue, pull request, or discussion needs more information |
wontfix |
Indicates that work won’t continue on an issue, pull request, or discussion |
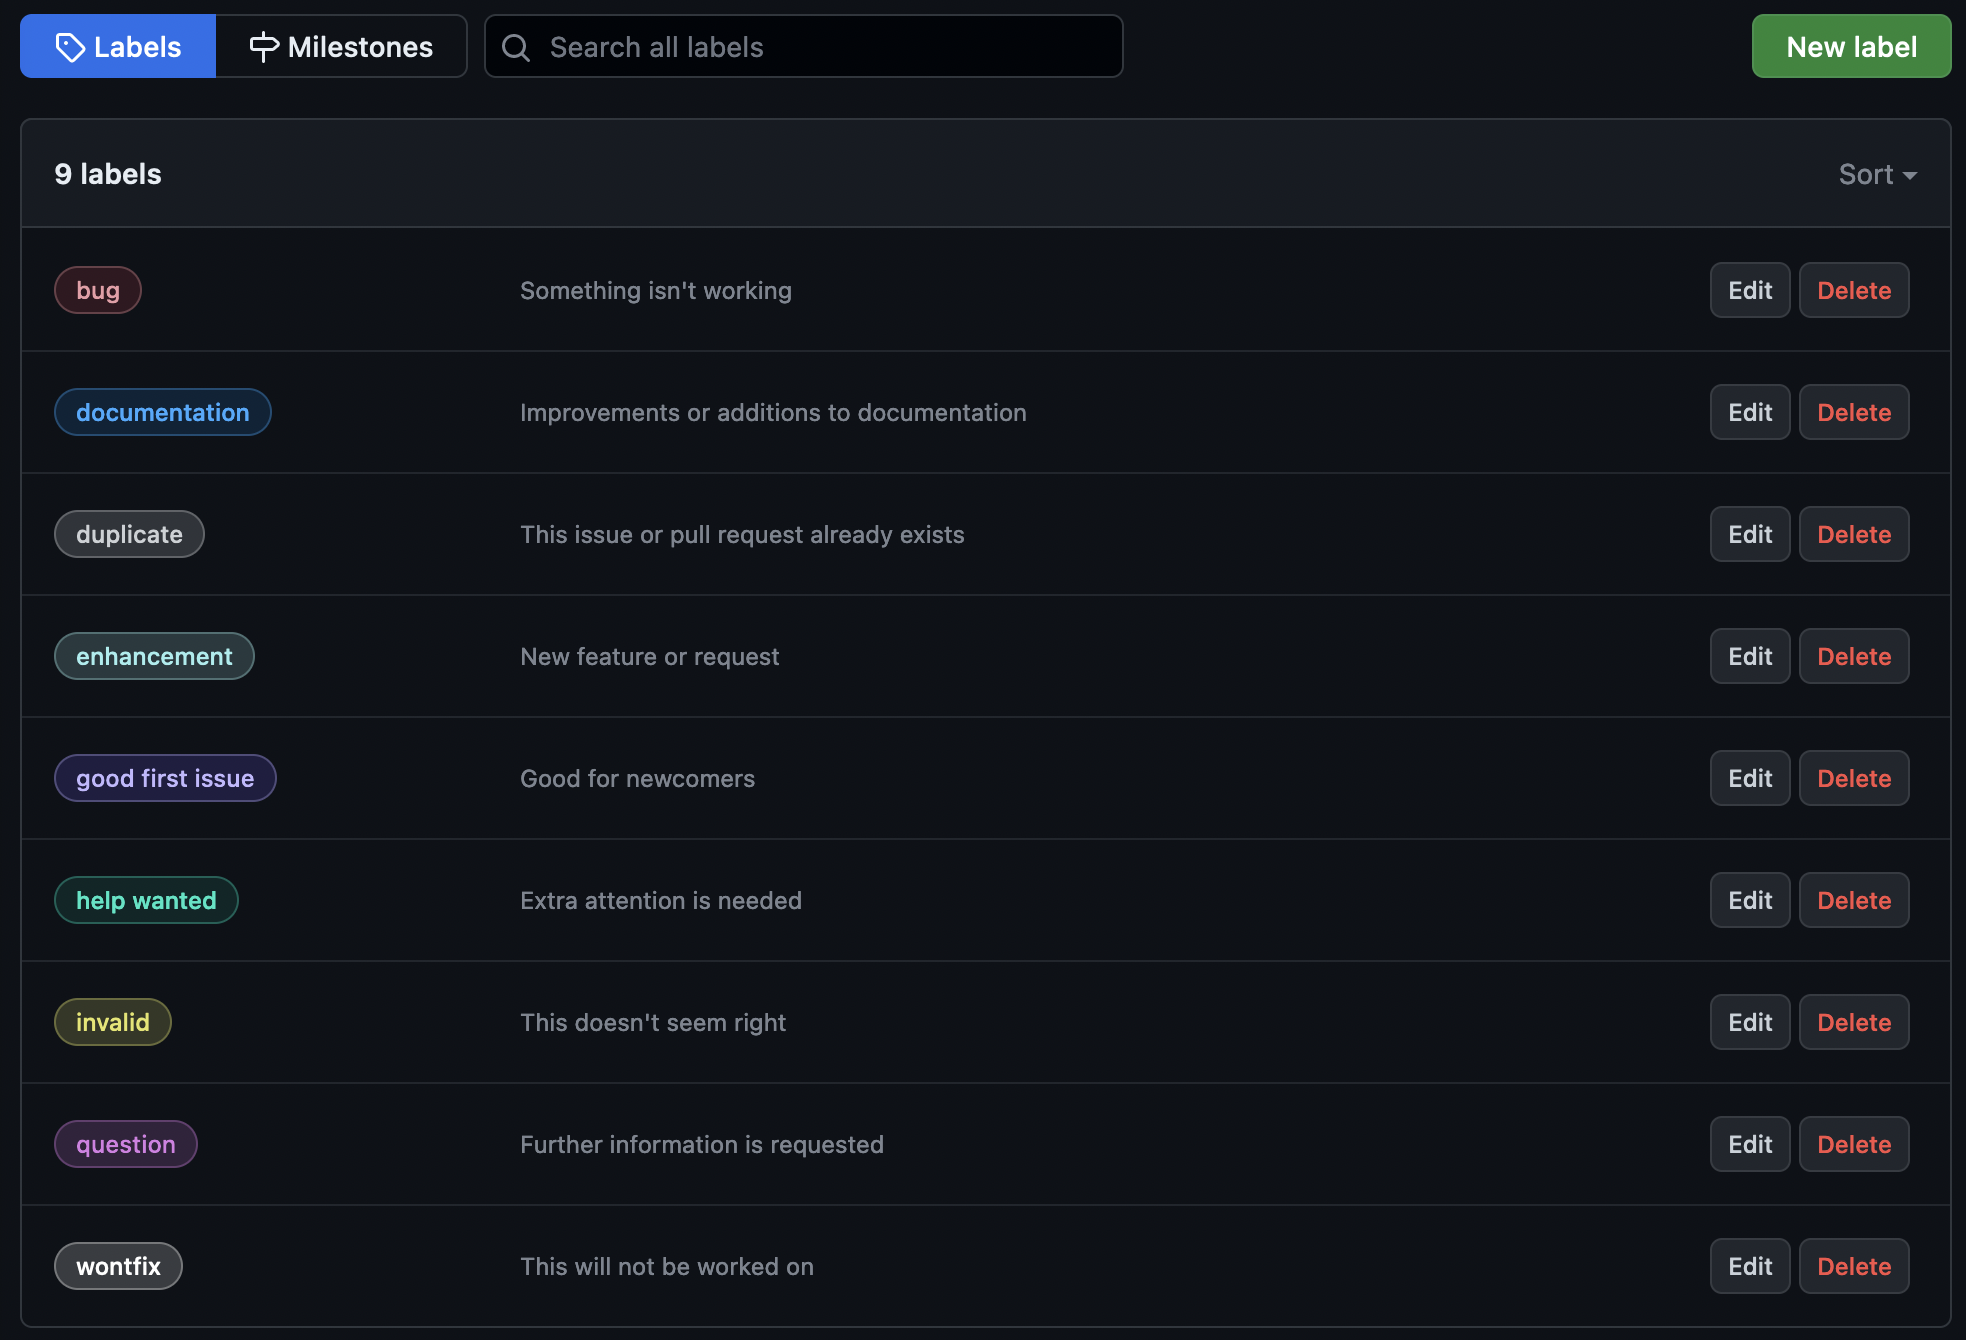
These labels can be viewed from the Issues and Pull Requests pages.

As you can see, several of these are aimed towards large, open-source communities with many collaborators. This is not always the case in Research Software Engineering, however, so we will need to modify these.
Modifying Labels
Labels can be added, edited, or deleted from the labels page.
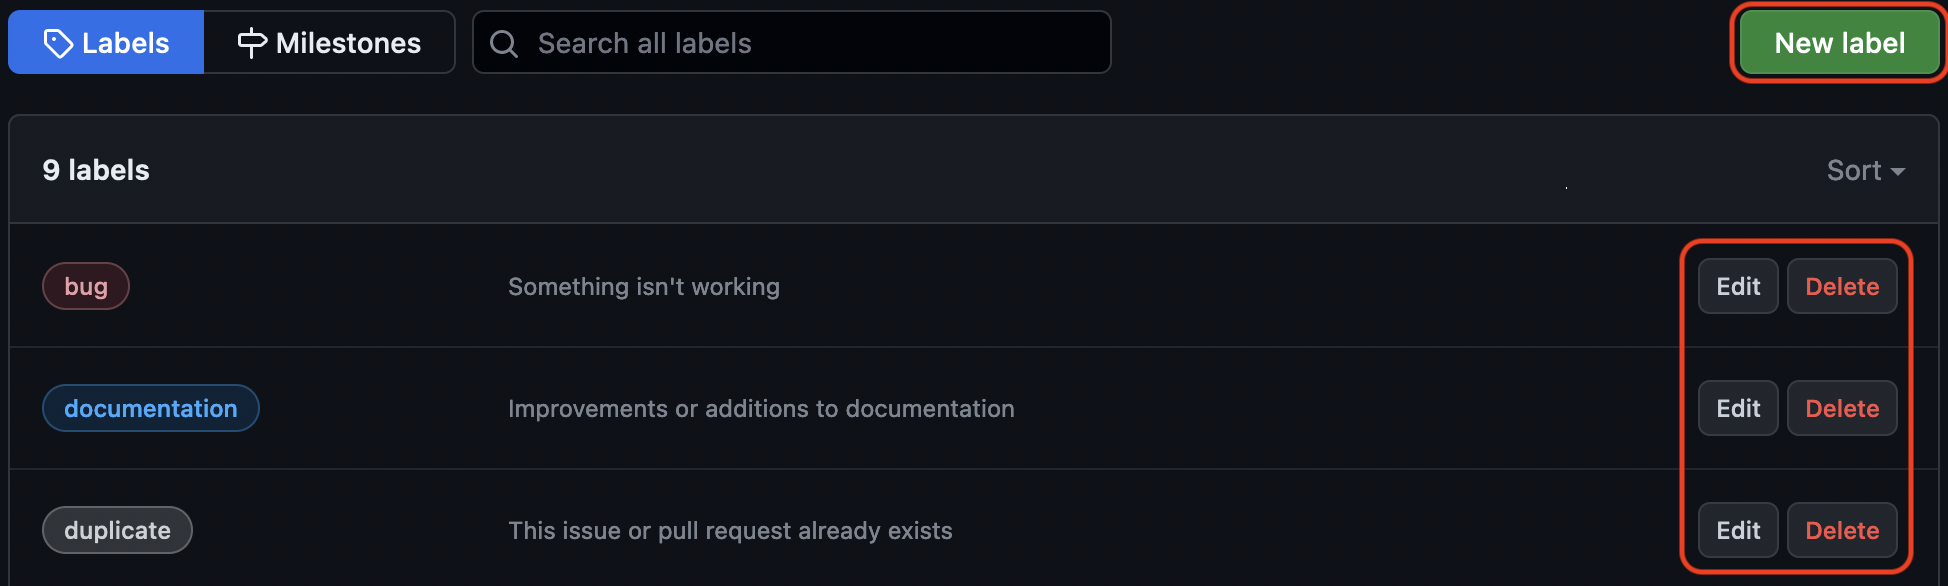
Each label has three attributes:
- Label name
- Description
- Color (Hex code)

Label Maker
Navigate to your practice repository’s label page.
- Add a new label for
discussion- Remove the label for
good first issue- Modify the color on the
wontfixlabel to your favorite color
Using Labels
Now that the labels are created, they can be assigned to issues.
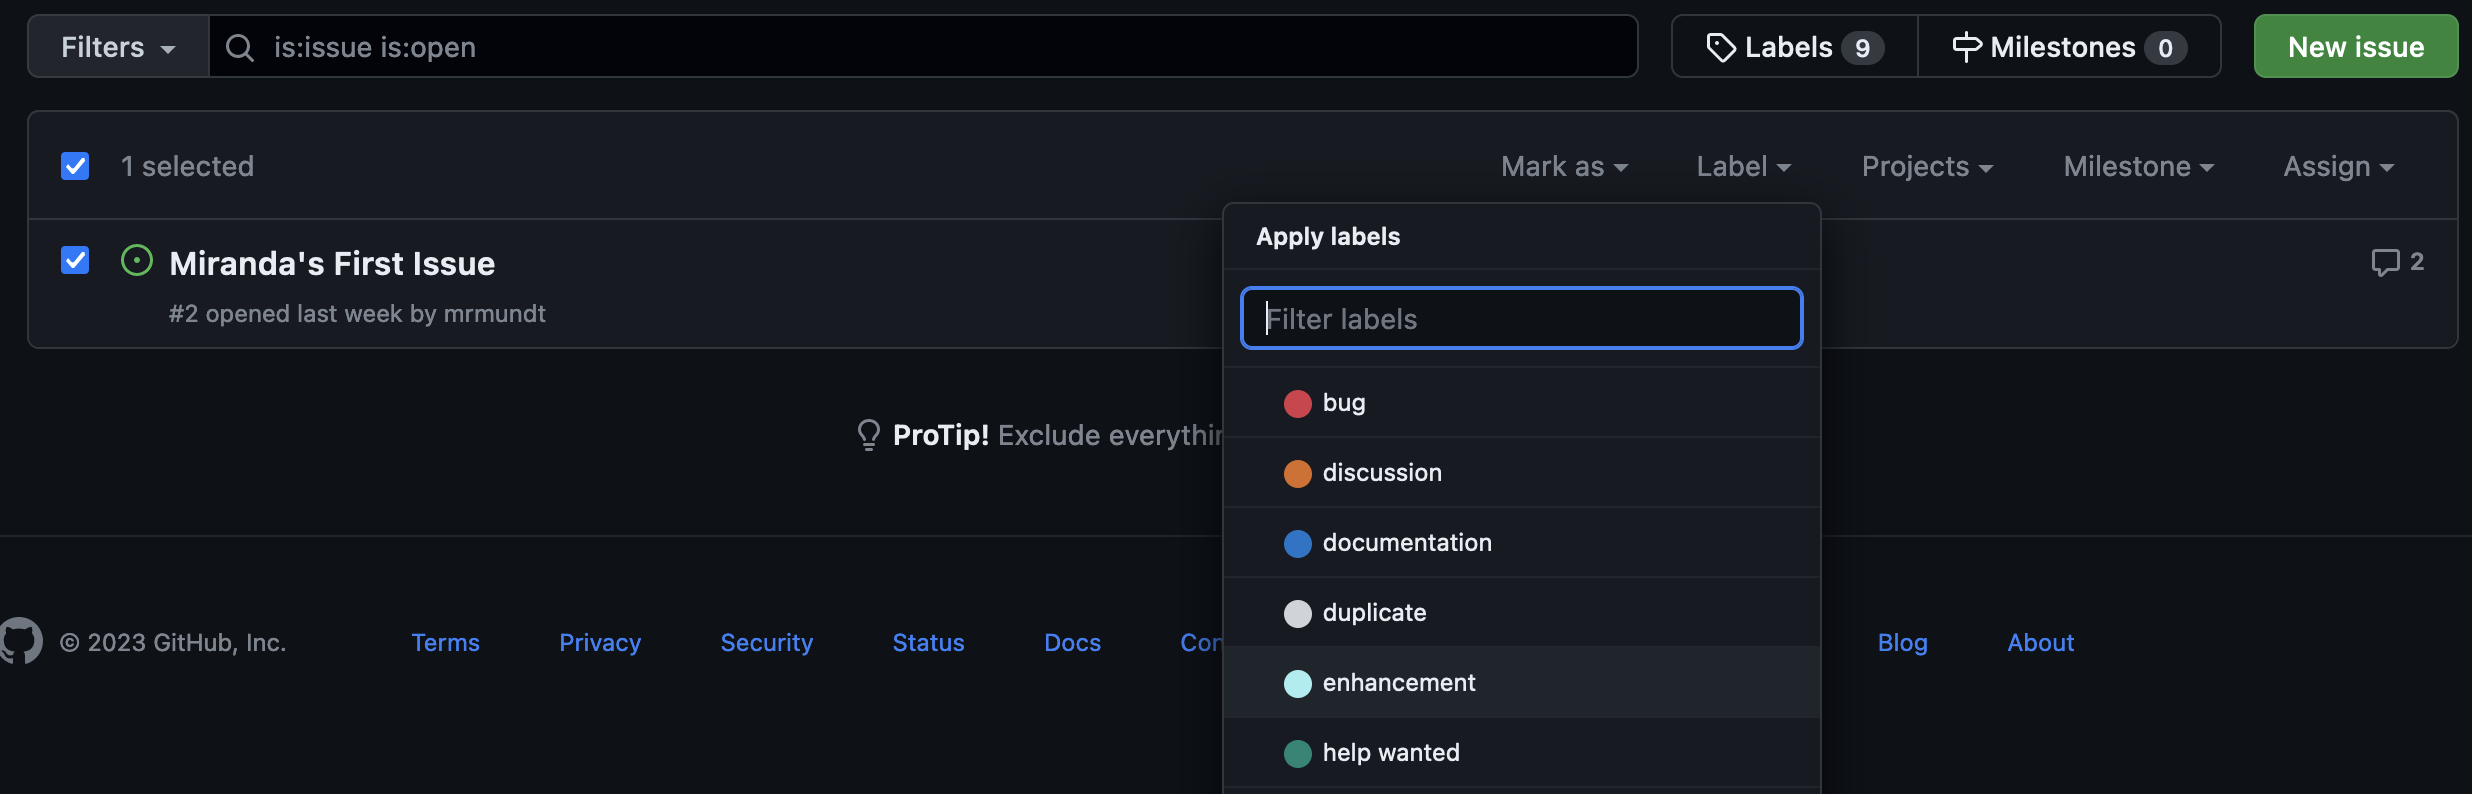
Labels can be applied from the main Issues page or within a single issue.
From the main Issues page, simply checkmark the issue, hit the “Label” dropdown, select your preferred label(s), and click outside of the dropdown.
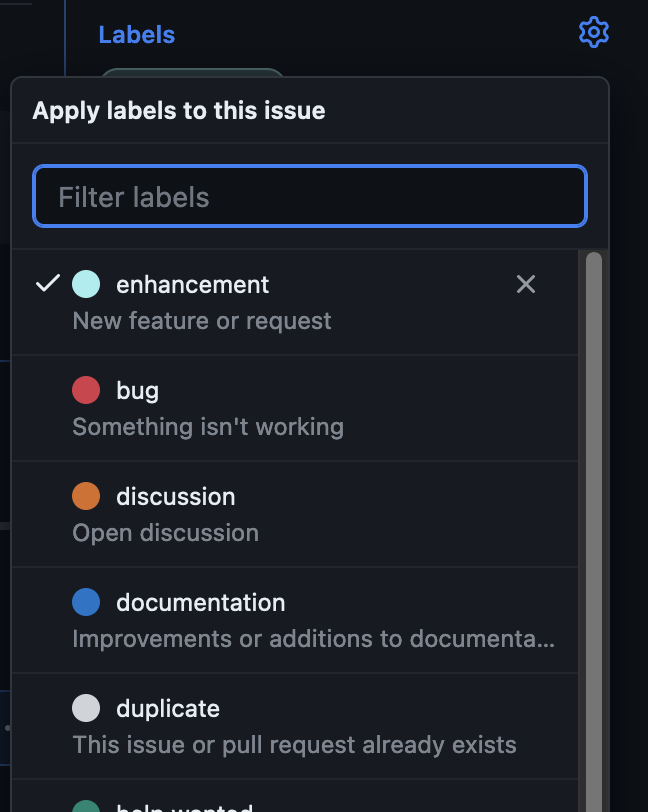
To apply within a single issue, click on the issue to open it. Then you will see the “Labels” option on the right-hand side.
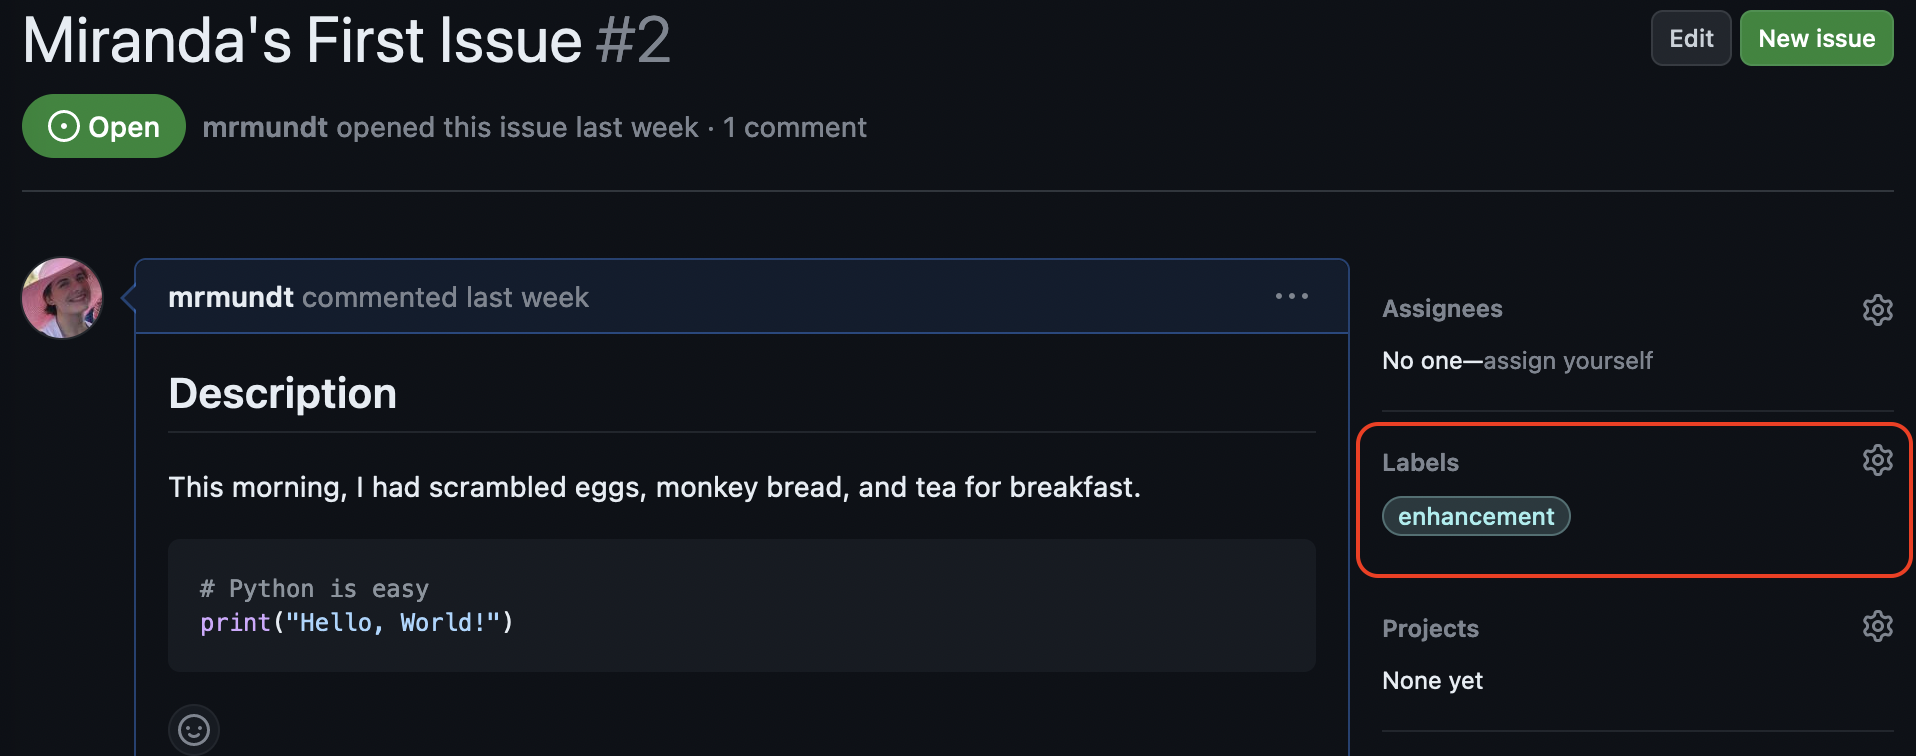
Click on “Labels”. A dropdown will appear in which you can select or deselect your preferred label(s).
Stick the Label
Navigate to your practice repository’s issue page.
- Create a new issue entitled “[YOUR NAME]’s label issue”
- Add the
discussionlabel
Filter by Labels
Another feature of labels within GitHub is the ability to filter issues by them. This is a powerful and useful feature for any project that uses GitHub Issues for tracking, organizing, and prioritizing work.
To filter, navigate to the main Issues page. With no issue selected, click the “Labels” dropdown again. You’ll see that this dropdown now says “Filter by label” rather than “Apply labels.”
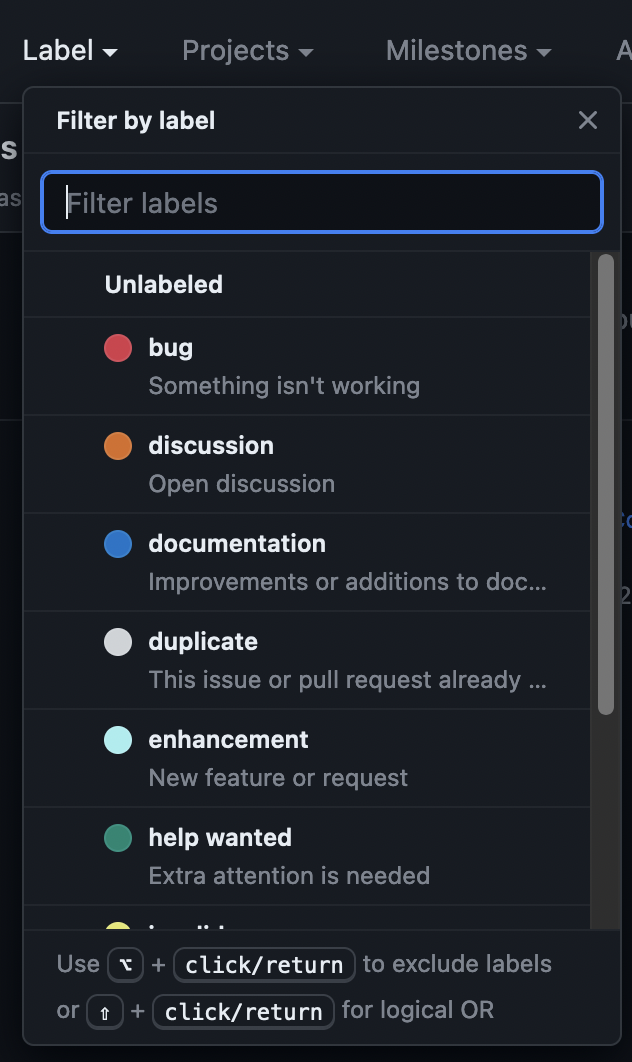
Click on a label in the list to filter by it. GitHub will only show issues that have that label applied.
You can select multiple labels or use the hints at the bottom of the “Labels” dropdown to do more advanced filtering, such as exclusion.
Practice Filtering
Navigate to https://github.com/spack/spack and find the issues page.
- Filter by the
architecturelabel- Filter by both the
architectureandarchitectureslabels- (CHALLENGE) Filter by
questionbut excludebug
You now understand how to make, change, apply, and filter by labels in GitHub Issues.
Key Points
Labelling issues can help with organization and filtering.