Branches
Overview
Teaching: 15 min
Exercises: 15 minQuestions
Why use branches?
How do we use branches?
Objectives
Be able to create and merge a branch
About Branches
Branches are independent development lines. Working independently, you can likely get away with using git without creating any branches, as in the first diagram in the figure below. However, when you begin to work with others, branches allow team members to work on the code without impacting the work of other developers or users.
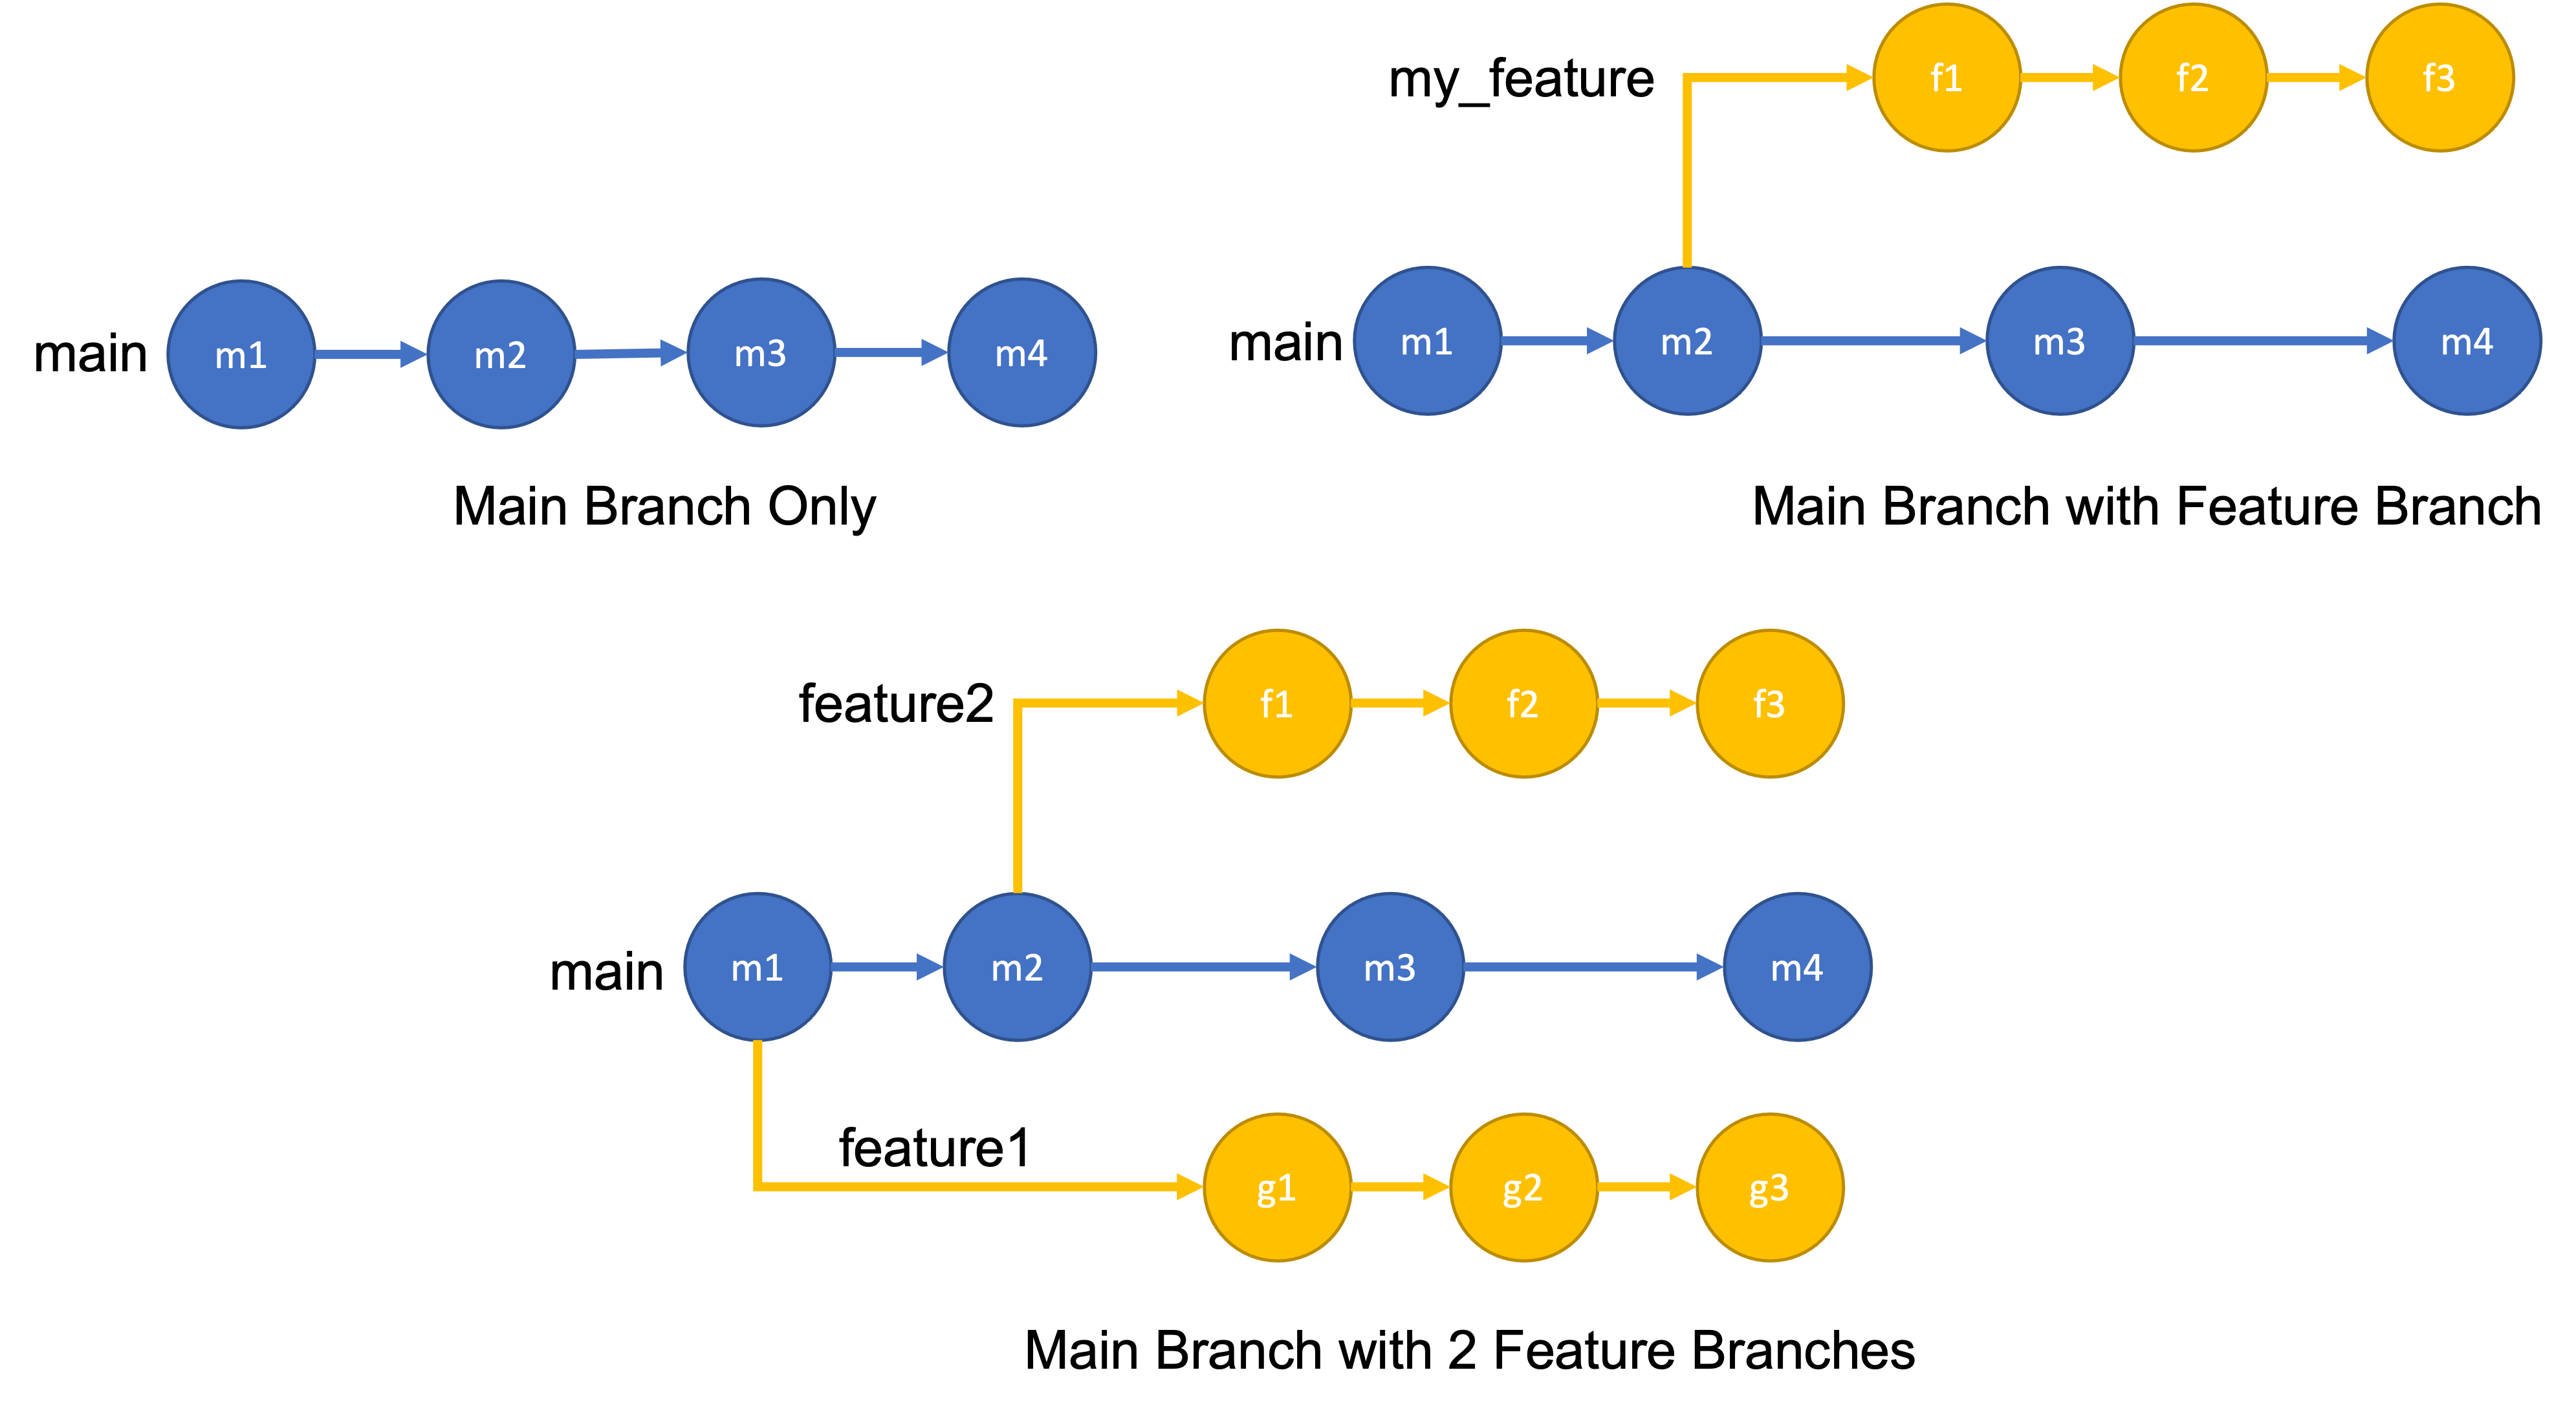 These graph diagrams show repositories with different numbers of branches. The vertices, or circles, in these graphs show different commits, and each horizontal path is a branch. The first shows a repository with 1 main branch, the second a repository with 1 main and 1 feature branch, and the third repository 1 main and 2 feature branches.
Branches can have a few different purposes. Branches created to develop a specific feature are referred to as feature branches, and are often short-lived. Branches can also be used for longer-term purposes, such as having separate development and production branches. How you organize and use branches in your project is referred to as a branching strategy, which we will cover more when we talk about git workflows.
Changes made in one branch can be brought into another branch with a merge. For example, when a feature branch is completed it may be merged into the main branch. And, if while you are working on a feature branch the main branch changes, you can merge the changes from the main branch into your feature branch while you are still working.
How to Work with Branches
Creating Branches
You can create a branch on your local clone of the repository. If didn’t just clone the repository it is always good to make sure you have any recent changes to the main branch by checking out the main branch and running “git pull”:
git checkout main
git pull
Then, to create a branch we can run:
git checkout -b my_new_branch
This will create the branch my_new_branch and move you to the new branch. If you run git status at this point it will display On branch my_new_branch. Making and committing any changes will only update my_new_branch.
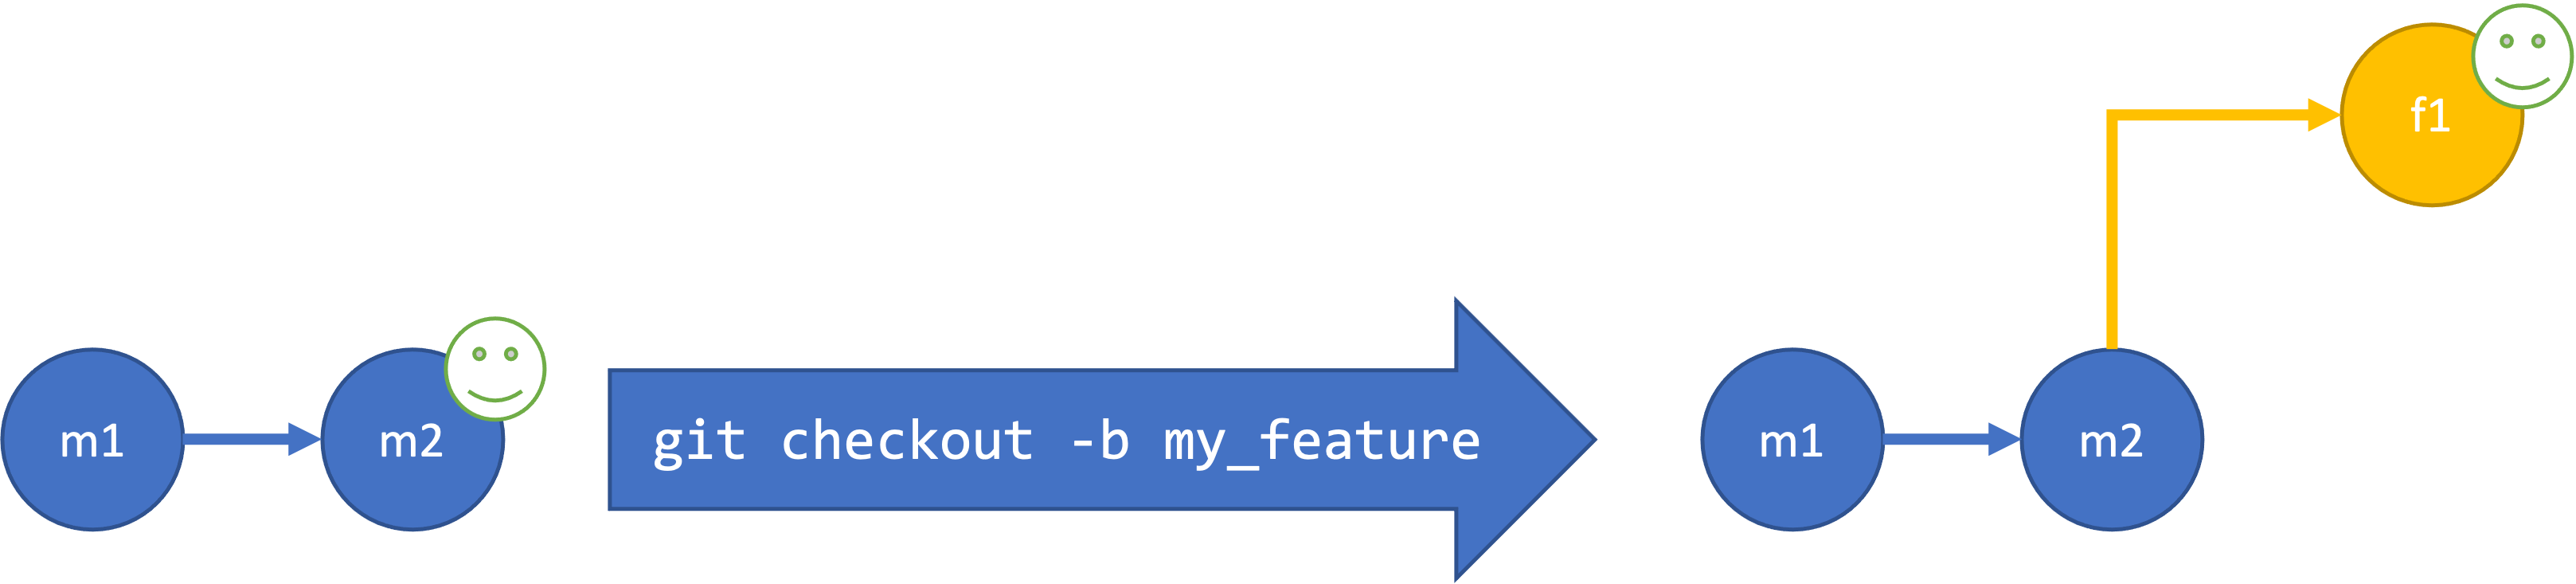 Creating a new branch. When you run
 git checkout -b my_branch your new branch gets created and checked out, meaning you are now on your new branch (represented by the smiley face). Any commits you make will be on this branch until you checkout another one.
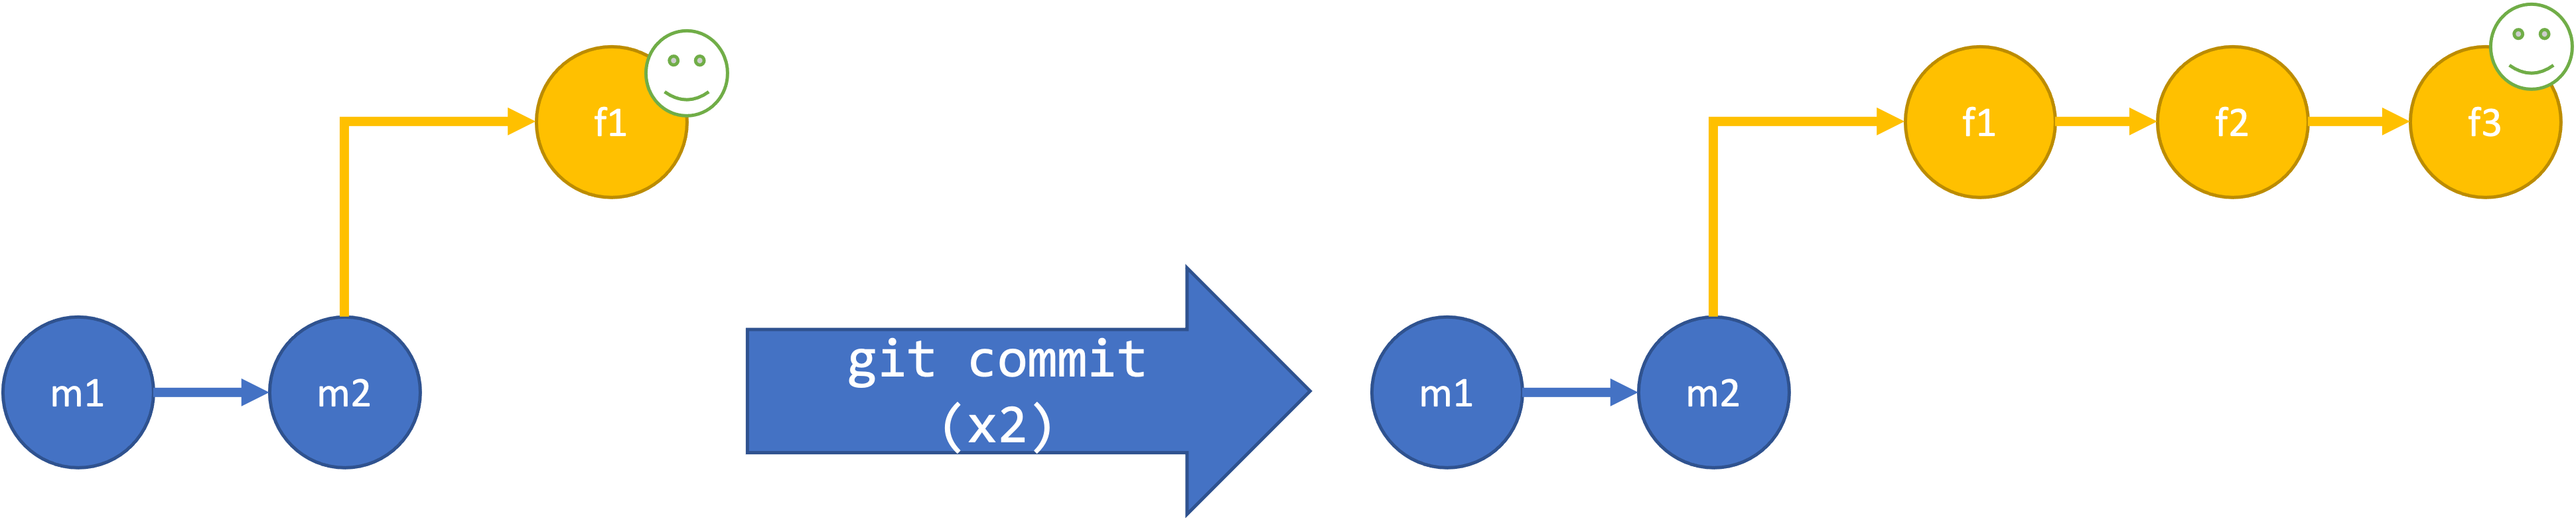 Every time you run the
 git commit command the commit will be added to your current branch.
The first time you push your branch to the remote repository, you will need to publish the branch by running run:
git push --set-upstream origin my_new_branch
After this any commits can be pushed with a simple git push.
Changing Branches
If you need to switch to another existing branch you can use the git checkout command. For example, to switch back to the main branch you can run:
git checkout main
Remember, if you aren’t sure which branch you are on you can run git status. It is good practice before you start making changes to any of your files to check that you are on the right branch with git status, particularly if you haven’t touched the code recently.
 Switching branches using
 git checkout.
Merging Branches
Bring the changes from one branch into another branch by merging them. When you merge branches, changes from the specified branch are merged into the branch that you currently have checked out. For example,
git checkout my_new_branch
git merge main
will merge any changes introduced to main into the my_new_branch. Merging in this direction is especially useful when you’ve been working on my_new_branch for a while and main has changed in the meantime.
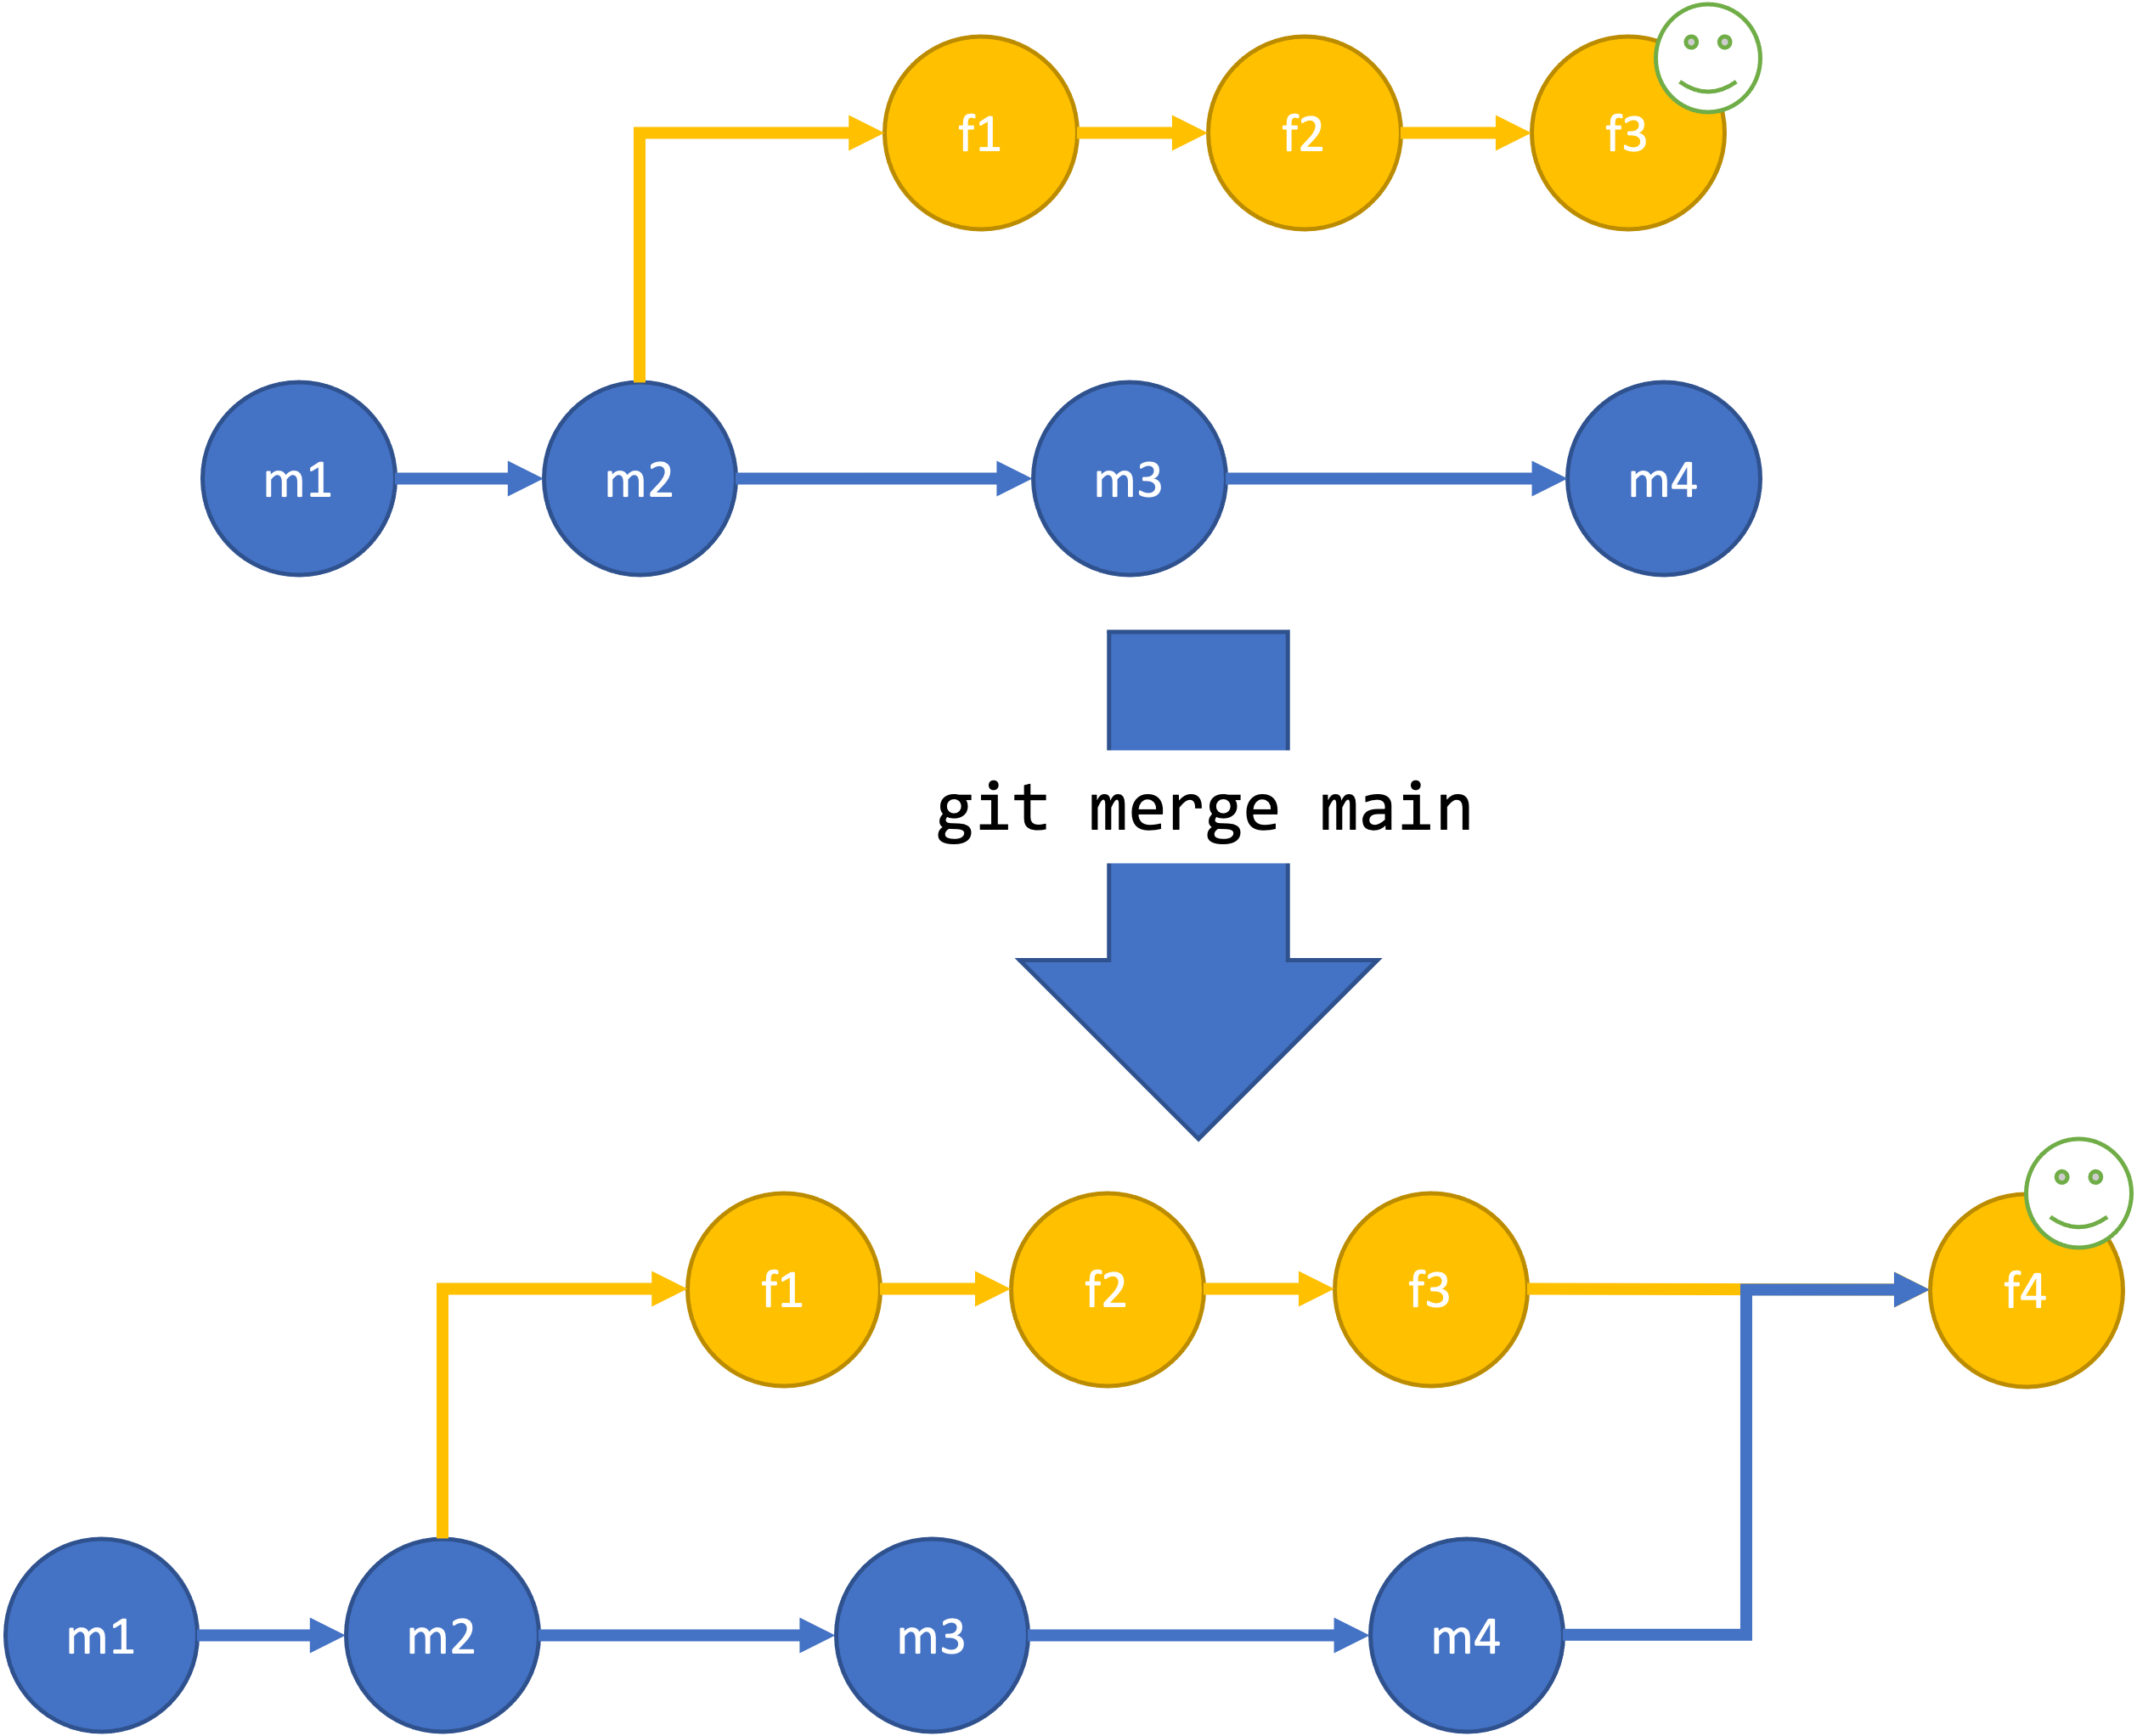 Merging new commits from the main branch into the feature branch with
 git merge main.
When development is complete on my_new_branch, it would be merged into main:
git checkout main
git merge my_new_branch
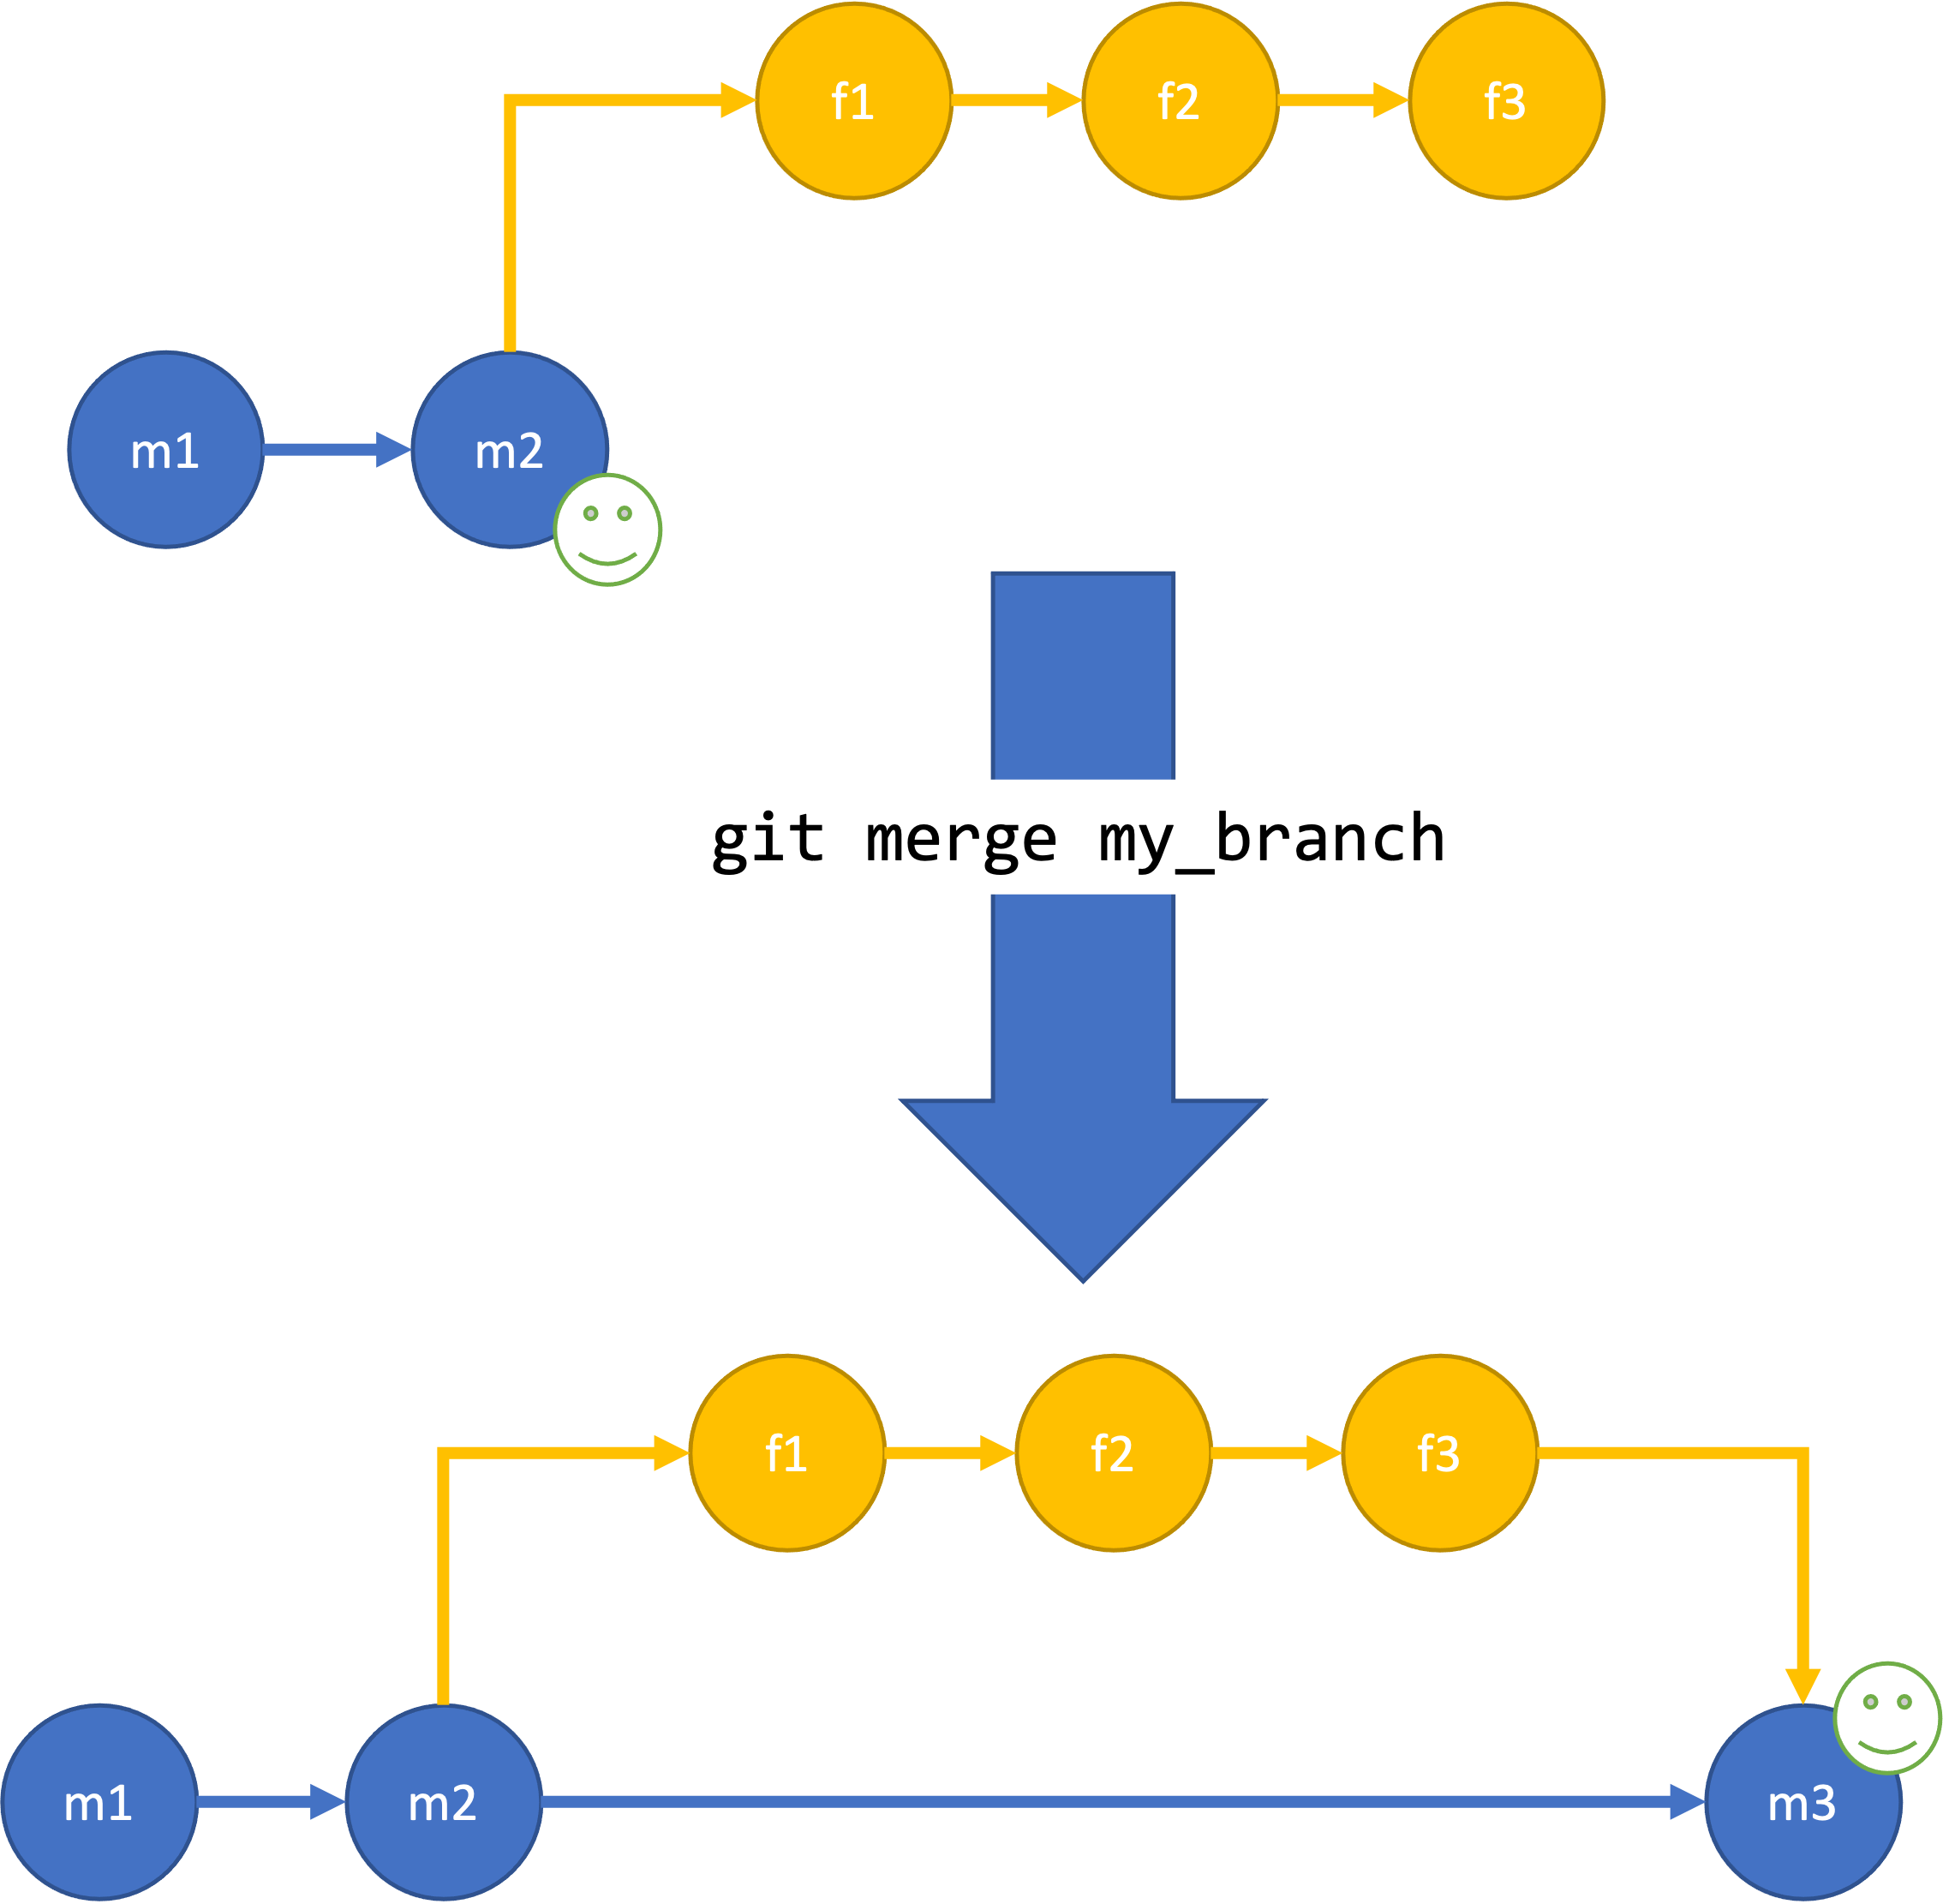 Merging new commits the feature branch into the main branch with
 git merge my_branch.
Git will do its best to complete the merge automatically. For example, if none of the changes have happened in the same lines of code, things will usually merge cleanly. If the merge can’t complete automatically, this is called a merge conflict. Any conflicts in the files must be resolved before the merge can be completed.
Merge vs Rebase
There is another way to introduce changes from one branch to another: rebasing. A rebase rewrites history. For example, if there are new commits on the main branch while you are working on a feature branch, you could merge those commits into your feature branch, as we describe above. This creates a new commit with two parent commits: one in your feature branch, one in the main branch. Alternatively, you can rebase your feature branch onto the new end of the main branch with git rebase main. Rebasing “replays” your feature branch commits onto the new commits of the main branch, as if you started your branch there.
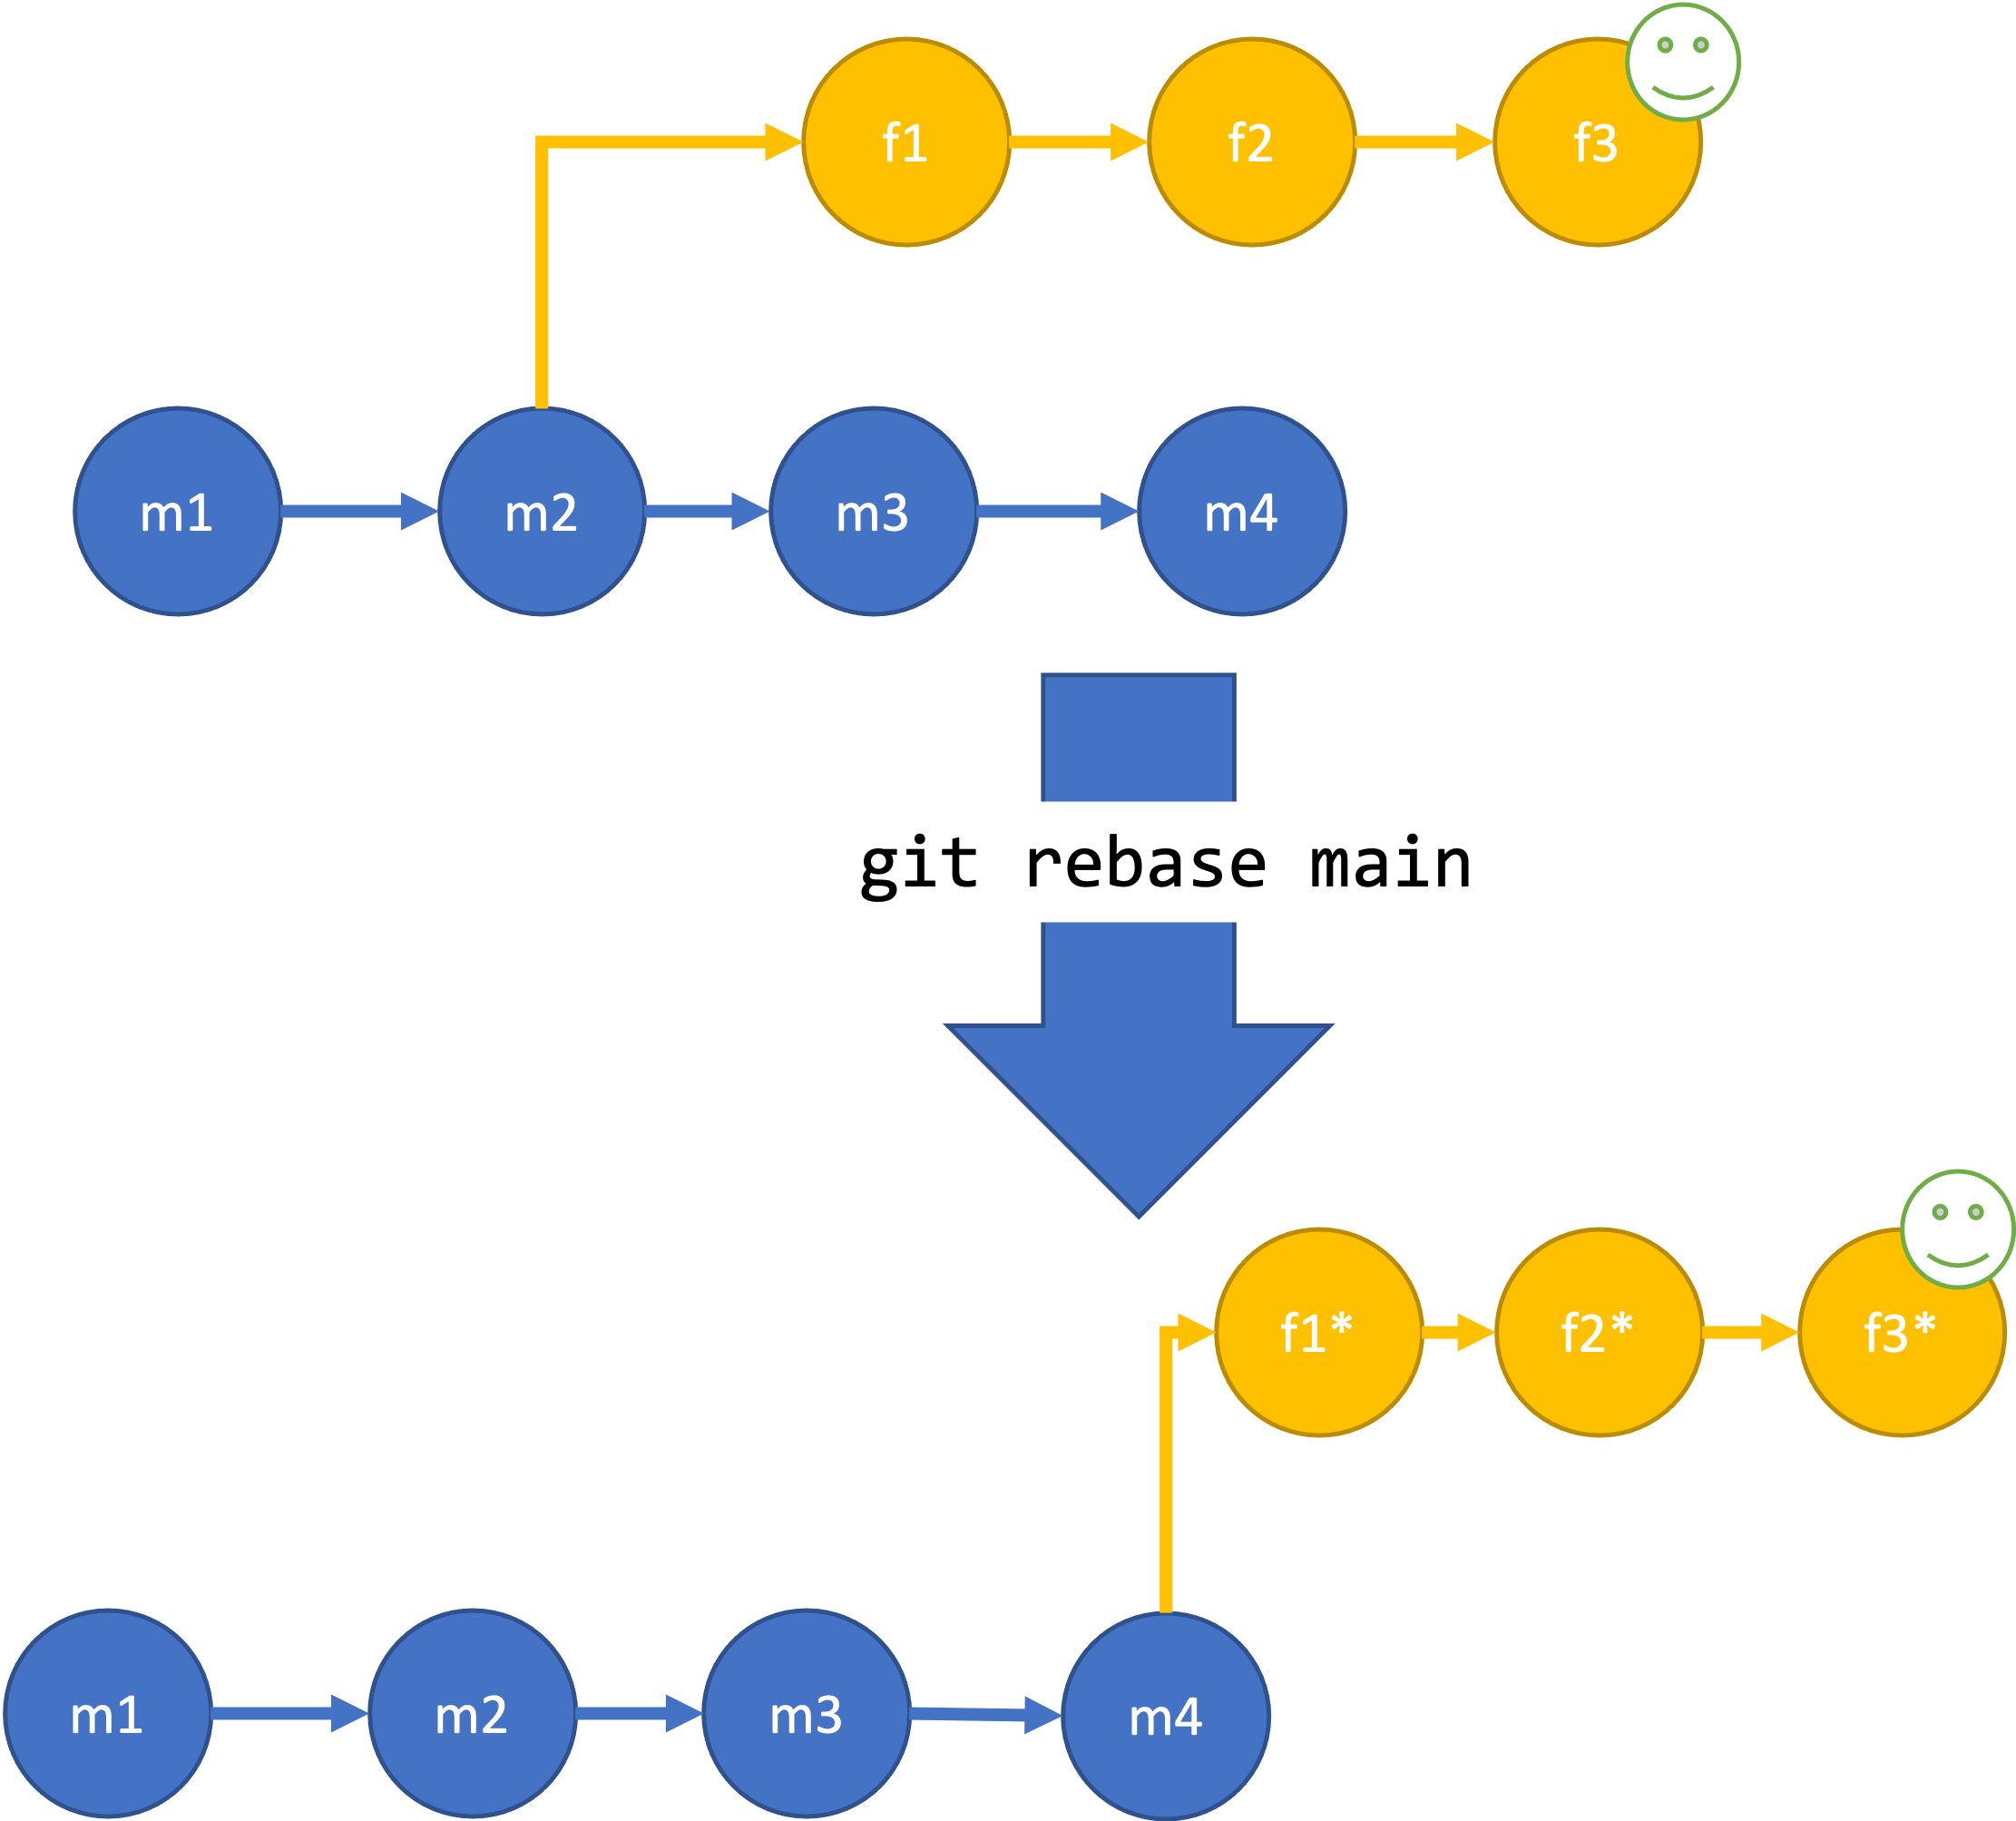 Rebasing the feature branch onto new commits in the main branch with
 git rebase main.
Rebasing creates a cleaner history, without the extra merge commit. However, rebases never be done on public branches that others might be using or even looking at. It will result in your repository and everyone else’s having different history, which can be confusing and difficult to fix. If no one else is looking at your branch, especially if you haven’t published it yet, rebasing is safe.
Activity
Everyone:
- Create a new branch in your local clone
- Publish the branch to the remote repository
- Make a small change, commit, and push
- Look at the remote repository, look at your change and your group’s changes
Now, all but one should run the following:
git pull
git checkout main
git merge branch_name
git push
Did anyone run into merge conflicts? How might this have been prevented?
There should be one team member who still has an unmerged branch at the end of this exercise.
Additional Resources
- Code Refinery: Branches
- Code Refinery: Conflict Resolution
- Atlassian Git Tutorials: Merging vs. Rebasing
- Slide version of this lesson
Key Points
Branches allow team members to work on code without impacting the work of other developers or users
Create a new branch with the git checkout -b command, for example: git checkout -b my_branch
Change to another branch with the git checkout command, for example: git checkout my_other_branch
Merge my_branch into the current branch with with the git merge command, for example: git merge my_branch
Rebasing rewrites history and can sometimes be used instead of merge, where appropriate
Never rebase on a public branch